Plumbers putty is a crucial material when it comes to plumbing repairs and installations. It is a pliable, waterproof sealant that is used to create a watertight seal around fixtures and pipes. One common application for plumbers putty is on bathroom sink drains. In this article, we will discuss the top 10 tips for applying plumbers putty to a bathroom sink drain to ensure a successful and leak-free installation.Applying Plumbers Putty to Bathroom Sink Drain


Applying Plumbers Putty to Bathroom Sink Drain


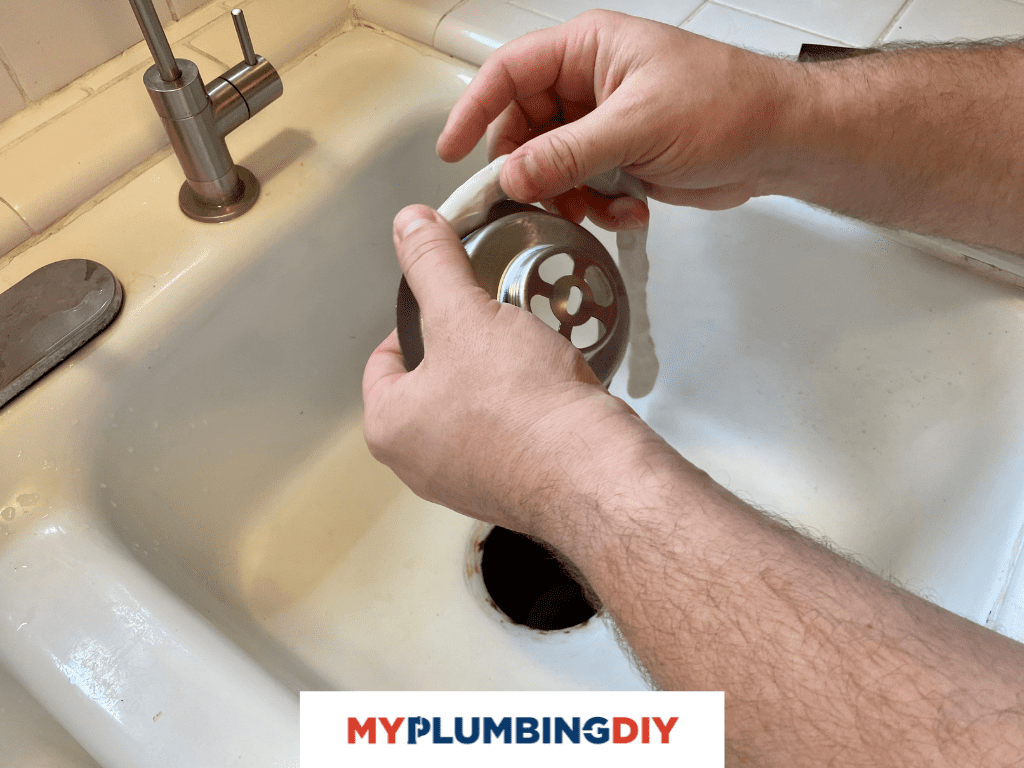
If you are planning to install a new bathroom sink or repair an existing one, proper application of plumbers putty is essential to prevent water leaks. Here is a step-by-step guide to help you apply plumbers putty to a bathroom sink drain:How to Apply Plumbers Putty to a Bathroom Sink Drain


How to Apply Plumbers Putty to a Bathroom Sink Drain

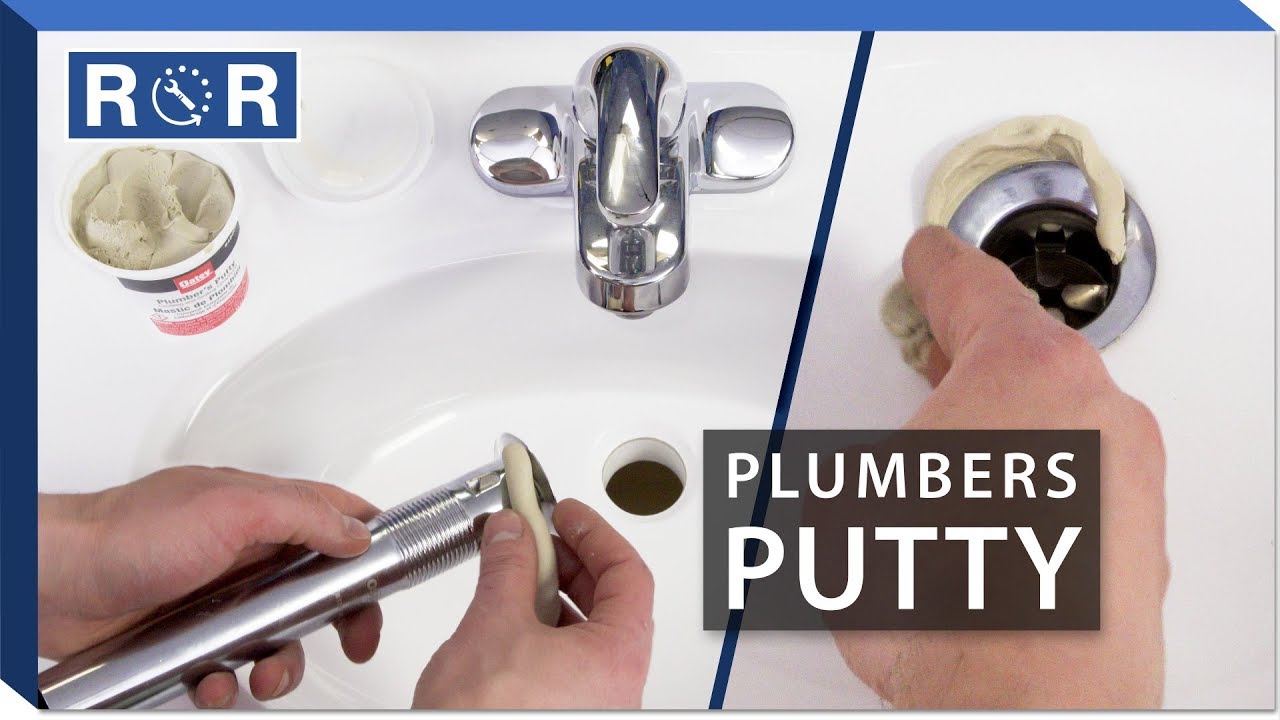


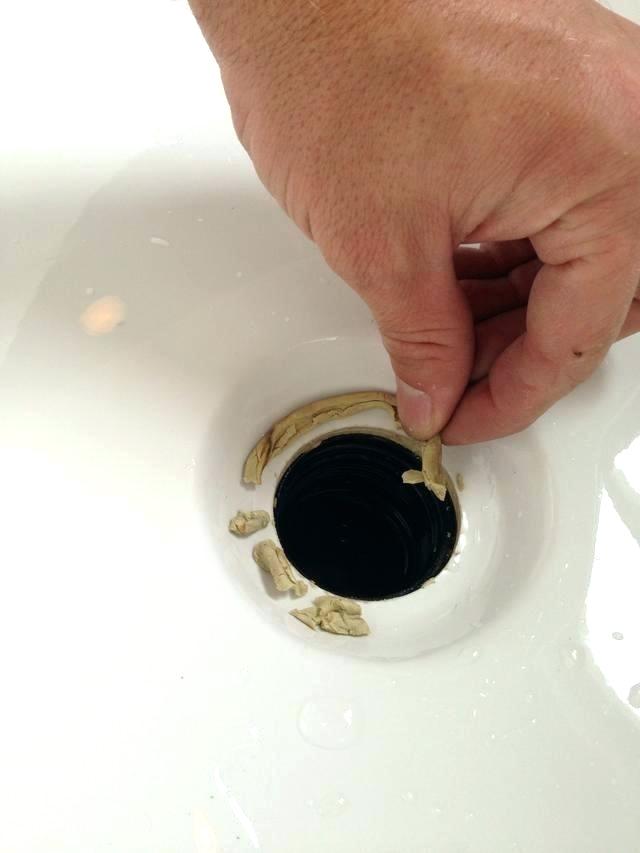
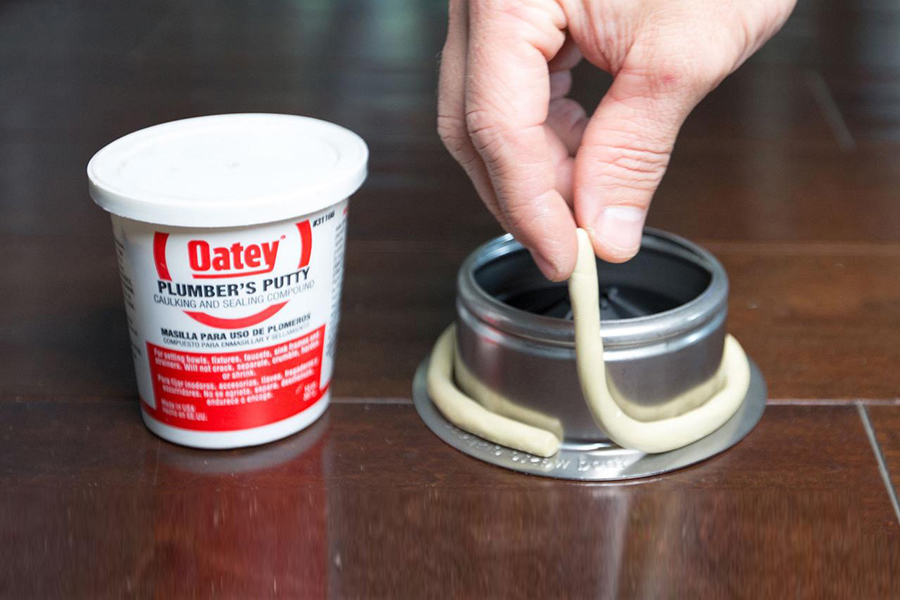
Step 1: Before starting the application process, make sure to clean the area around the sink drain thoroughly. Remove any old putty, dirt, or debris with a damp cloth. Step 2: Take a small amount of plumbers putty and roll it into a thin rope. Make sure the rope is long enough to cover the entire circumference of the drain. Step 3: Place the putty rope around the edge of the sink drain, pressing it firmly to create a seal. Use your fingers to smooth out any bumps or irregularities in the putty. Step 4: Gently place the sink drain into the sink hole, making sure it is centered and level. Press down firmly to create a tight seal with the putty. Step 5: Wipe off any excess putty that may have squeezed out from under the drain. Step 6: Install the sink drain according to the manufacturer's instructions. Step 7: Once the drain is securely in place, wipe away any remaining putty from the edges. Step 8: Allow the putty to dry completely before using the sink. This usually takes around 24 hours. Step 9: Test for leaks by running water through the sink. If there are any leaks, tighten the drain further or add more putty to the affected area. Step 10: Once you are sure there are no leaks, you can proceed with installing the rest of the bathroom fixtures.Step-by-Step Guide for Applying Plumbers Putty to a Bathroom Sink Drain
Step-by-Step Guide for Applying Plumbers Putty to a Bathroom Sink Drain


To ensure a successful application of plumbers putty to a bathroom sink drain, here are some best practices to keep in mind: Use a high-quality plumbers putty that is specifically designed for use on sinks and other plumbing fixtures. This will ensure a strong and durable seal that will last for years.
Make sure the surface area around the sink drain is clean and dry before applying the putty. Any dirt or moisture can interfere with the adhesion of the putty and cause leaks.
Do not use too much putty. A thin, even layer is all that is needed to create a proper seal. Using too much putty can cause excess to squeeze out and create a messy installation.
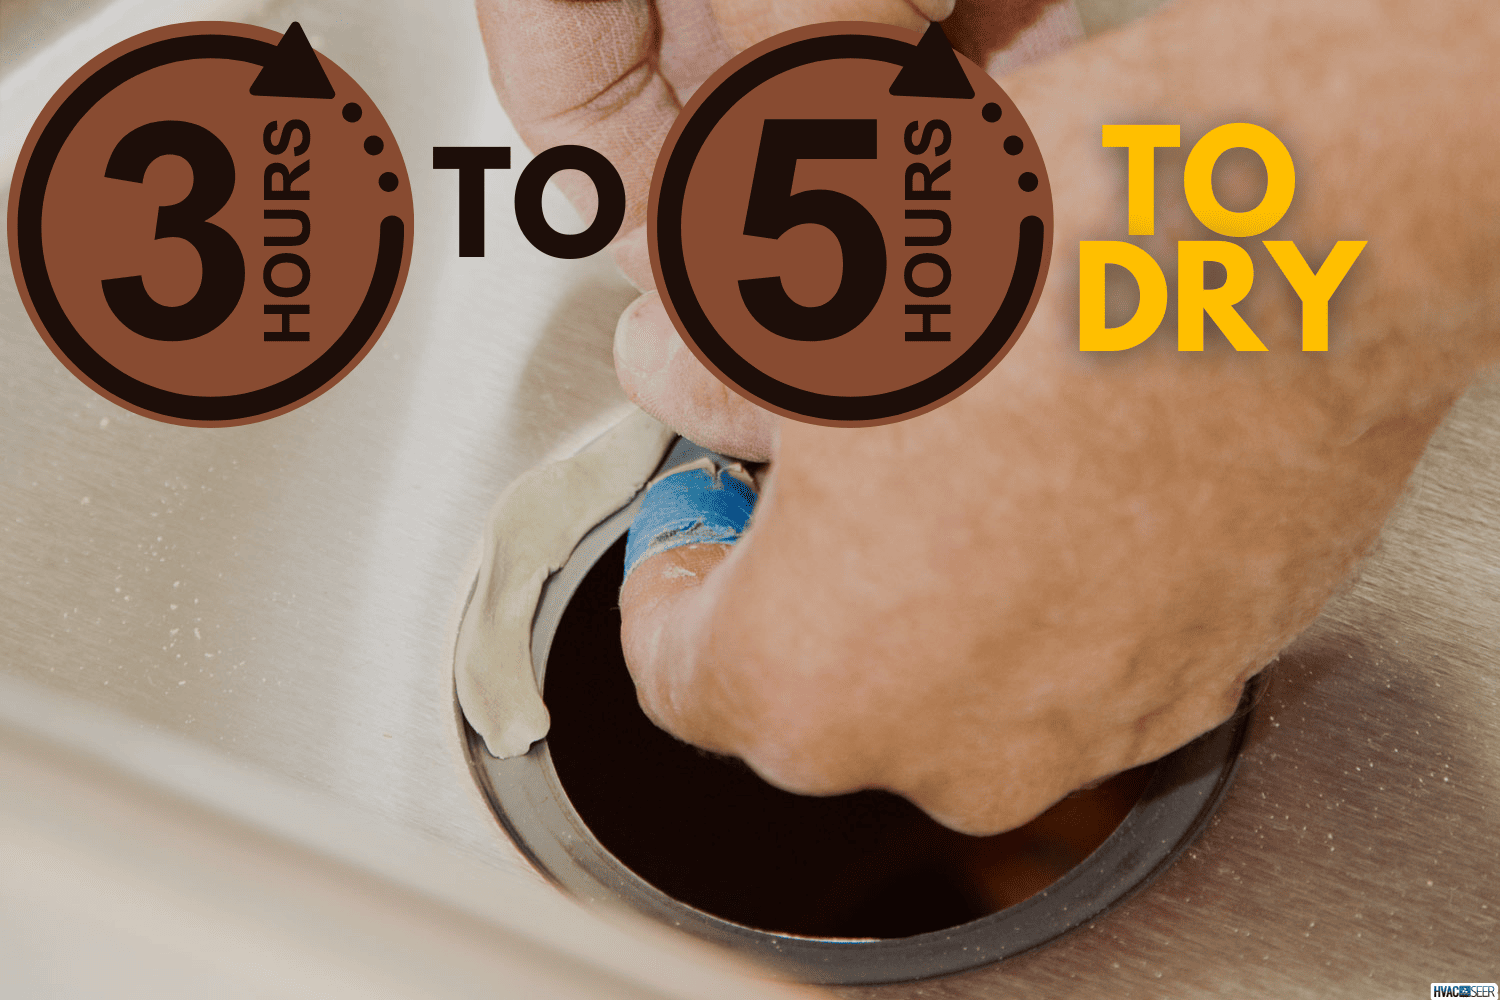
Always follow the manufacturer's instructions when it comes to drying time. Do not use the sink until the putty has fully dried to prevent leaks.
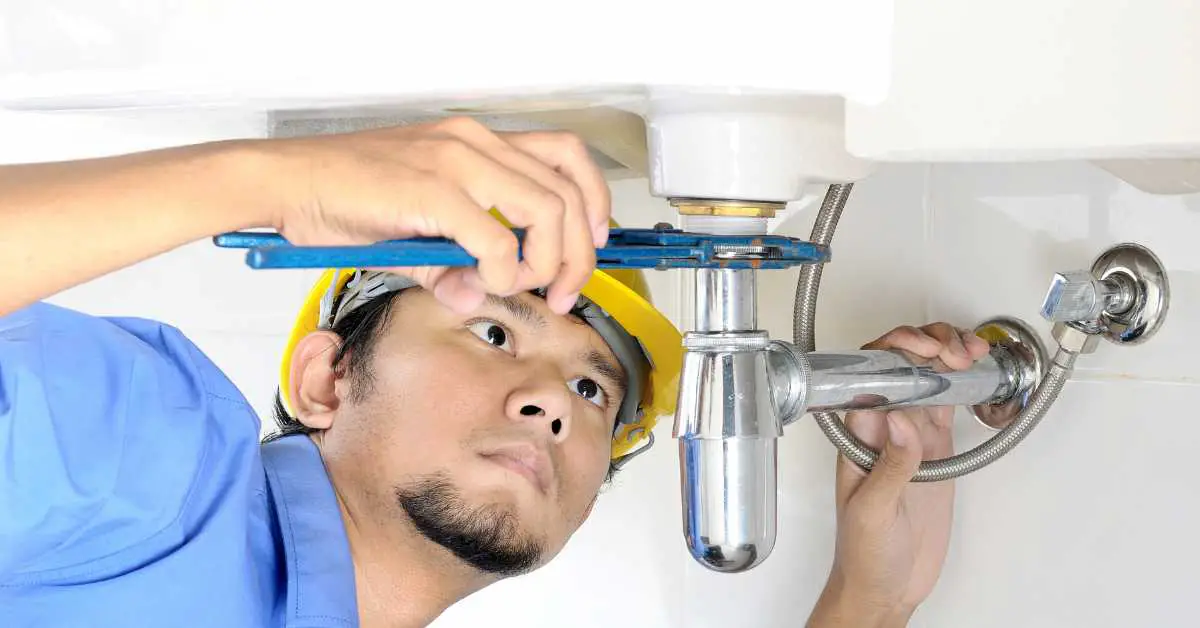
If you are unsure about the application process, seek professional help. Improperly applied putty can cause water leaks and potentially damage your bathroom fixtures and cabinets.
Use gloves when working with plumbers putty. This will protect your hands from any irritation or staining from the putty.
Do not use plumbers putty on porous surfaces. It is meant to be used on non-porous materials like metal, porcelain, or plastic.
Apply putty to the sink drain, not the sink itself. This will ensure a tight seal and prevent any putty from getting onto the sink surface.
Invest in a high-quality putty knife for easier application. This will help you spread and shape the putty more evenly and efficiently.
Store plumbers putty in an airtight container. This will prevent it from drying out and becoming unusable.
Mistakes can happen, especially if you are new to working with plumbers putty. Here are some common mistakes to avoid when applying plumbers putty to a bathroom sink drain: Not cleaning the surface area properly. This can lead to a weak seal and potential leaks.
Using too much putty. As mentioned earlier, using excessive putty can cause a messy installation and potential leaks.
Not allowing enough drying time. Rushing the process and using the sink before the putty has fully dried can cause leaks.
Not checking for leaks after installation. It is always a good idea to test for leaks before moving on to the next step in your bathroom renovation.
Applying putty to a damaged or cracked sink drain. This will not create a proper seal and can lead to water leaks.
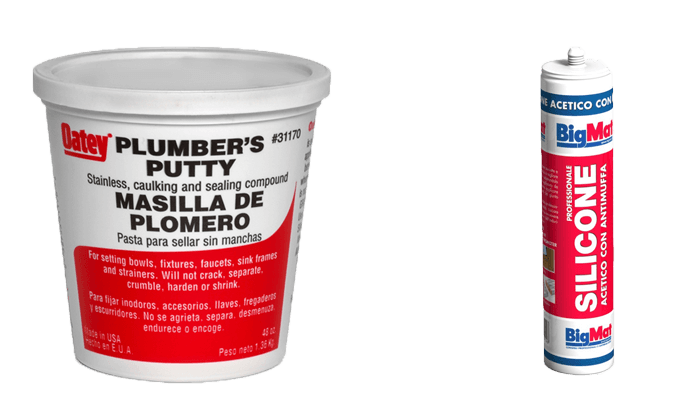
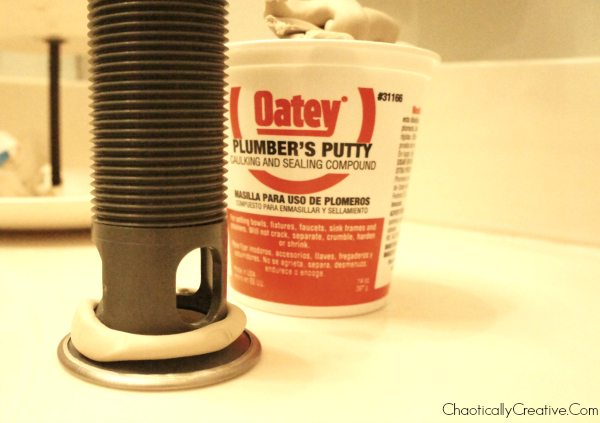
Plumbers putty (make sure it is specifically designed for use on sinks)
Putty knife
Old cloth or rag
Gloves
The drying time for plumbers putty can vary depending on the brand and type of putty used. In general, it takes around 24 hours for the putty to fully dry and create a strong seal. It is important to follow the manufacturer's instructions for the specific putty you are using to ensure the best results.Best Practices for Applying Plumbers Putty to a Bathroom Sink Drain
Tips for Applying Plumbers Putty to a Bathroom Sink Drain
Common Mistakes to Avoid When Applying Plumbers Putty to a Bathroom Sink Drain
Tools and Materials Needed for Applying Plumbers Putty to a Bathroom Sink Drain
How Long Does it Take for Plumbers Putty to Dry on a Bathroom Sink Drain?


Best Practices for Applying Plumbers Putty to a Bathroom Sink Drain

:max_bytes(150000):strip_icc()/185313098-56a73c255f9b58b7d0e81636.jpg)

If you do not have plumbers putty on hand or prefer not to use it, there are alternative methods for sealing a bathroom sink drain: Silicone caulk can be used as an alternative to plumbers putty. It is a waterproof sealant that is commonly used in plumbing and other home repairs.
Plumber's tape can also be used to seal a bathroom sink drain. It is a thin, flexible tape that is wrapped around the threads of the sink drain before installation.
Rubber gasket can be used for sealing a bathroom sink drain. It is a flexible ring that is placed between the sink drain and the sink itself to create a waterproof seal.
If you are unsure about the application process or are experiencing leaks even after following all the necessary steps, it is best to call a professional plumber for help. They have the expertise and tools to properly seal your bathroom sink drain and prevent any potential water damage. With the right tools and techniques, applying plumbers putty to a bathroom sink drain can be a simple and effective process. Remember to follow the best practices, avoid common mistakes, and seek professional help if needed. A properly sealed bathroom sink drain will ensure a leak-free and functional bathroom for years to come.Alternative Methods for Sealing a Bathroom Sink Drain Without Plumbers Putty
When to Call a Professional Plumber for Help with Applying Plumbers Putty to a Bathroom Sink Drain

Tips for Applying Plumbers Putty to a Bathroom Sink Drain


Benefits of Using Plumbers Putty for Bathroom Sink Drain Installation

Ensures a Secure and Leak-Proof Seal
 When it comes to installing a bathroom sink drain, one of the most crucial steps is creating a tight and leak-proof seal. This is where
plumbers putty
comes into play. This versatile and durable material is specifically designed for sealing joints and preventing leaks, making it an essential component in any bathroom sink installation.
When it comes to installing a bathroom sink drain, one of the most crucial steps is creating a tight and leak-proof seal. This is where
plumbers putty
comes into play. This versatile and durable material is specifically designed for sealing joints and preventing leaks, making it an essential component in any bathroom sink installation.
Easy to Apply and Mold
 One of the major advantages of using
plumbers putty
is its easy application and molding capabilities. Unlike other sealants, it doesn't require any special tools or skills to apply. You simply need to roll the putty into a long string and wrap it around the base of the sink drain before placing it into the sink hole. This makes it a preferred choice for DIY enthusiasts and professional plumbers alike.
One of the major advantages of using
plumbers putty
is its easy application and molding capabilities. Unlike other sealants, it doesn't require any special tools or skills to apply. You simply need to roll the putty into a long string and wrap it around the base of the sink drain before placing it into the sink hole. This makes it a preferred choice for DIY enthusiasts and professional plumbers alike.
Long-Lasting and Water-Resistant
 Another reason why
plumbers putty
is the go-to choice for bathroom sink drain installations is its durability and water-resistant properties. Once applied, it forms a flexible and watertight seal that can withstand constant exposure to water and moisture. This ensures that your bathroom sink will remain leak-free and in top condition for years to come.
Another reason why
plumbers putty
is the go-to choice for bathroom sink drain installations is its durability and water-resistant properties. Once applied, it forms a flexible and watertight seal that can withstand constant exposure to water and moisture. This ensures that your bathroom sink will remain leak-free and in top condition for years to come.
No Need for Drying Time
 Unlike other sealants that require a significant amount of time to dry and set,
plumbers putty
offers an immediate seal. This means that you can continue with your bathroom sink installation without having to wait for the putty to dry. This not only saves time but also allows for any necessary adjustments to be made before the putty sets.
Unlike other sealants that require a significant amount of time to dry and set,
plumbers putty
offers an immediate seal. This means that you can continue with your bathroom sink installation without having to wait for the putty to dry. This not only saves time but also allows for any necessary adjustments to be made before the putty sets.
Cost-Effective Solution
 With its affordable price point and long-lasting properties,
plumbers putty
is a cost-effective solution for bathroom sink drain installations. It can be easily found at any hardware store and a small amount goes a long way, making it a budget-friendly choice for any homeowner.
In conclusion, when it comes to installing a bathroom sink drain, using
plumbers putty
is a wise choice. Its ability to create a secure and leak-proof seal, easy application and molding, durability, quick setting time, and cost-effectiveness make it a top choice for both professionals and DIY enthusiasts. So next time you're installing a bathroom sink, don't forget to include plumbers putty in your toolkit for a hassle-free and successful installation.
With its affordable price point and long-lasting properties,
plumbers putty
is a cost-effective solution for bathroom sink drain installations. It can be easily found at any hardware store and a small amount goes a long way, making it a budget-friendly choice for any homeowner.
In conclusion, when it comes to installing a bathroom sink drain, using
plumbers putty
is a wise choice. Its ability to create a secure and leak-proof seal, easy application and molding, durability, quick setting time, and cost-effectiveness make it a top choice for both professionals and DIY enthusiasts. So next time you're installing a bathroom sink, don't forget to include plumbers putty in your toolkit for a hassle-free and successful installation.