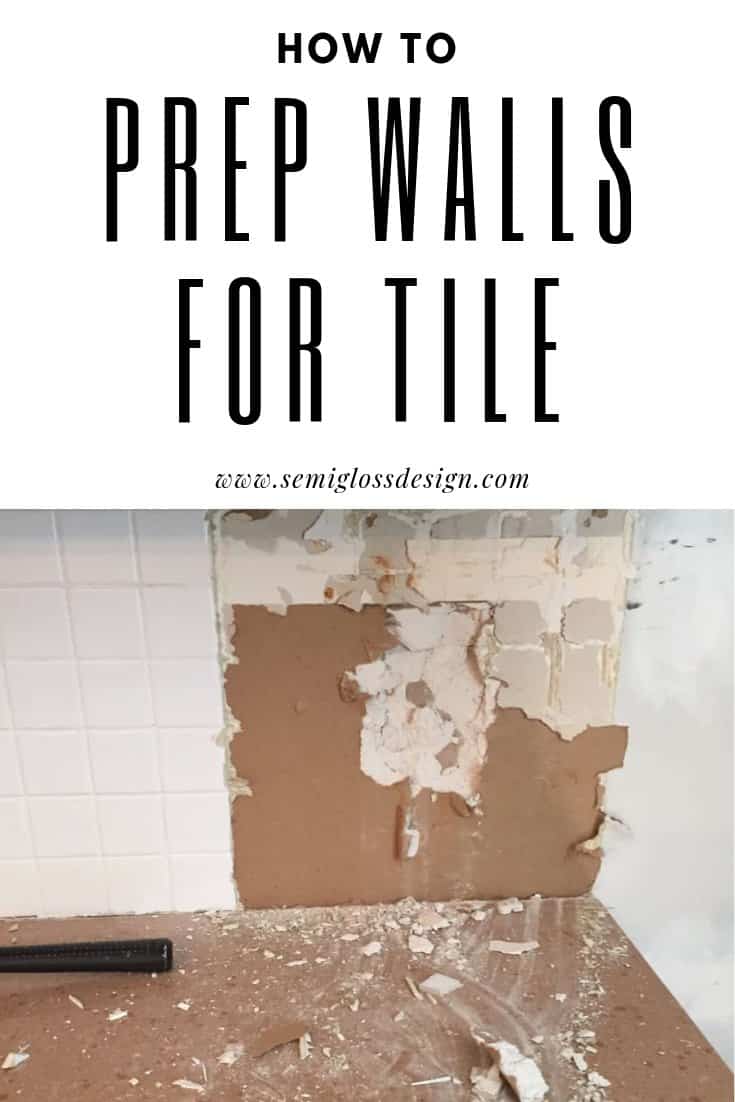
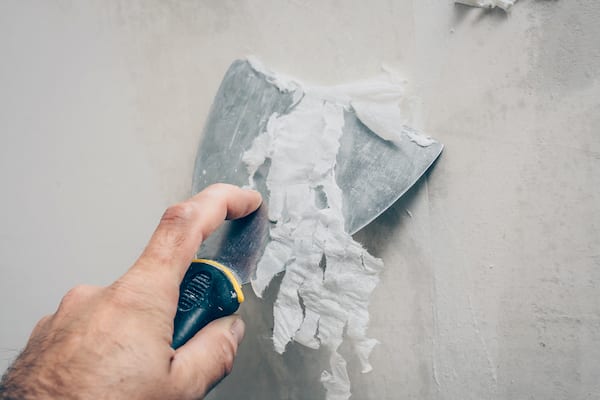
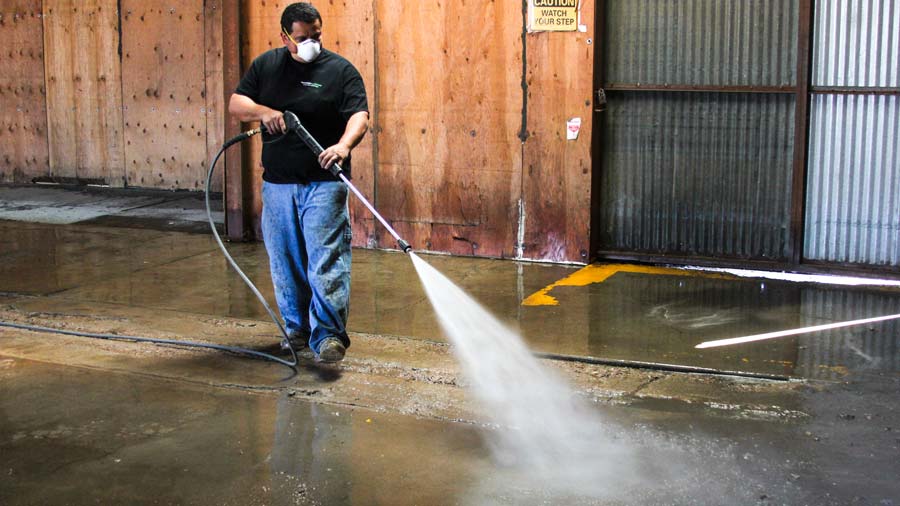
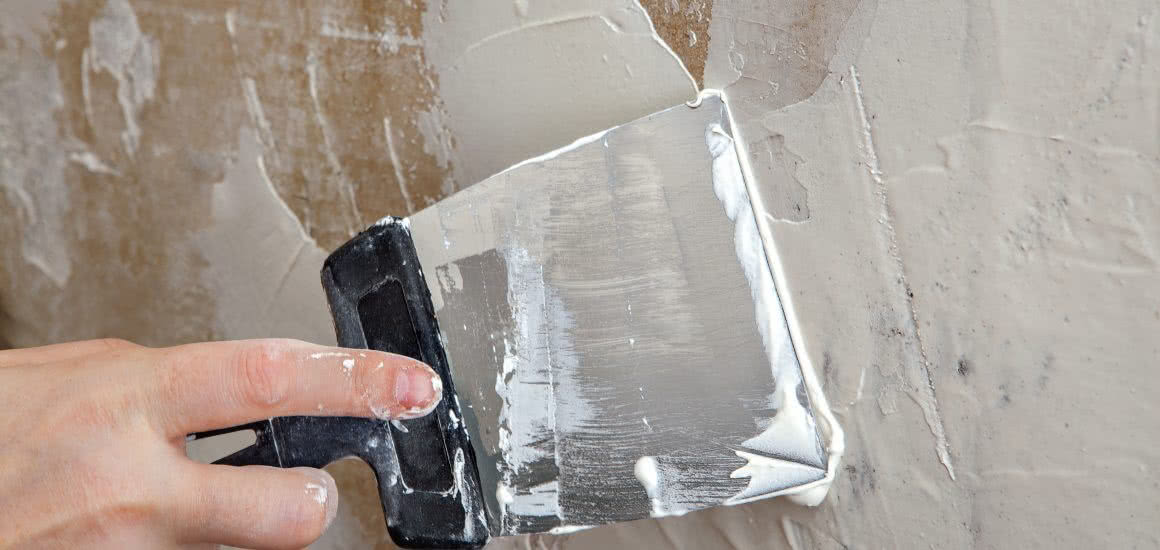
Before installing a kitchen backsplash wall, it is important to properly prepare the surface to ensure a smooth and long-lasting finish. This involves cleaning, repairing, and priming the wall to create a solid base for the backsplash to adhere to. Cleaning: Begin by thoroughly cleaning the wall with a mixture of warm water and mild dish soap. This will remove any dirt, grease, or grime that may prevent the adhesive from sticking properly. Use a sponge or cloth to scrub the wall, then rinse with clean water and allow it to dry completely. Repairing: Inspect the wall for any cracks, holes, or other imperfections. Use a spackling compound to fill in any gaps and smooth it out with a putty knife. Once dry, sand the area to create a smooth surface. Priming: To ensure the adhesive sticks to the wall, it is important to prime it first. Use a high-quality primer that is suitable for the material of your wall. Apply a thin coat and allow it to dry completely before moving on to the next step.Surface Preparation for Kitchen Backsplash Wall


Surface Preparation for Kitchen Backsplash Wall
:max_bytes(150000):strip_icc()/luxury-kitchen-165594300-58a719fb5f9b58a3c9362b1c.jpg)
:max_bytes(150000):strip_icc()/Slab-backsplash-credit-Madeline-Harper--3f2a53a02fdc484ba34b885c07b55b5e.jpg)


:max_bytes(150000):strip_icc()/kitchen6-3acaf0fc86c14800b71d4b169a1e4c81.jpg)


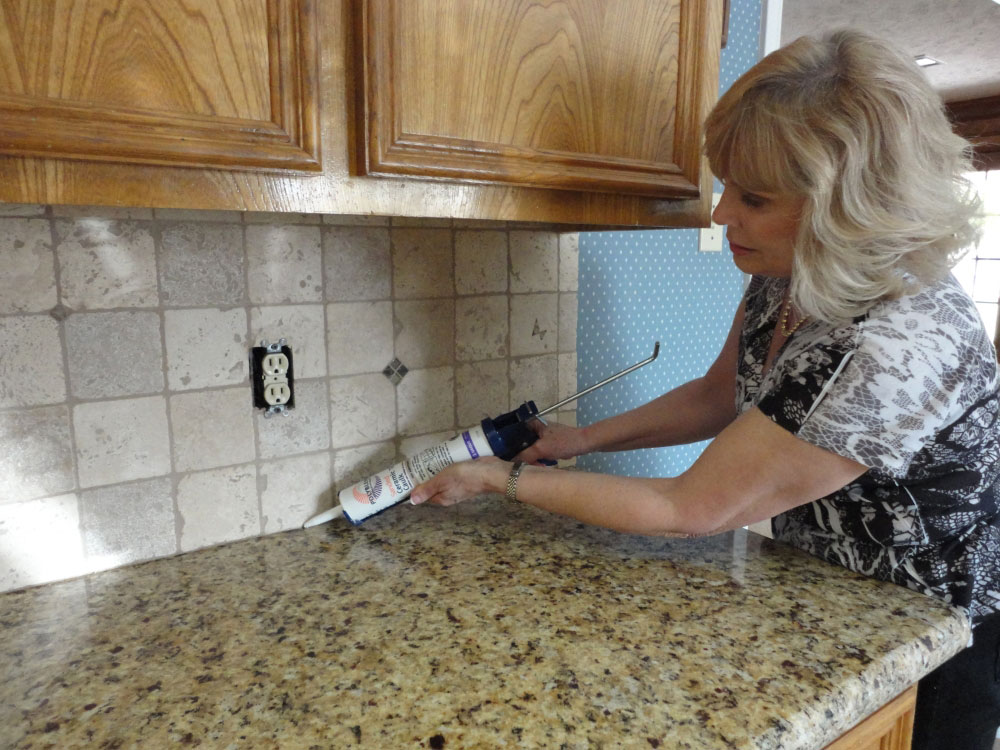
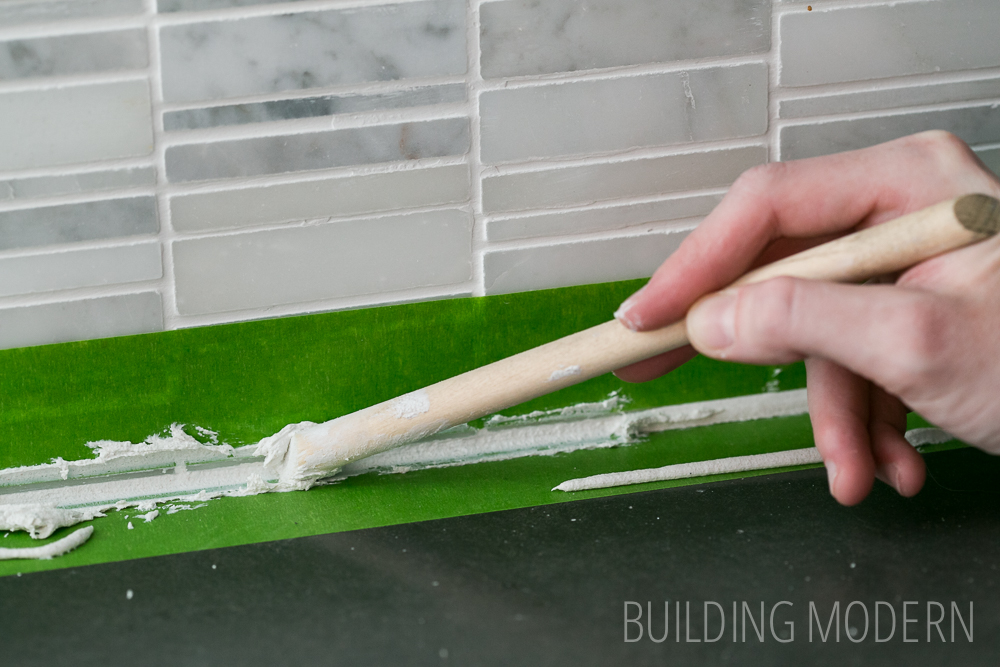
Caulking is an essential step in installing a kitchen backsplash wall. It not only creates a clean and polished look, but also helps prevent water and moisture from seeping behind the backsplash and causing damage to the wall. Selecting the right caulk: There are various types of caulk available, so it is important to choose one that is suitable for your kitchen backsplash wall. For example, silicone caulk is ideal for areas prone to moisture, while acrylic caulk is better for interior walls. Preparing the caulk: Before applying the caulk, make sure to read the manufacturer's instructions carefully. Some may require mixing or priming, while others can be used straight from the tube. Applying the caulk: Using a caulk gun, carefully apply a thin, even line of caulk along the edges of the backsplash where it meets the wall. Use a damp finger or caulk smoothing tool to create a clean, smooth finish. Wipe away any excess caulk with a damp cloth. Drying time: Allow the caulk to dry completely before moving on to the next step. This can take anywhere from a few hours to a full day, depending on the type of caulk used.Caulking for Kitchen Backsplash Wall


Caulking for Kitchen Backsplash Wall


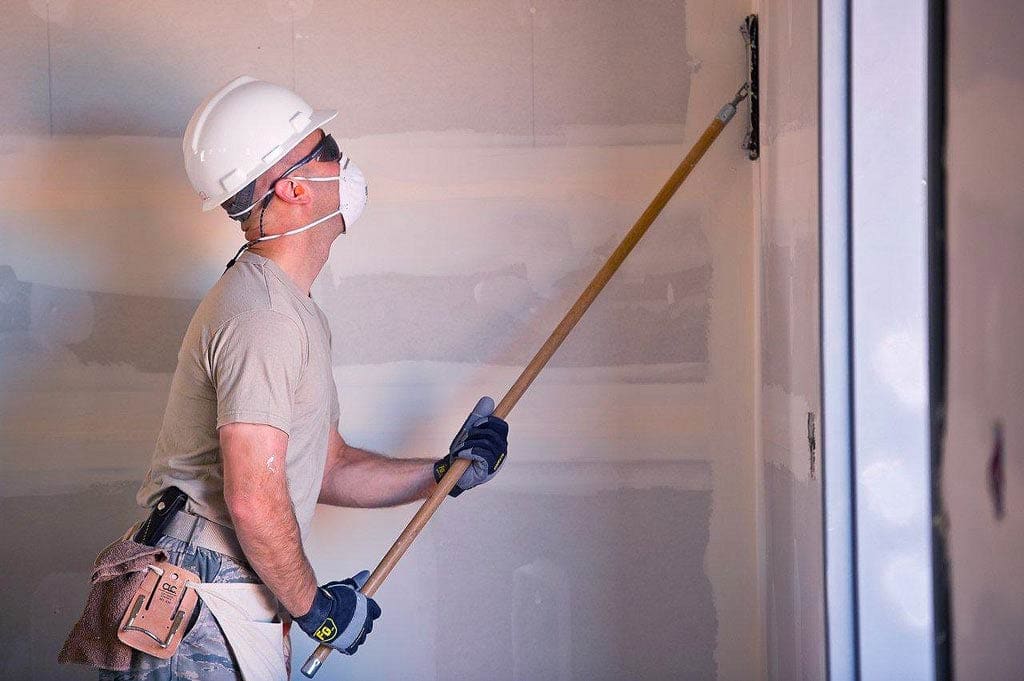
In addition to preparing the wall for the backsplash, it is also important to properly prepare the entire kitchen wall to ensure a cohesive and professional-looking finish. Removing obstacles: Before starting any surface preparation, make sure to remove any obstacles such as outlet covers, light switches, or vent covers. This will make it easier to clean and prime the entire wall. Cleaning: Just like with the backsplash wall, it is important to thoroughly clean the entire kitchen wall before proceeding with any surface preparation. Use warm water and mild dish soap to remove any dirt, grease, or grime. Repairing: Inspect the wall for any imperfections and repair them using a spackling compound and putty knife, just as you did for the backsplash wall. Priming: Finally, prime the entire kitchen wall using a high-quality primer suitable for the material of your wall. This will create a smooth and even base for the paint to adhere to.Surface Preparation for Kitchen Wall


Surface Preparation for Kitchen Wall


Just like with the backsplash wall, caulking is an important step in creating a professional and polished look for the entire kitchen wall. Selecting the right caulk: As mentioned before, be sure to choose a caulk that is suitable for your kitchen wall, taking into consideration any moisture or temperature concerns. Preparing the caulk: Again, make sure to read and follow the manufacturer's instructions for preparing the caulk before applying it to the wall. Applying the caulk: Using the same techniques as before, apply a thin and even line of caulk along the edges of the wall and any other areas that may need it. Smooth it out with your finger or a caulk smoothing tool and wipe away any excess with a damp cloth. Drying time: Allow the caulk to dry completely before moving on to painting the wall. This can take anywhere from a few hours to a full day, depending on the type of caulk used.Caulking for Kitchen Wall


Caulking for Kitchen Wall


For a seamless finish, it is important to prepare the backsplash wall itself before installing the backsplash. This involves cleaning, repairing, and possibly priming the surface. Cleaning: Using warm water and mild dish soap, thoroughly clean the backsplash wall to remove any dirt, grease, or grime. Make sure to dry it completely before moving on to the next step. Repairing: Inspect the wall for any imperfections and repair them using a spackling compound and putty knife, just as you did for the kitchen walls. Priming: Depending on the material of the backsplash and the type of adhesive being used, it may be necessary to prime the wall before installing the backsplash. Check the manufacturer's instructions to determine if this step is necessary.Surface Preparation for Backsplash Wall


Surface Preparation for Backsplash Wall


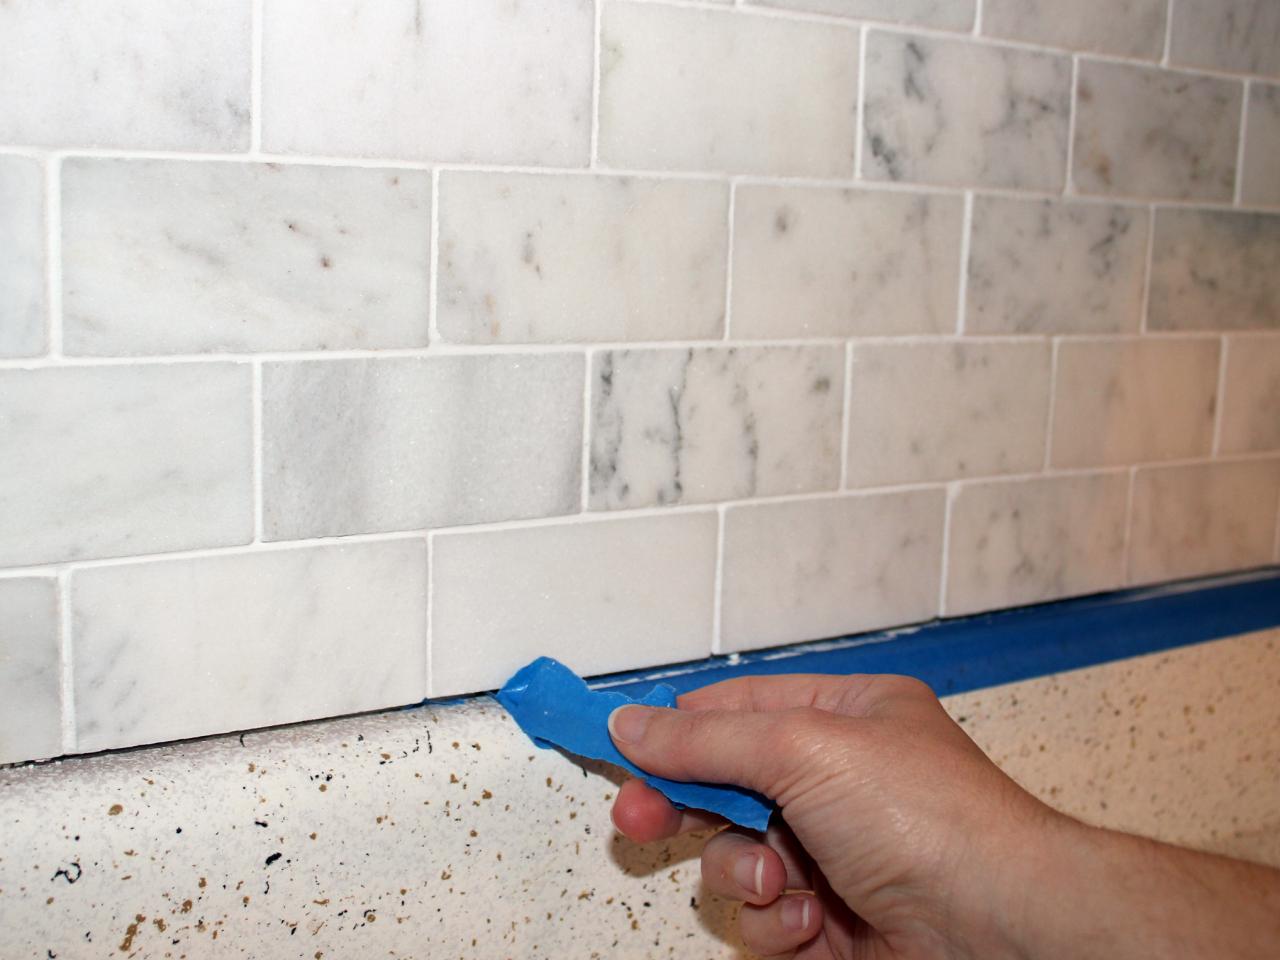
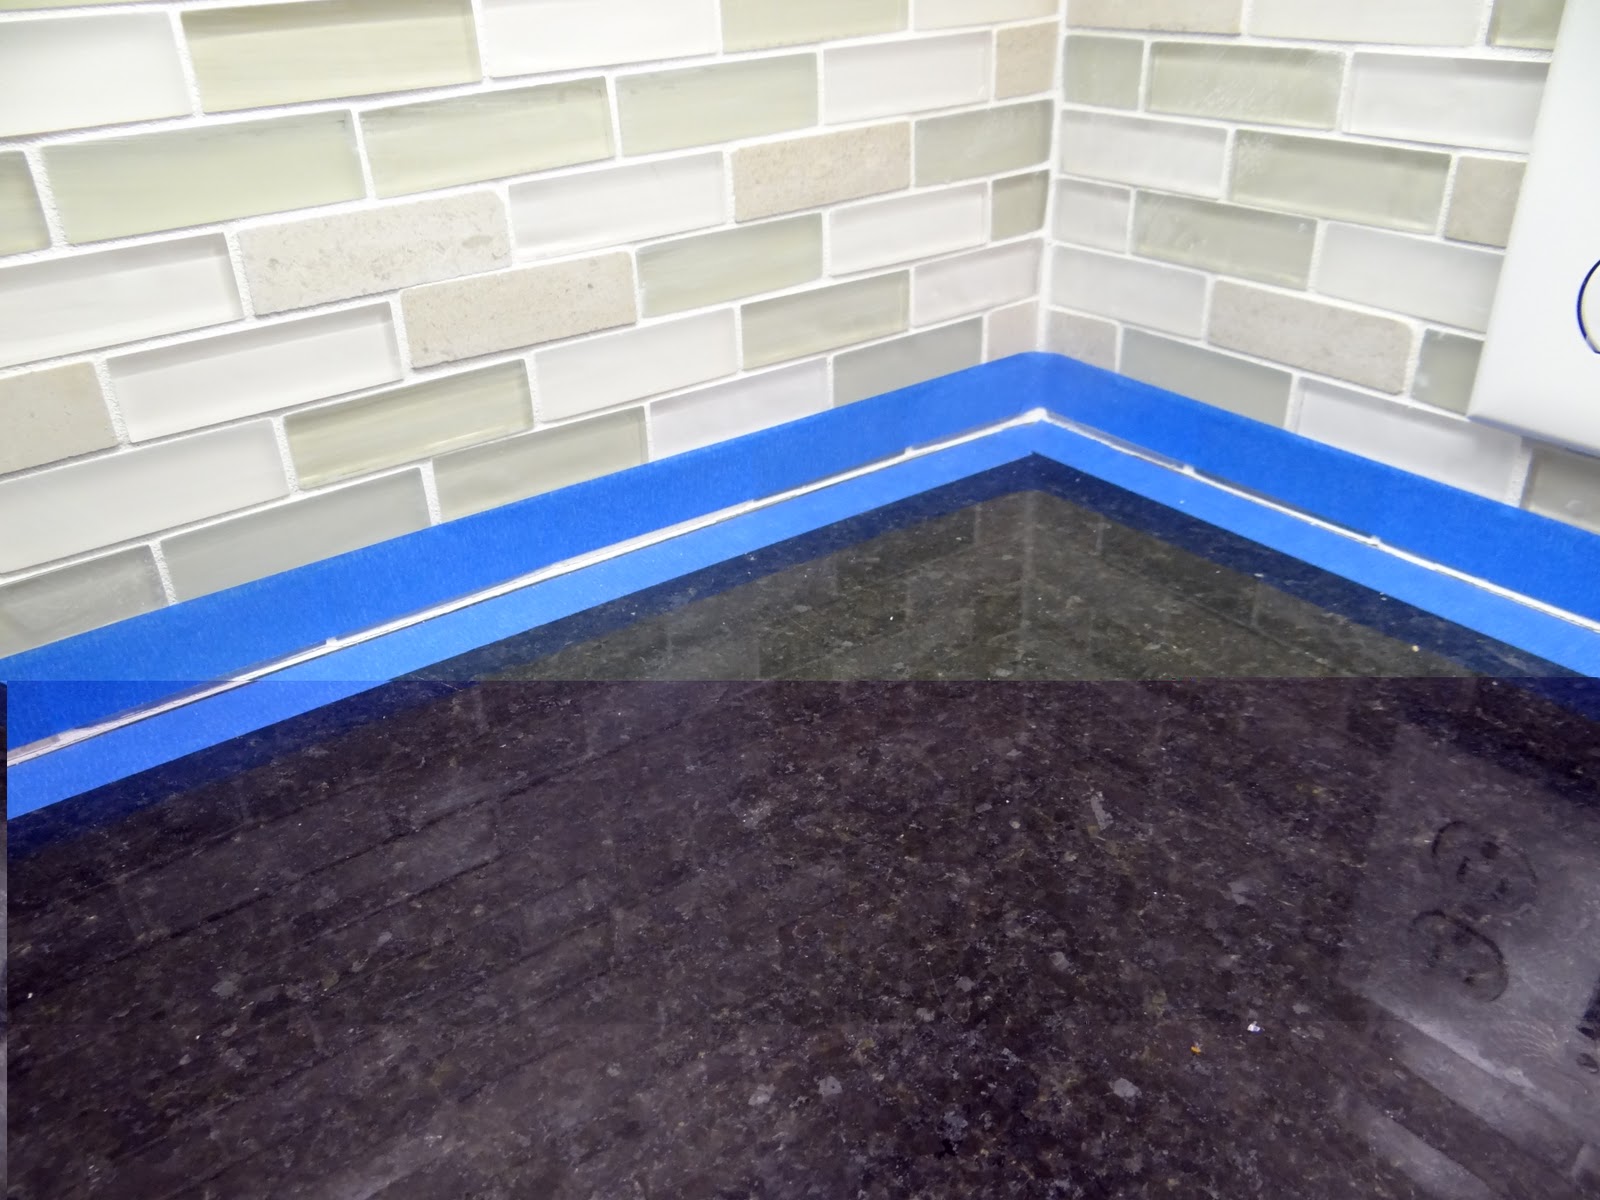
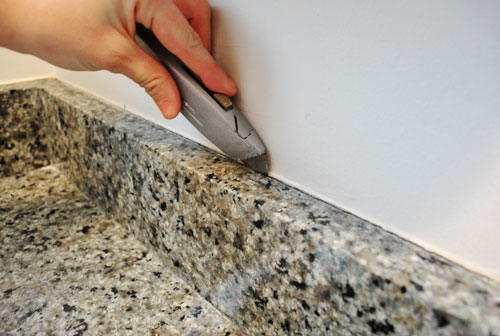
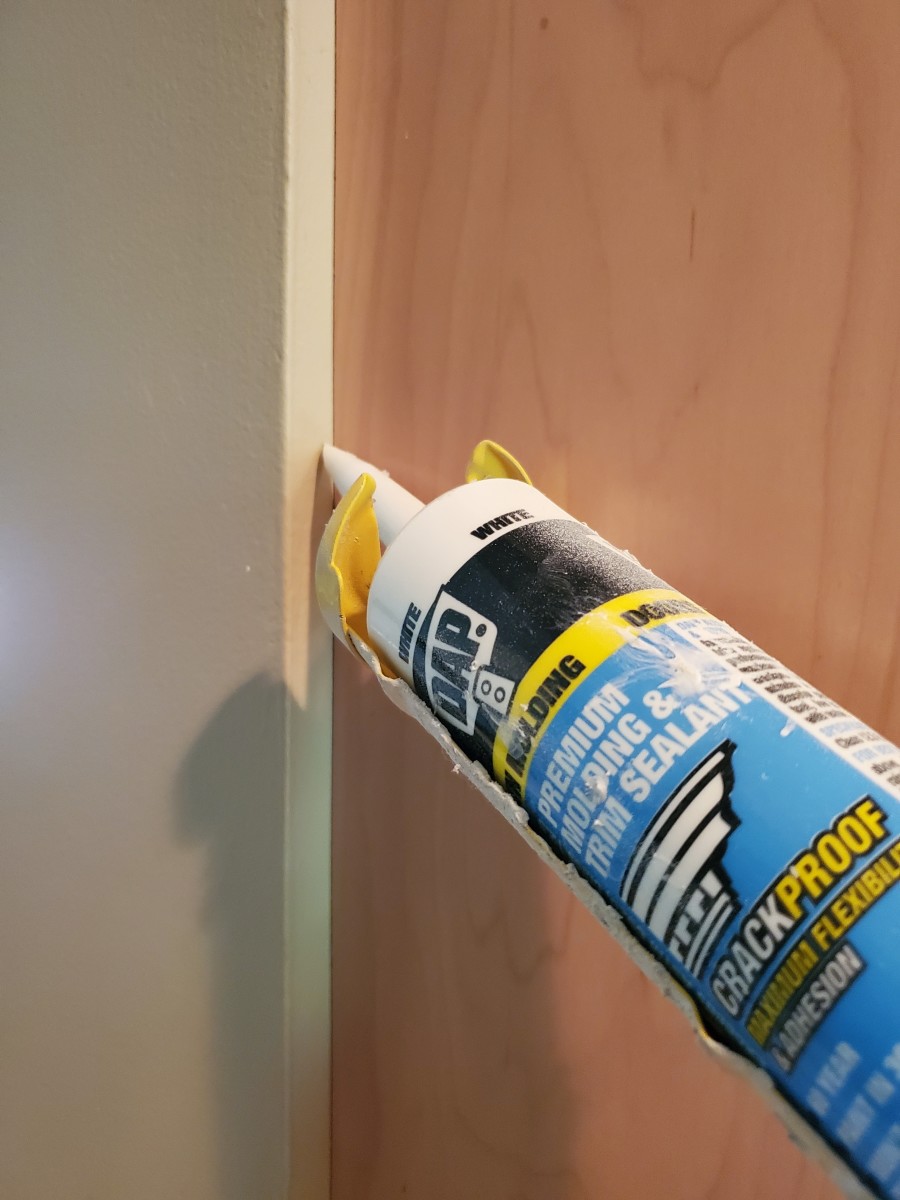
Finally, caulking is the last step in creating a beautiful and functional backsplash wall. It not only creates a clean and polished look, but also helps prevent moisture from seeping behind the backsplash. Selecting the right caulk: Just like with the other walls, be sure to choose a caulk that is suitable for the material of the backsplash and any moisture concerns. Preparing the caulk: Once again, follow the manufacturer's instructions for preparing the caulk before applying it to the backsplash wall. Applying the caulk: Carefully apply a thin and even line of caulk along the edges of the backsplash where it meets the wall. Smooth it out with your finger or a caulk smoothing tool and wipe away any excess with a damp cloth. Drying time: Allow the caulk to dry completely before using the backsplash. This can take anywhere from a few hours to a full day, depending on the type of caulk used.Caulking for Backsplash Wall


Caulking for Backsplash Wall


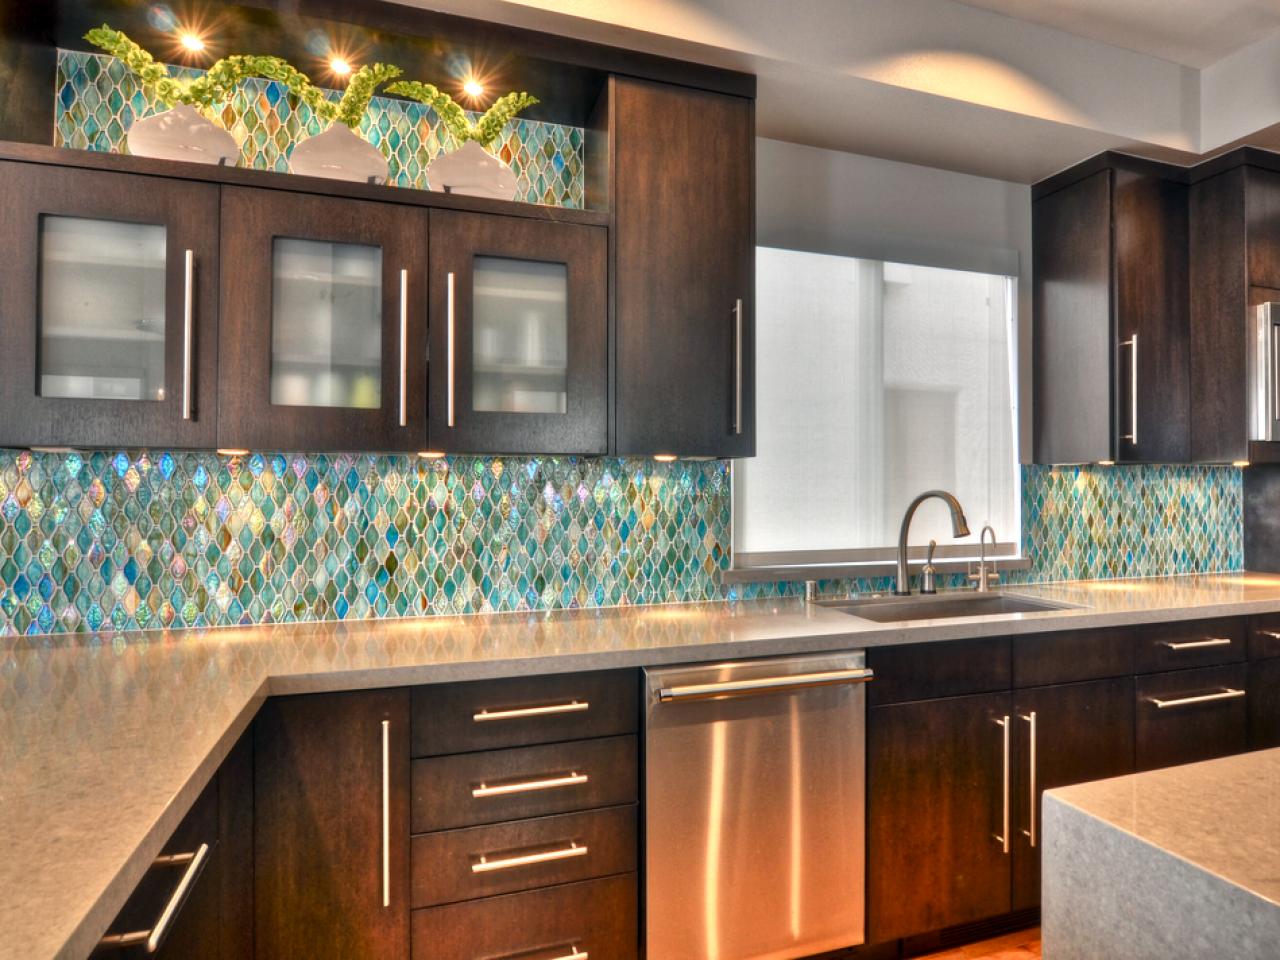
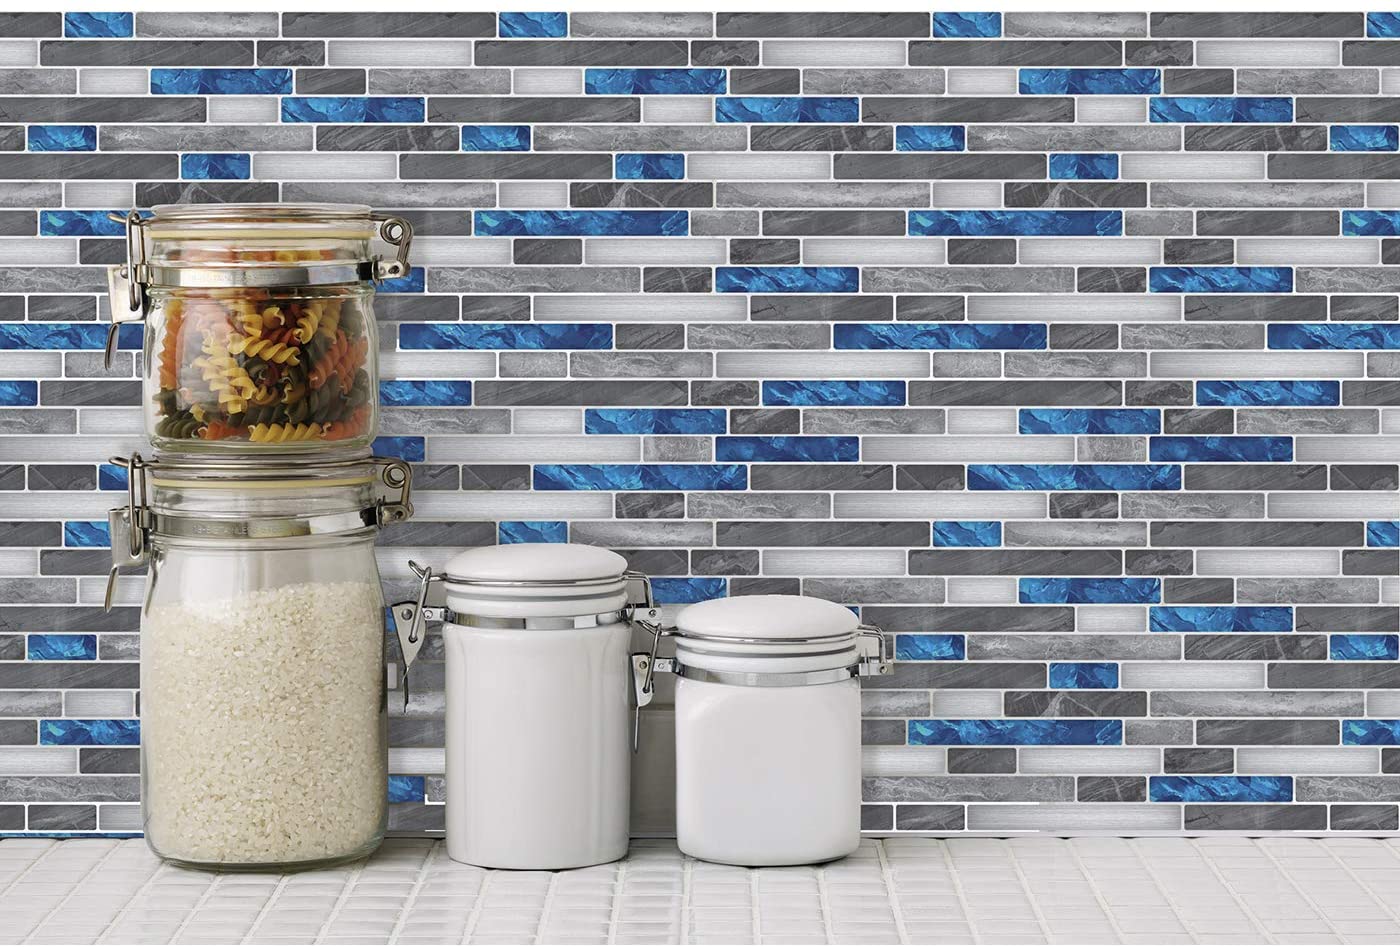
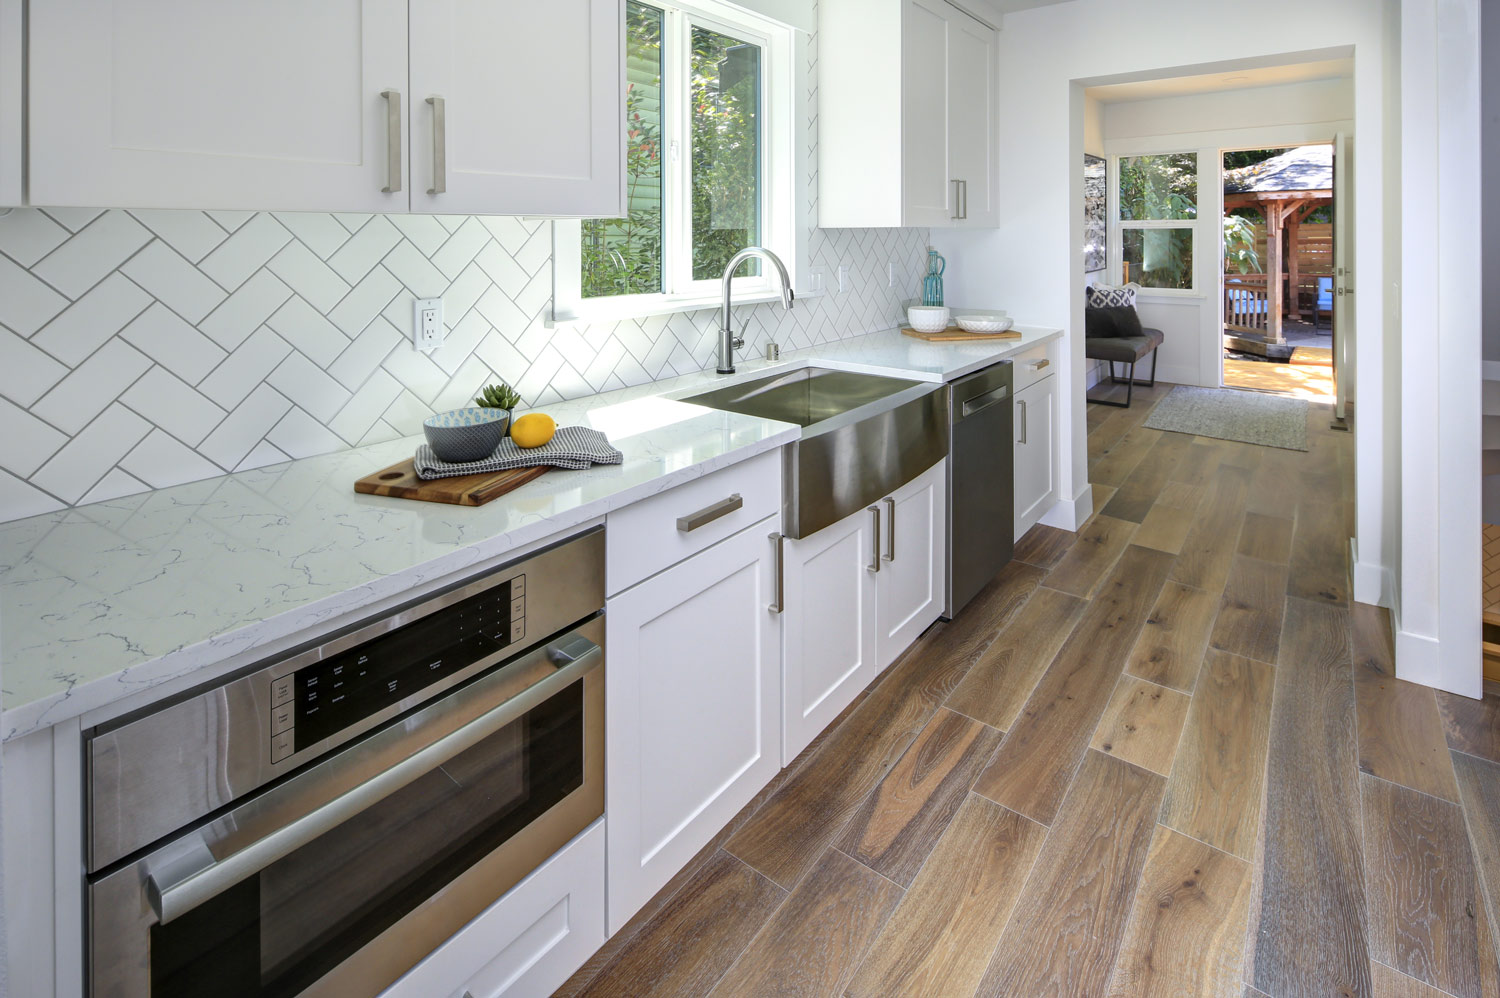
The kitchen backsplash wall is not only a functional element in your kitchen, but also a design feature that can enhance the overall look of the space. Make sure to take the time to properly prepare and caulk the wall to ensure a seamless and professional finish.Kitchen Backsplash Wall


Kitchen Backsplash Wall


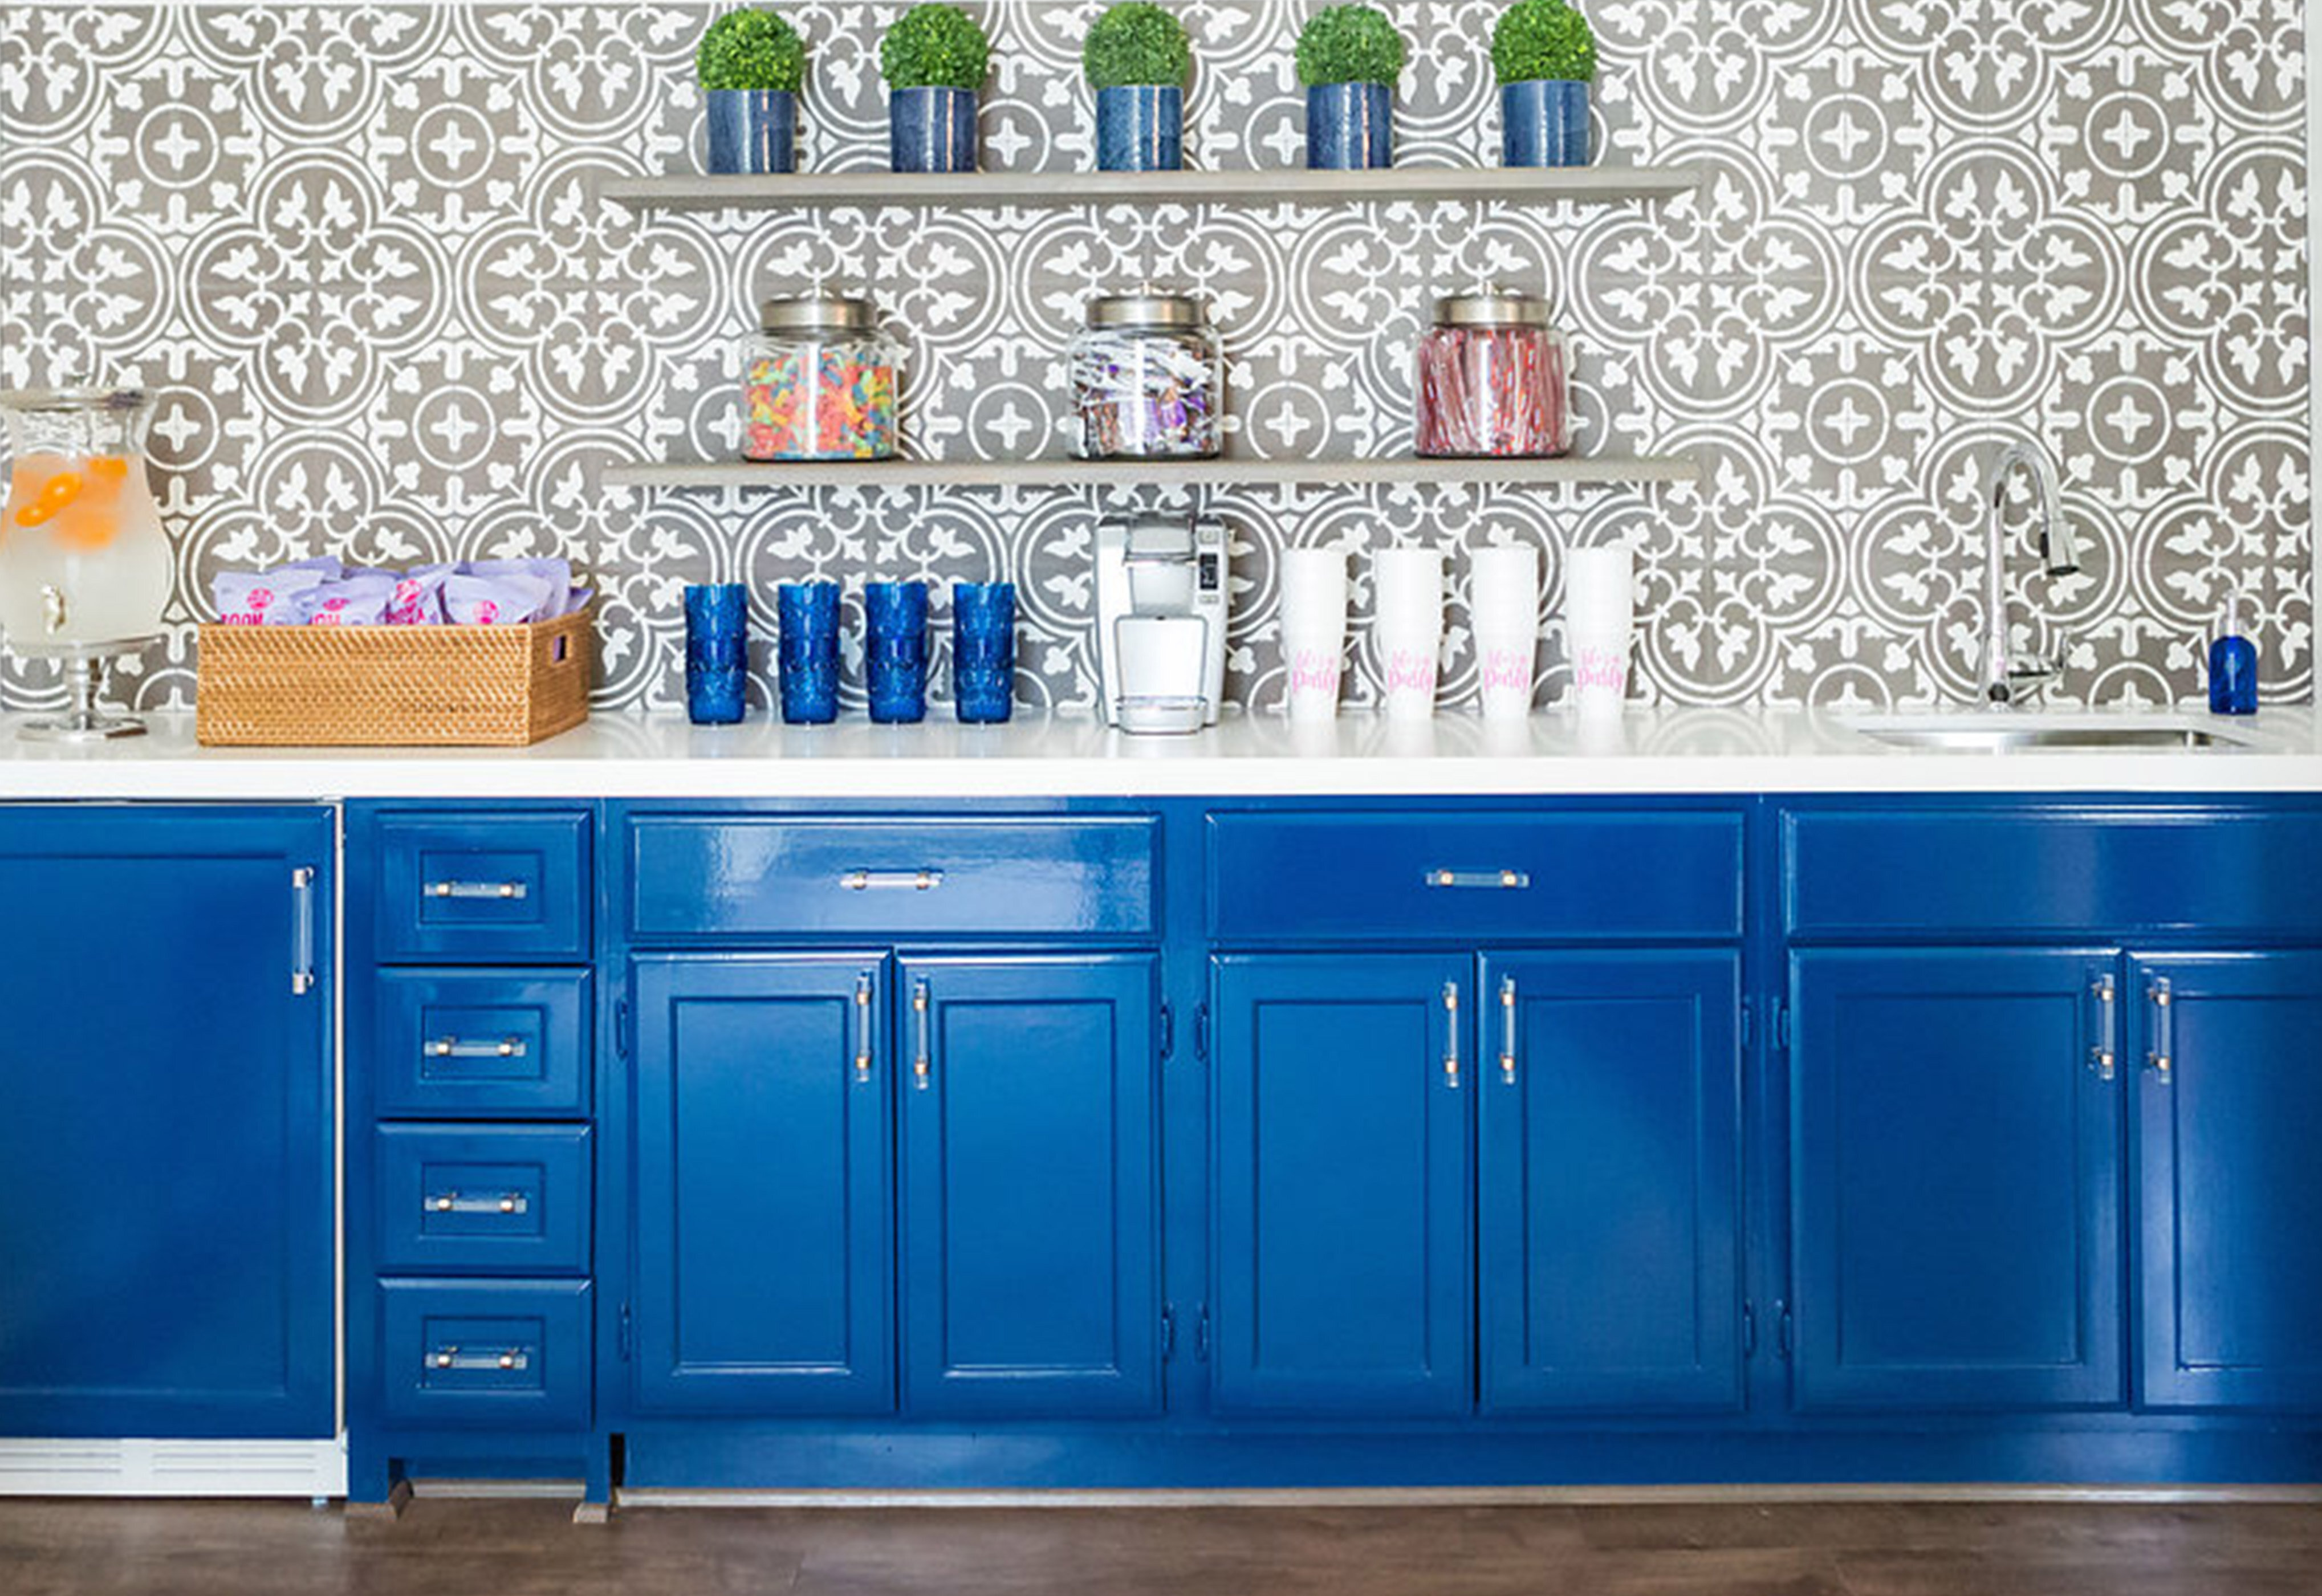
In addition to preparing the walls, it is also important to properly prepare the actual backsplash before installation. This involves cleaning, repairing, and possibly priming the surface. Cleaning: Using warm water and mild dish soap, thoroughly clean the backsplash to remove any dirt, grease, or grime. Make sure to dry it completely before moving on to the next step. Repairing: Inspect the backsplash for any imperfections and repair them using a spackling compound and putty knife, just as you did for the walls. Priming: Depending on the material of the backsplash and the type of adhesive being used, it may be necessary to prime the surface before installation. Check the manufacturer's instructions to determine if this step is necessary.Surface Preparation for Kitchen Backsplash


Surface Preparation for Kitchen Backsplash
/luxury-kitchen-165594300-58a719fb5f9b58a3c9362b1c.jpg)


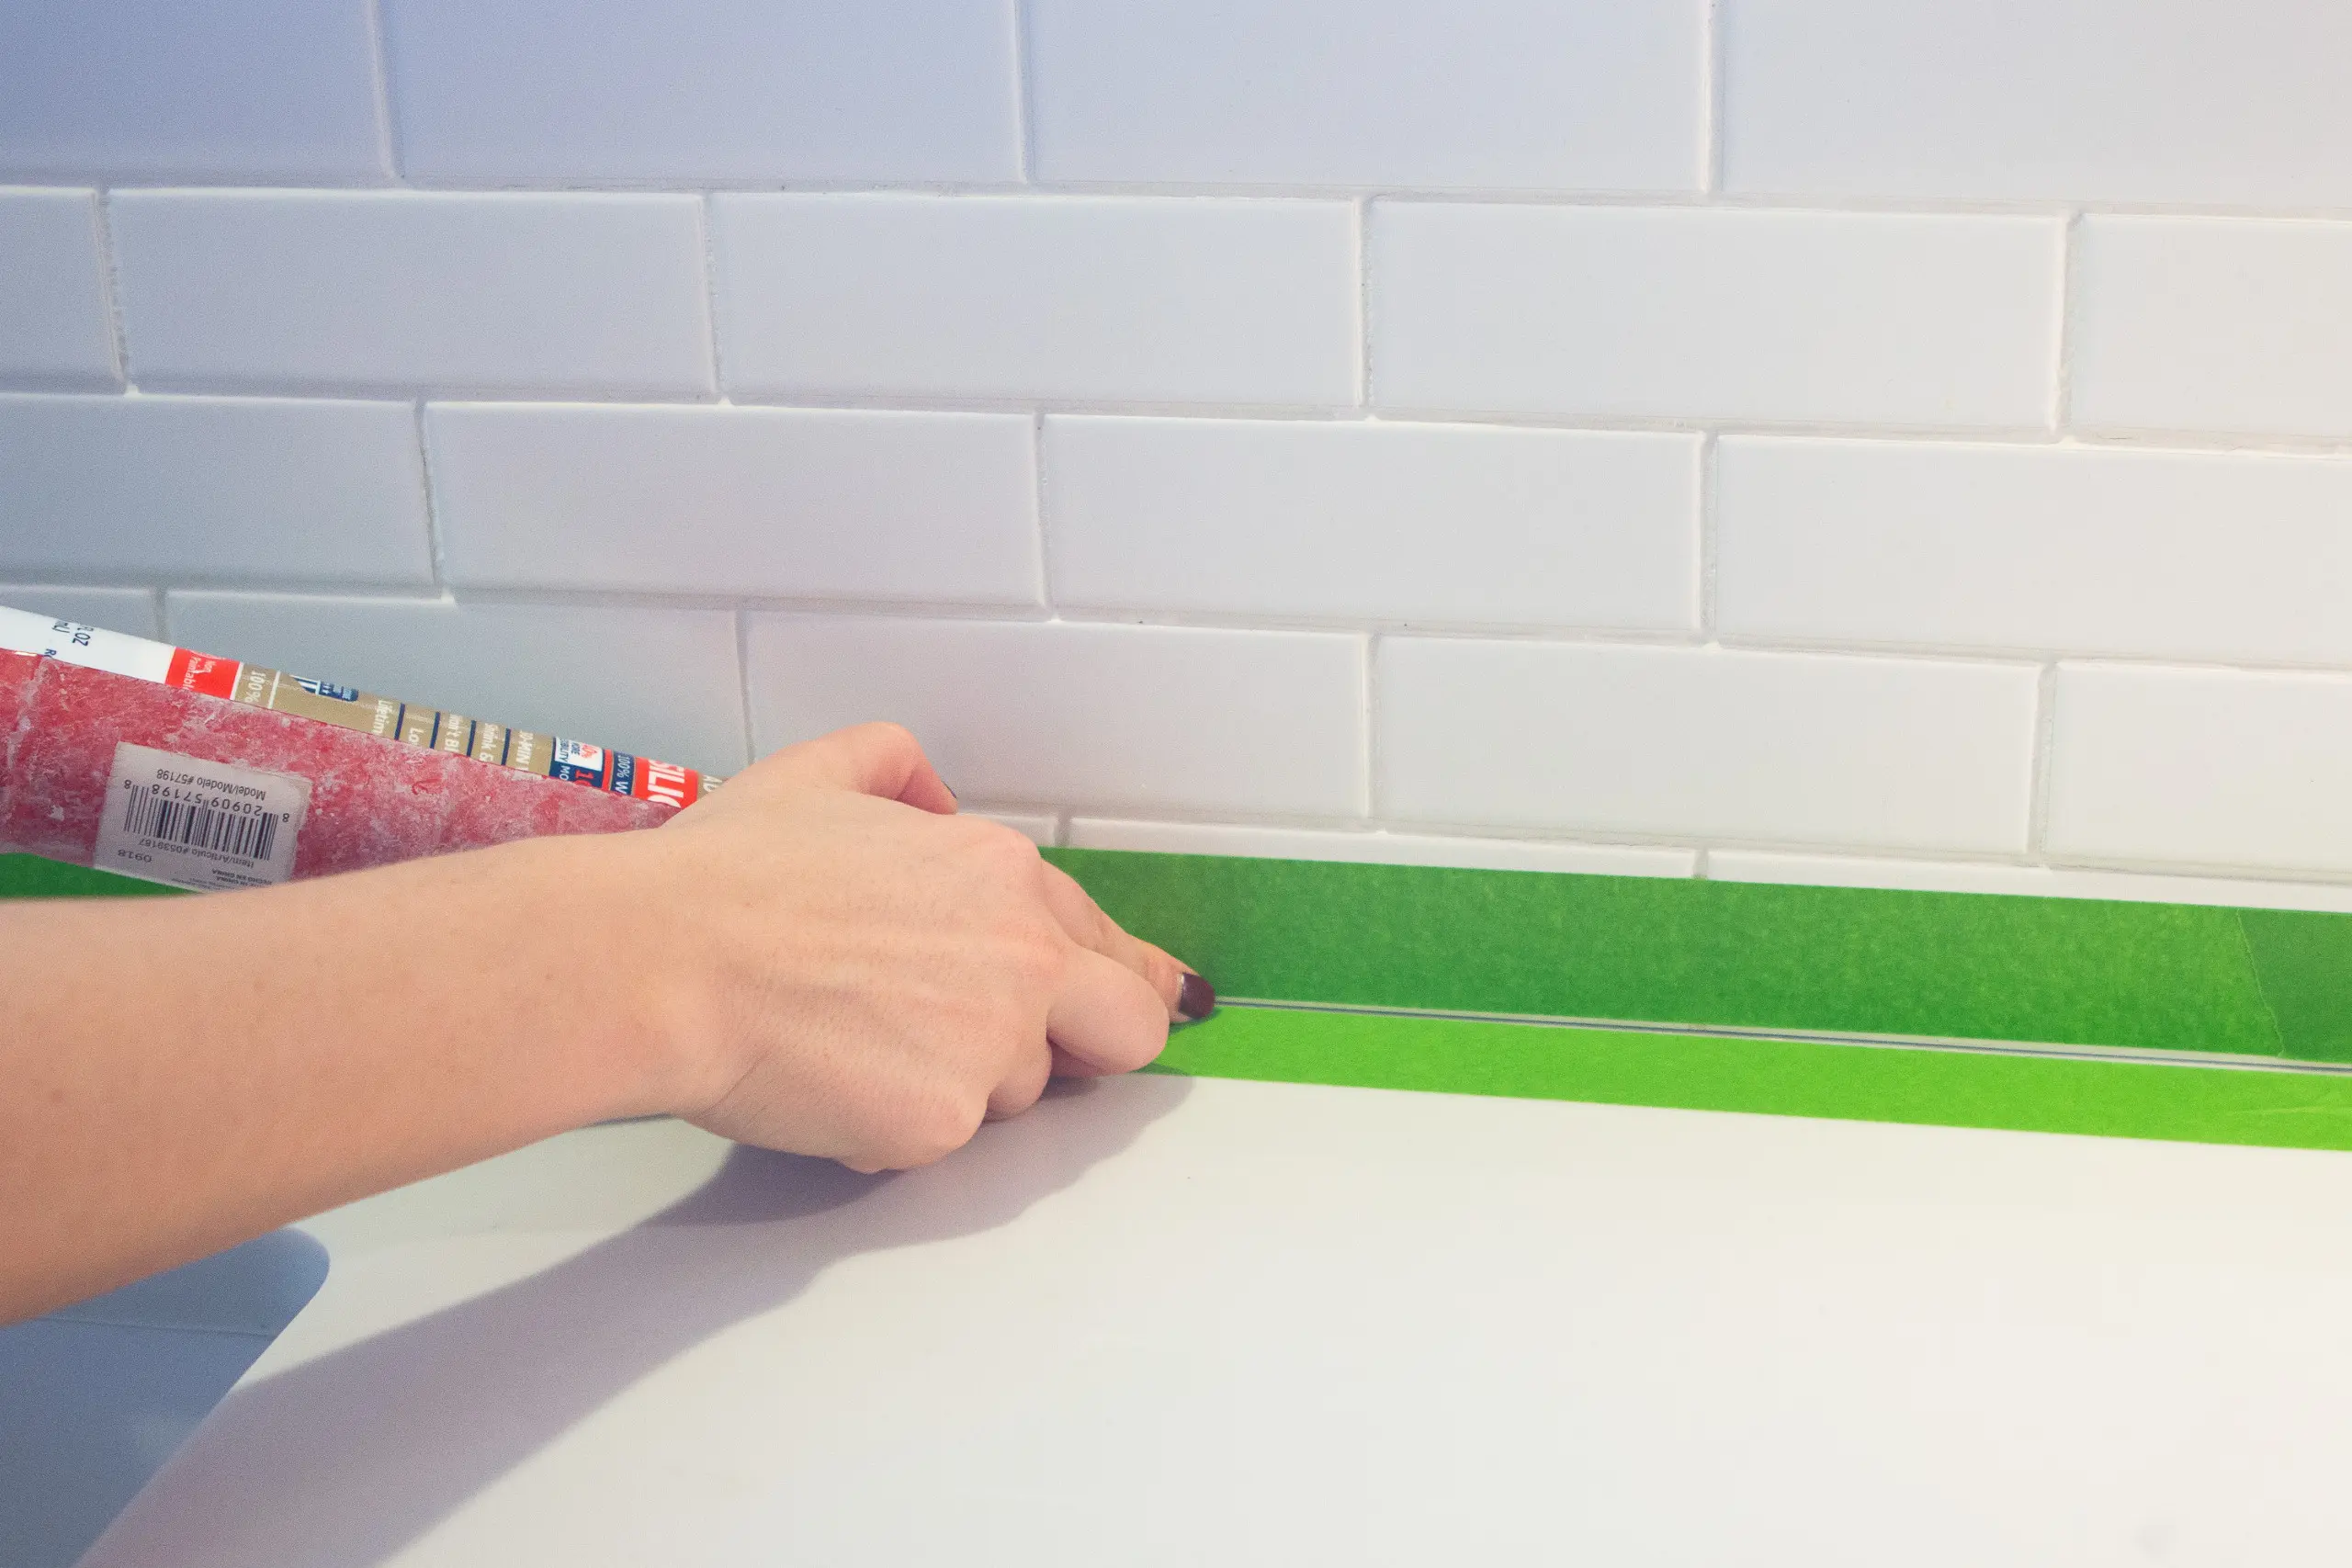
Finally, caulking is the last step in installing a kitchen backsplash. It not only creates a clean and polished look, but also helps prevent moisture from seeping behind the backsplash. Selecting the right caulk: Choose a caulk that is suitable for the material of the backsplash and any moisture concerns. Preparing the caulk: Follow the manufacturer's instructions for preparing the caulk before applying it to the backsplash. Applying the caulk: Carefully apply a thin and even line of caulk along the edges of the backsplash where it meets the wall. Smooth it out with your finger or a caulk smoothing tool and wipe away any excess with a damp cloth. Drying time: Allow the caulk to dry completely before using the backsplash. This can take anywhere from a few hours to a full day, depending on the type of caulk used.Caulking for Kitchen Backsplash
Caulking for Kitchen Backsplash


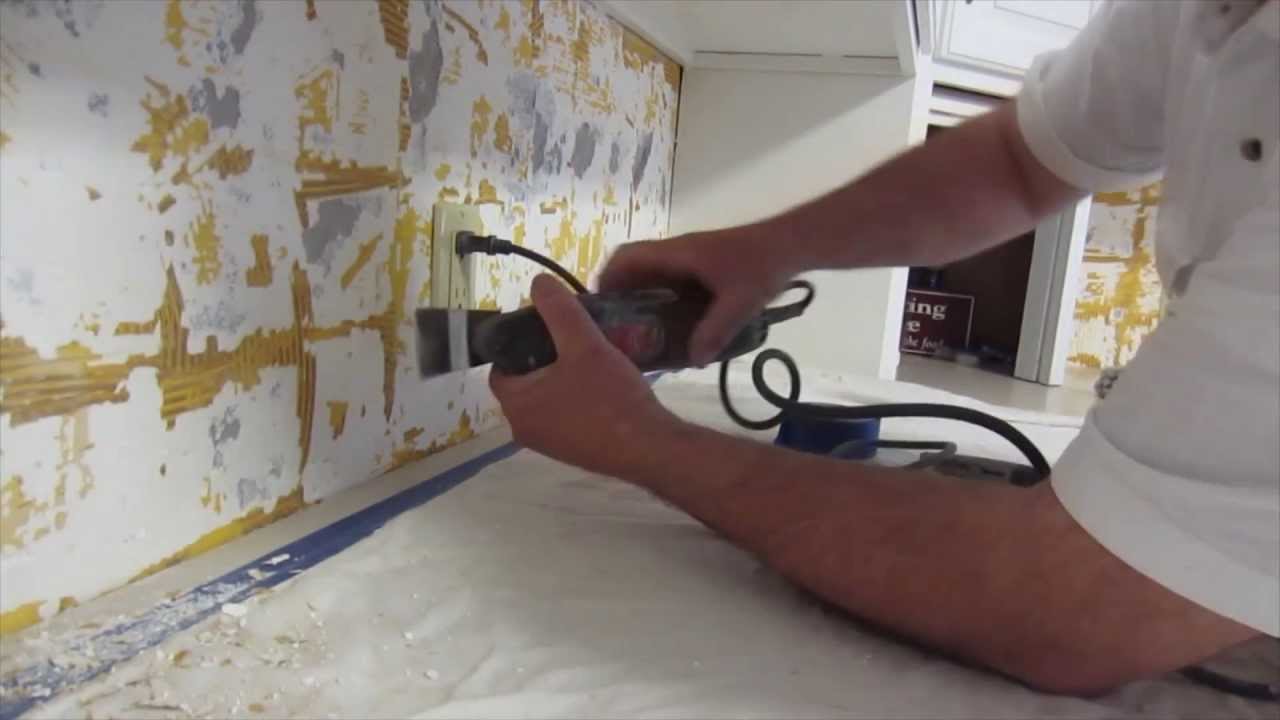
Properly preparing the walls before any installation is crucial for a successful and long-lasting finish. This includes cleaning, repairing, and possibly priming the surface. Cleaning: Using warm water and mild dish soap, thoroughly clean the wall to remove any dirt, grease, or grime. Make sure to dry it completely before moving on to the next step. Repairing: Inspect the wall for any imperfections and repair them using a spackling compound and putty knife, just as you did for the other walls. Priming: Depending on the material of the wall and the type of adhesive being used, it may be necessary to prime the surface before installation. Check the manufacturer's instructions to determine if this step is necessary.Surface Preparation for Wall


Surface Preparation for Wall


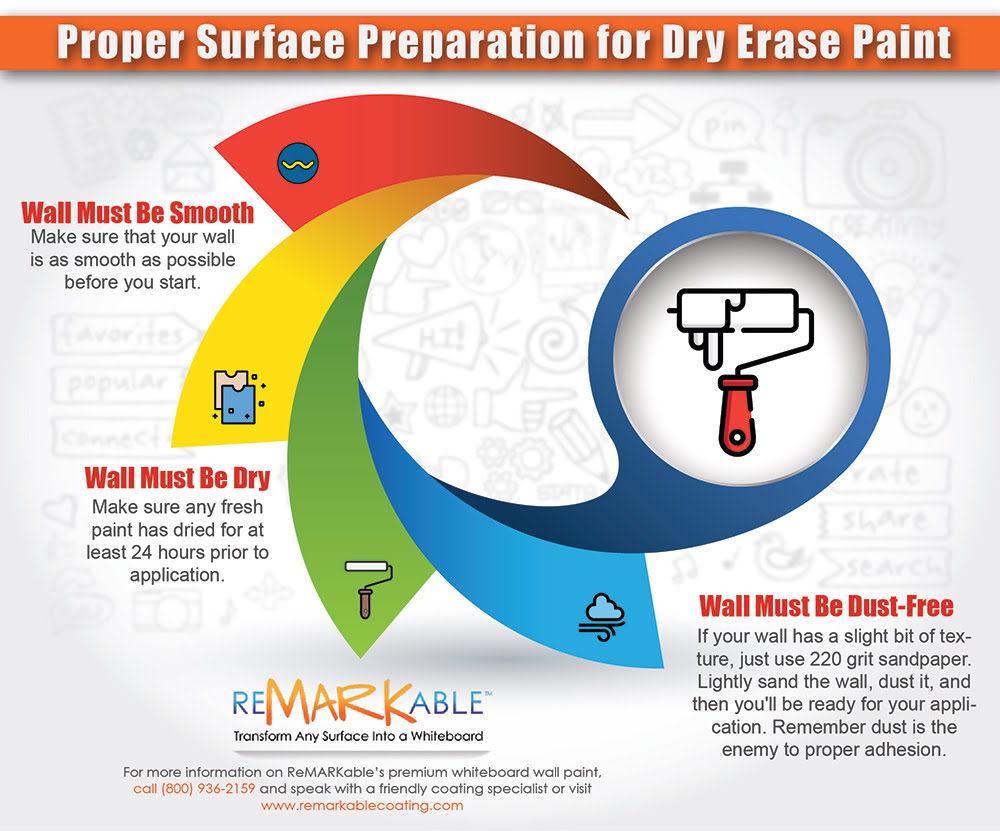
Why Surface Preparation is Essential for Caulking Your Kitchen Backsplash Wall
Creating a polished and functional kitchen design involves paying attention to even the smallest details. One crucial aspect that often gets overlooked is proper surface preparation before caulking a kitchen backsplash wall. While it may seem like an unnecessary step, it can make a significant difference in the overall look and longevity of your backsplash. Here's why:
 Proper surface preparation ensures that the
caulking
adheres to the wall and forms a tight seal. If the surface is not clean and smooth, the
caulk
may not stick properly, leading to gaps and cracks over time. Additionally, any dirt, grime, or residue on the wall can affect the color and texture of the
caulk
, making it appear uneven and unappealing.
Another reason why surface preparation is essential for caulking your kitchen backsplash wall is that it helps to prevent moisture and water damage. The kitchen is a high-moisture area, and if the
caulk
is not applied correctly, water can seep through the gaps and cause damage to the underlying walls. Proper surface preparation, including cleaning and priming the wall, can create a barrier against moisture and ensure that your backsplash remains in good condition for years to come.
Not only does surface preparation help with the functionality of your kitchen backsplash, but it also plays a crucial role in its aesthetics.
Caulking
can be a prominent feature in your kitchen design, and the last thing you want is for it to look sloppy or mismatched. By properly cleaning and preparing the surface, you can achieve a smooth and uniform appearance for your
caulk
, enhancing the overall look of your backsplash and kitchen.
In conclusion, surface preparation is a vital step in the process of caulking your kitchen backsplash wall. It ensures proper adhesion, prevents moisture damage, and improves the overall appearance of your backsplash. Don't overlook this crucial step in your kitchen design process, and you'll be rewarded with a beautiful and functional backsplash that will stand the test of time. So before you reach for that
caulk
gun, make sure to prep those surfaces first!
Proper surface preparation ensures that the
caulking
adheres to the wall and forms a tight seal. If the surface is not clean and smooth, the
caulk
may not stick properly, leading to gaps and cracks over time. Additionally, any dirt, grime, or residue on the wall can affect the color and texture of the
caulk
, making it appear uneven and unappealing.
Another reason why surface preparation is essential for caulking your kitchen backsplash wall is that it helps to prevent moisture and water damage. The kitchen is a high-moisture area, and if the
caulk
is not applied correctly, water can seep through the gaps and cause damage to the underlying walls. Proper surface preparation, including cleaning and priming the wall, can create a barrier against moisture and ensure that your backsplash remains in good condition for years to come.
Not only does surface preparation help with the functionality of your kitchen backsplash, but it also plays a crucial role in its aesthetics.
Caulking
can be a prominent feature in your kitchen design, and the last thing you want is for it to look sloppy or mismatched. By properly cleaning and preparing the surface, you can achieve a smooth and uniform appearance for your
caulk
, enhancing the overall look of your backsplash and kitchen.
In conclusion, surface preparation is a vital step in the process of caulking your kitchen backsplash wall. It ensures proper adhesion, prevents moisture damage, and improves the overall appearance of your backsplash. Don't overlook this crucial step in your kitchen design process, and you'll be rewarded with a beautiful and functional backsplash that will stand the test of time. So before you reach for that
caulk
gun, make sure to prep those surfaces first!