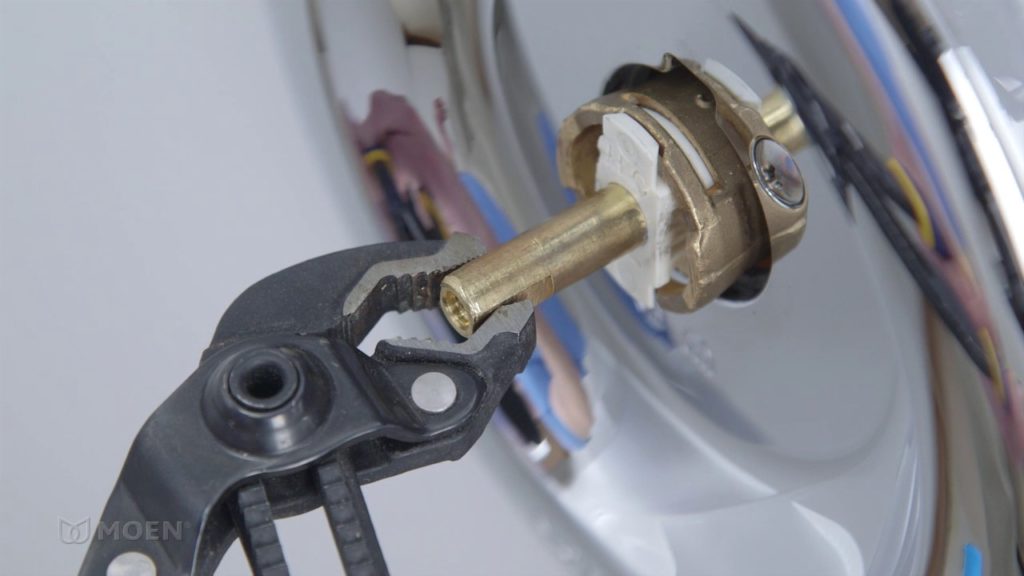
If you're experiencing a leaky or malfunctioning kitchen sink faucet, it may be time to replace the cartridge. This small but essential component is responsible for controlling the flow of water and can become worn out over time. While it may seem like a daunting task, replacing a kitchen sink faucet cartridge is actually a relatively simple DIY project that can save you time and money. Follow this step-by-step guide to learn how to replace a kitchen sink faucet cartridge and get your kitchen sink back in working order.How to Replace a Kitchen Sink Faucet Cartridge
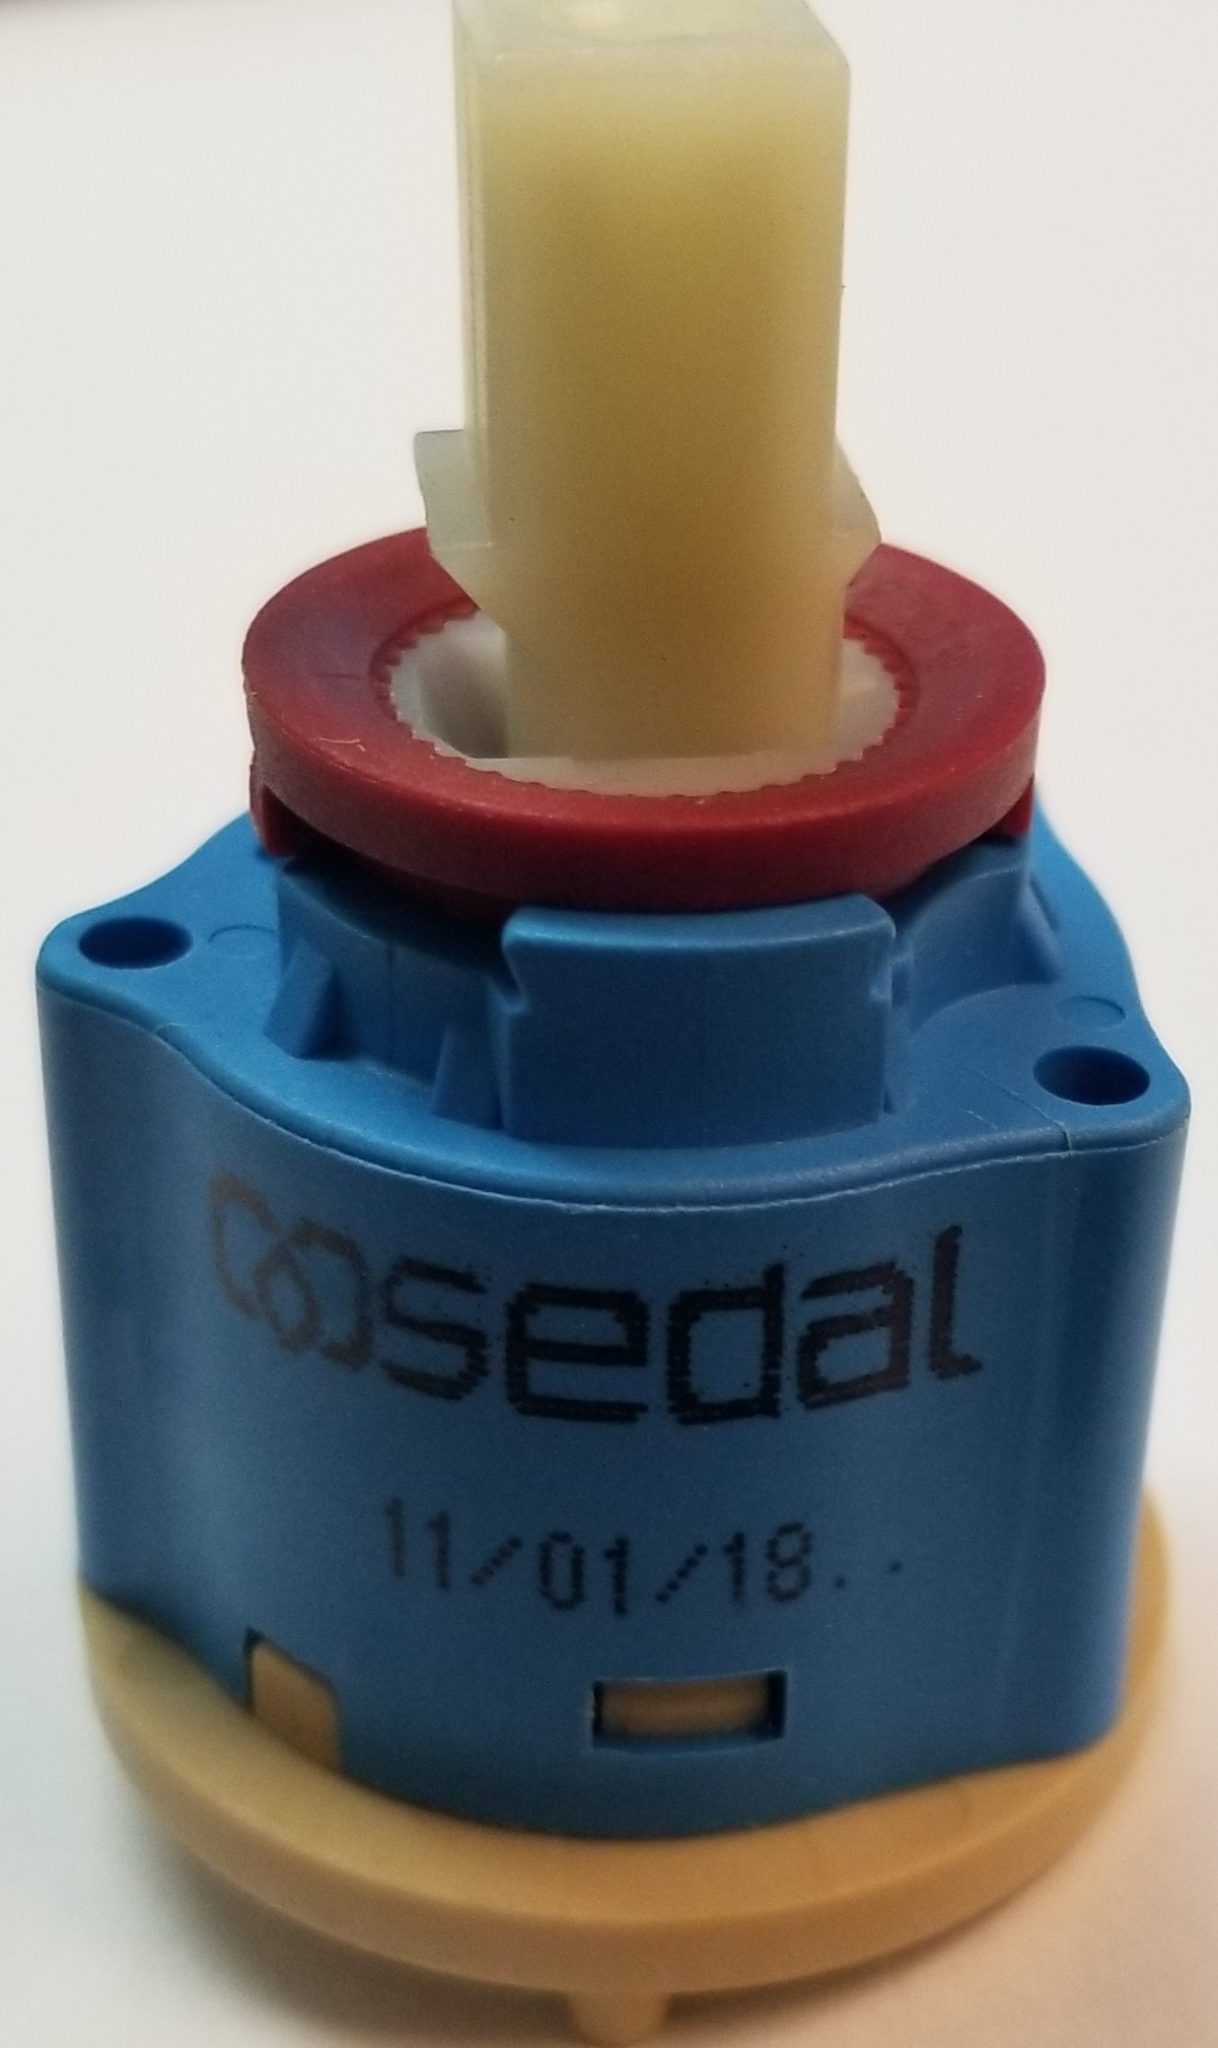
The first step to replacing a kitchen sink faucet cartridge is to identify the type of faucet you have. There are two common types of cartridges: the compression cartridge and the ceramic disc cartridge. The compression cartridge has a rubber stem that is compressed against a valve seat to control the flow of water, while the ceramic disc cartridge has two ceramic discs that move against each other to regulate the water flow. It's important to know which type you have before starting the replacement process.How to Replace a Cartridge in a Kitchen Faucet
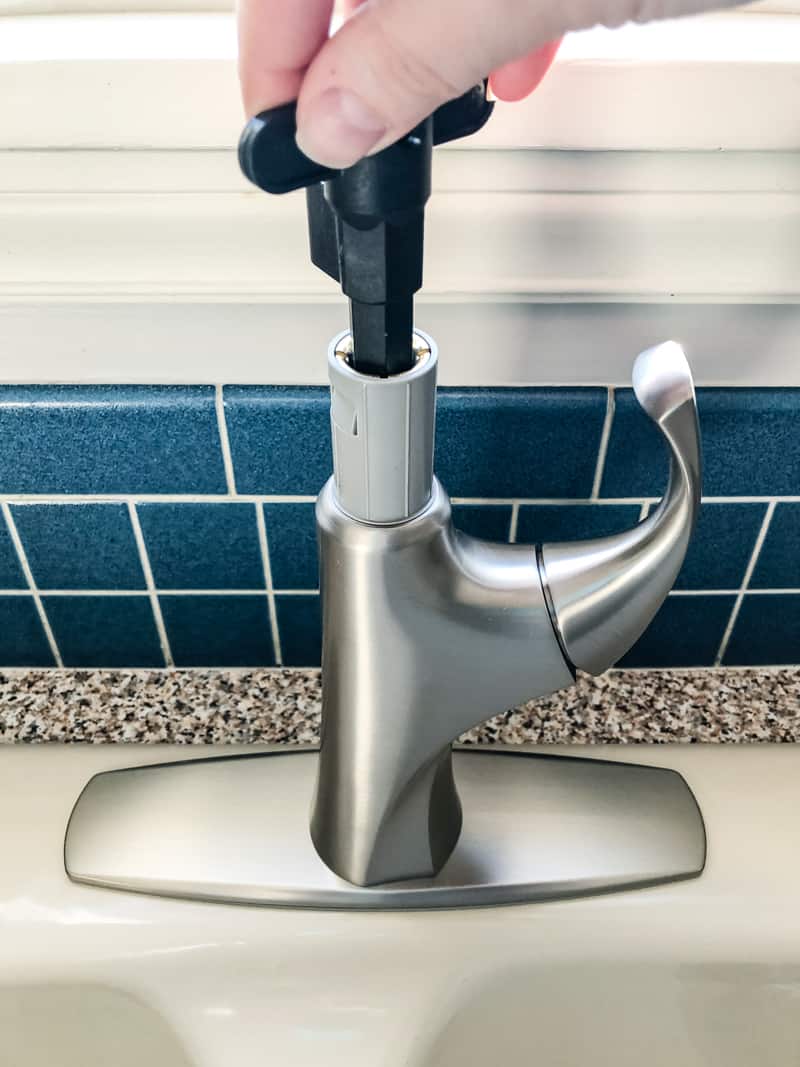
Before you begin, gather all the necessary tools and materials. This may include a new cartridge, an adjustable wrench, pliers, and a screwdriver. Once you have everything you need, follow these steps: Step 1: Turn off the water supply to your kitchen sink by closing the shut-off valves under the sink. Step 2: Remove the handle of the faucet by unscrewing the screw that holds it in place. If there is a decorative cap covering the screw, use a flathead screwdriver to pop it off. Step 3: Use an adjustable wrench to unscrew the retaining nut that holds the cartridge in place. Depending on the type of faucet, you may also need to remove the spout to access the cartridge. Step 4: Once the retaining nut is removed, you can pull the cartridge out of the faucet body. If it's stuck, you can use pliers to gently wiggle it out. Step 5: Take the old cartridge to a hardware store to find an exact replacement. Make sure to match the size and type of your old cartridge to ensure a proper fit. Step 6: Install the new cartridge by following the previous steps in reverse order. Make sure the cartridge is properly aligned and secure before reattaching the spout and handle.Replacing a Kitchen Sink Faucet Cartridge: Step-by-Step Guide
If you're feeling confident in your DIY skills, you can save even more money by replacing the cartridge yourself. Just follow these additional tips: TIP 1: Take pictures as you remove the old cartridge to help you remember how to put everything back together. TIP 2: Clean the inside of the faucet body before installing the new cartridge to ensure proper functioning. TIP 3: If your faucet has a ceramic disc cartridge, be sure to lubricate the O-rings with silicone grease before installing to prevent leaks.DIY: How to Replace a Kitchen Faucet Cartridge
Replacing a kitchen sink faucet cartridge may seem like a daunting task, but with the right tools and a little know-how, it can be a quick and easy process. Follow these simple steps to get your faucet working like new again: Step 1: Turn off the water supply. Step 2: Remove the handle and retaining nut. Step 3: Pull out the old cartridge. Step 4: Install the new cartridge. Step 5: Reattach the handle and spout.Quick and Easy Guide to Replacing a Kitchen Sink Faucet Cartridge
Even with the right tools and instructions, replacing a kitchen sink faucet cartridge can still be tricky. Here are some helpful tips to make the process smoother: TIP 1: If your faucet has a cartridge with plastic parts, be careful not to overtighten the retaining nut as this can cause the plastic to crack. TIP 2: If your faucet has a compression cartridge, you may need to replace the valve seat if it is worn or damaged. This can be done with a valve seat wrench, which can be purchased at a hardware store. TIP 3: If you're unsure about how to remove the cartridge, consult the manufacturer's instructions or contact a professional for assistance.Replacing a Kitchen Sink Faucet Cartridge: Tips and Tricks
Replacing a kitchen sink faucet cartridge can sometimes involve trial and error, but if you follow these steps, you should have a successful replacement: Step 1: Turn off the water supply. Step 2: Remove the handle and retaining nut. Step 3: Take out the old cartridge and inspect it for any damage. Step 4: Install the new cartridge. Step 5: Test the faucet to make sure it is working properly.Step-by-Step Guide to Replacing a Kitchen Sink Faucet Cartridge
While replacing a kitchen sink faucet cartridge is a DIY project, there are some common mistakes that can lead to bigger problems. Avoid these mistakes to ensure a successful replacement: MISTAKE 1: Not turning off the water supply before starting the replacement process. MISTAKE 2: Forgetting to replace the O-rings or lubricate them before installing the new cartridge. MISTAKE 3: Using excessive force when removing or installing the cartridge, which can cause damage to the faucet or cartridge.Replacing a Kitchen Sink Faucet Cartridge: Common Mistakes to Avoid
If you're new to DIY projects, replacing a kitchen sink faucet cartridge may seem intimidating. But with the right tools and instructions, even beginners can successfully complete this task. Follow this guide to learn how to replace a kitchen sink faucet cartridge with confidence.How to Replace a Kitchen Sink Faucet Cartridge: A Beginner's Guide
Now that you know the steps to replacing a kitchen sink faucet cartridge, there are a few additional things you should know: KNOW 1: Cartridges can vary in price, so make sure to shop around for the best deal. KNOW 2: If you're unsure about any step in the process, it's always best to consult the manufacturer's instructions or contact a professional for assistance. KNOW 3: Regular maintenance and cleaning of your faucet can help prolong the life of the cartridge and prevent the need for frequent replacements. Now that you know how to replace a kitchen sink faucet cartridge, you can tackle this DIY project with confidence and get your kitchen sink back to functioning like new. Remember to gather all the necessary tools and materials, follow the step-by-step guide, and avoid common mistakes to ensure a successful replacement. Your wallet (and your kitchen sink) will thank you. Replacing a Kitchen Sink Faucet Cartridge: What You Need to Know
The Importance of Replacing Your Kitchen Sink Faucet Cartridge

Signs that Your Faucet Cartridge Needs Replacing
 Your kitchen sink faucet is one of the most used fixtures in your home. From washing dishes to filling up water bottles, it endures a lot of wear and tear. Over time, the constant use and exposure to water and other elements can cause the faucet cartridge to wear out and malfunction. This can lead to leaks, reduced water flow, and difficulty in turning the faucet on and off. If you notice any of these issues, it may be time to
replace your kitchen sink faucet cartridge
.
Why You Should Replace Your Faucet Cartridge
 Some homeowners may try to ignore a malfunctioning faucet cartridge, thinking it's just a minor inconvenience. However, not replacing it can lead to bigger problems and even cost you more money in the long run. A leaky faucet can waste a significant amount of water, increasing your water bill. It can also cause water damage to your kitchen cabinets and countertops, leading to costly repairs. Additionally, a worn-out faucet cartridge can affect the overall functionality and efficiency of your kitchen sink, making daily tasks more difficult.
The Benefits of a New Faucet Cartridge
 Replacing your kitchen sink faucet cartridge can bring several benefits to your home. Firstly, it will fix any issues with leaks and low water flow, ensuring your sink is functioning properly. This can save you money on your water bills and prevent any potential water damage. Secondly, a new cartridge can improve the overall appearance of your kitchen sink. Over time, the old cartridge may become discolored or worn, making your sink look outdated. A new cartridge will give your sink a fresh and updated look. Lastly, replacing your faucet cartridge can improve the value of your home. Potential buyers will appreciate a well-functioning and visually appealing kitchen sink, making your home more attractive on the market.
How to Replace Your Faucet Cartridge
 Replacing a kitchen sink faucet cartridge may seem like a daunting task, but it can be done with some basic tools and a little know-how. Start by turning off the water supply to your sink and removing the old cartridge. Then, install the new cartridge according to the manufacturer's instructions. It's important to make sure all connections are tight and secure to prevent leaks. Finally, turn the water supply back on and test your new cartridge. If you're unsure or uncomfortable with DIY projects, it's always best to hire a professional plumber to ensure the job is done correctly.
In conclusion,
replacing your kitchen sink faucet cartridge
is an essential maintenance task that should not be ignored. Not only will it fix any issues with leaks and low water flow, but it can also improve the overall functionality and appearance of your kitchen sink. With a little effort and the right tools, you can easily replace your faucet cartridge and enjoy the benefits it brings. Don't wait until it's too late - take care of your kitchen sink and keep it in top shape by replacing the cartridge when needed.


