How to Remove a Moen Bathroom Sink Drain
Are you tired of dealing with a clogged bathroom sink drain? Removing a Moen bathroom sink drain may seem like a daunting task, but with the right tools and techniques, it can be a relatively simple process. Whether you need to replace a faulty drain or just want to clean out built-up debris, we've got you covered. In this article, we'll walk you through the steps to remove your Moen bathroom sink drain and get your sink running smoothly again.


How to Remove a Moen Bathroom Sink Drain


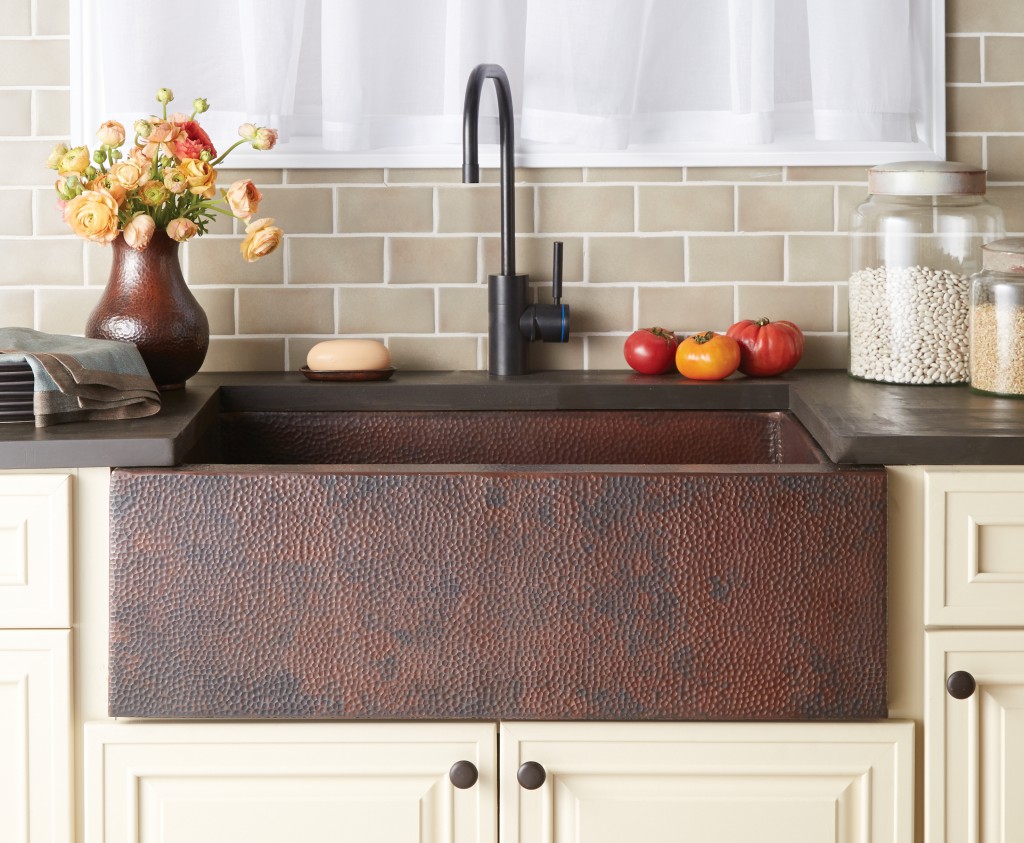
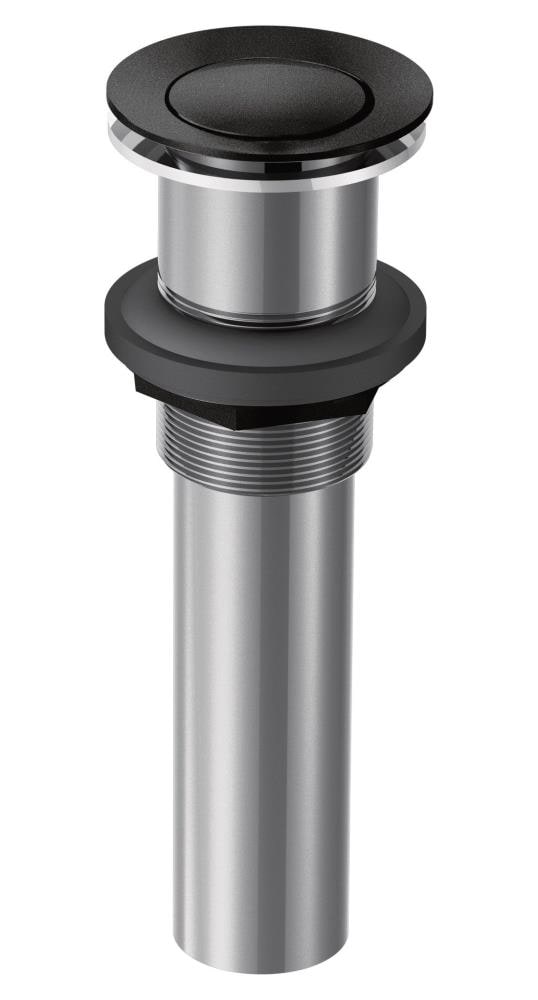
Moen Bathroom Sink Drain Removal
Before you start, make sure you have all the necessary tools and materials. You will need a pair of pliers, a screwdriver, a putty knife, and a new Moen sink drain. If you don't have a new drain, you can easily find one at your local hardware store. Once you have everything you need, it's time to get started on removing your Moen bathroom sink drain.


Moen Bathroom Sink Drain Removal


Removing a Moen Bathroom Sink Drain
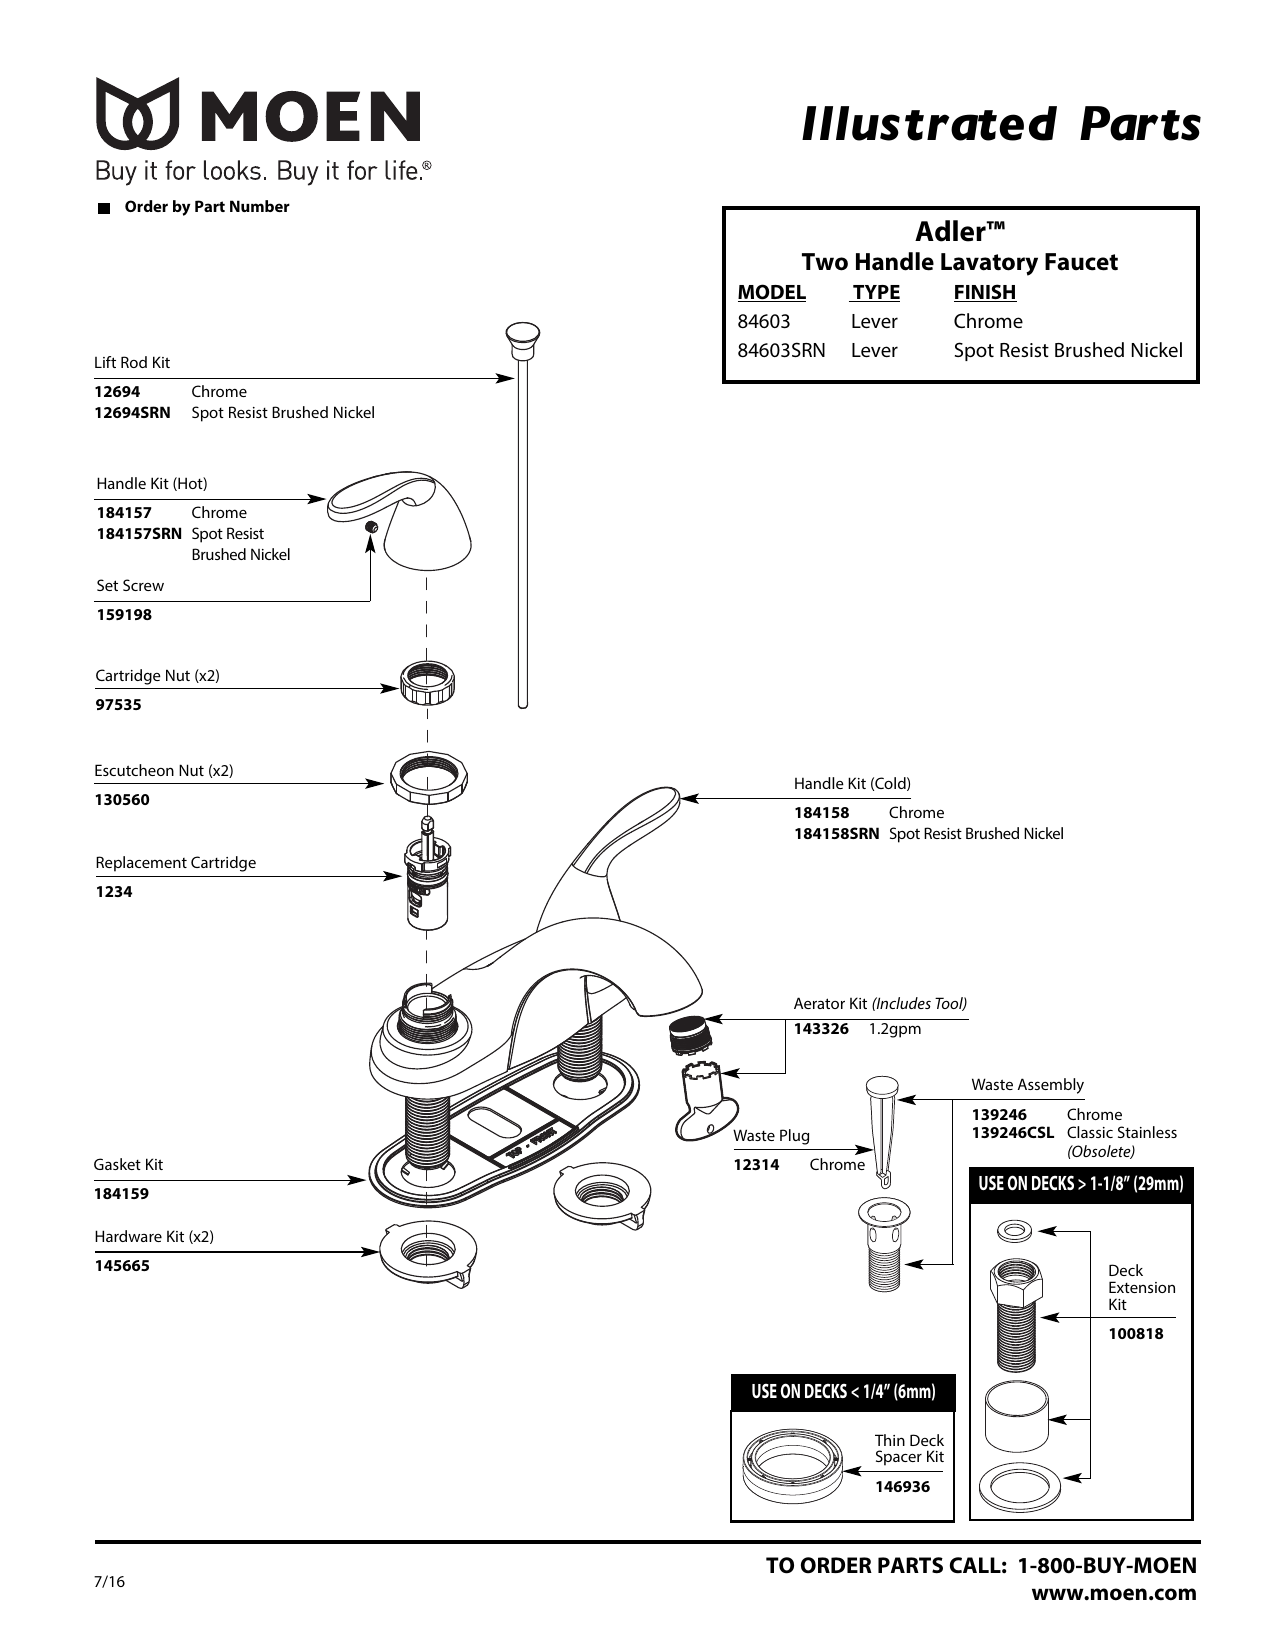
The first step is to locate the set screw on the back of the faucet handle. Use a screwdriver to loosen and remove this screw. Next, use your pliers to loosen and remove the mounting nut that holds the faucet handle in place. Once the handle is removed, you will see the mounting nut that holds the drain in place. Use your pliers to loosen and remove this nut as well.

Removing a Moen Bathroom Sink Drain


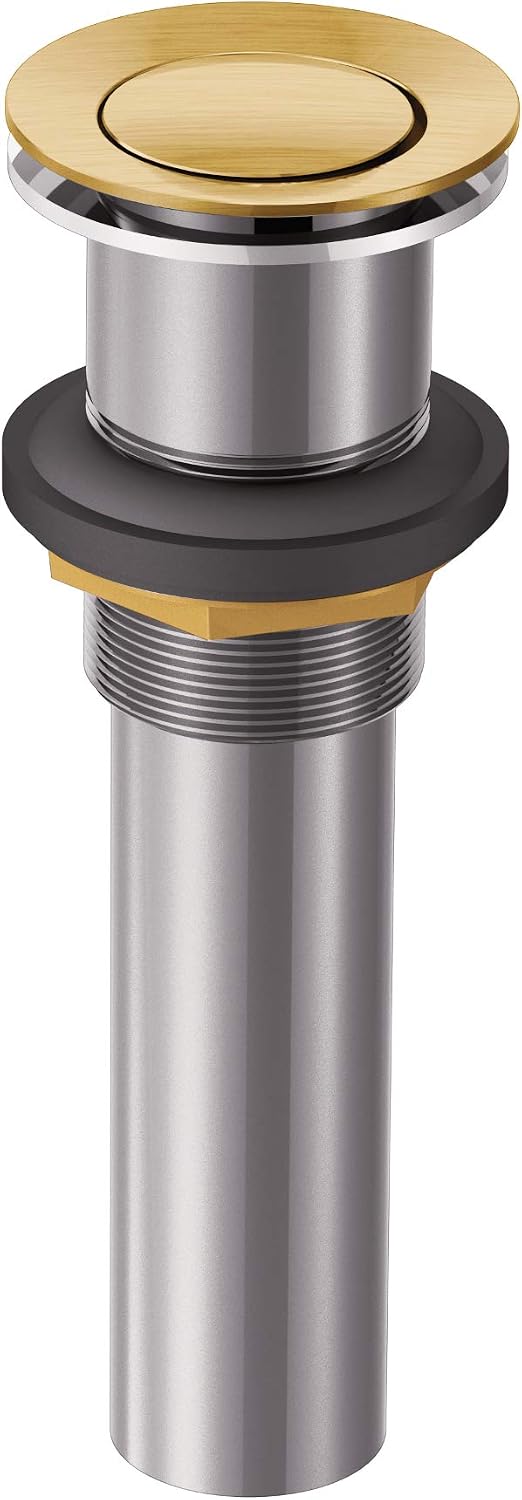
Moen Bathroom Sink Drain Replacement
With the mounting nut removed, the drain should now be loose and easy to remove. Pull the drain out of the sink and set it aside. You can now clean out any debris or buildup that may be causing your drain to clog. If you notice any damage to the drain or the rubber gasket, it's time to replace the entire drain.


Moen Bathroom Sink Drain Replacement


How to Replace a Moen Bathroom Sink Drain
If you need to replace your Moen bathroom sink drain, start by cleaning the sink and drain opening thoroughly. Next, apply a thin layer of plumber's putty around the edge of the drain opening. This will create a seal between the sink and the drain. Place the new drain into the opening and secure it in place with the mounting nut. Use your pliers to tighten the nut until the drain is snug.


How to Replace a Moen Bathroom Sink Drain


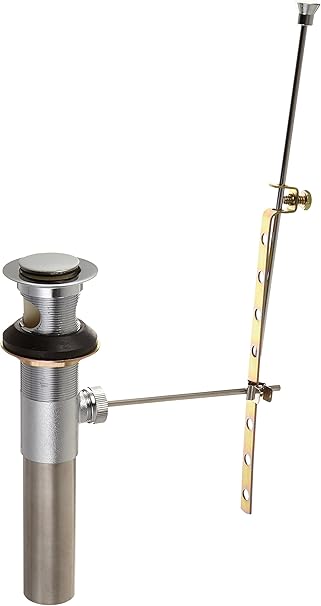
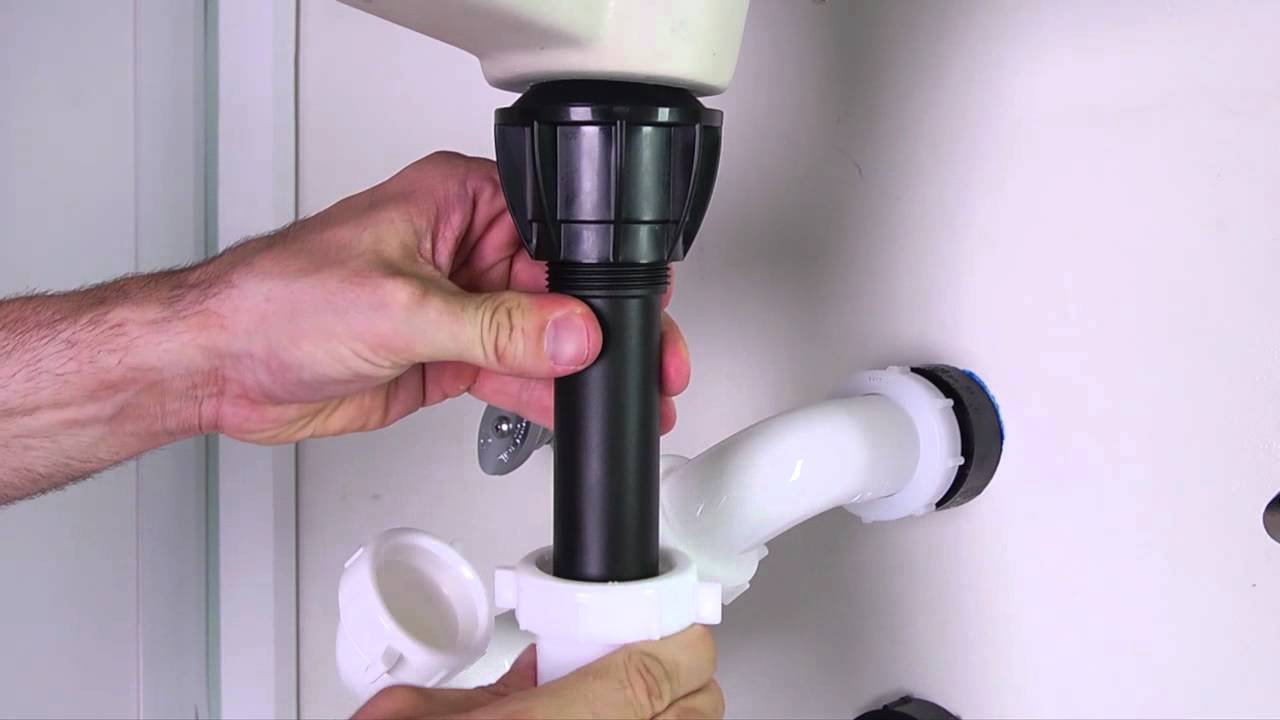
Moen Bathroom Sink Drain Installation
Now it's time to reassemble the faucet handle. Start by placing the handle back onto the mounting nut and securing it with the screw you removed earlier. Make sure everything is aligned properly and tighten the screw to hold the handle in place.

Moen Bathroom Sink Drain Installation

/bathroom-sink-drain-installation-2718843-01-4955fe1f576b447a91abe51c126d220b.jpg)

How to Install a Moen Bathroom Sink Drain
Once the faucet handle is back in place, turn on the water to test your new drain. If everything is working properly, you can now clean up any excess plumber's putty around the drain opening and enjoy your newly functioning sink.


How to Install a Moen Bathroom Sink Drain


Moen Bathroom Sink Drain Repair
If your Moen bathroom sink drain is still not functioning properly, you may need to do some further repairs. This could include replacing the rubber gasket or the entire drain assembly. You can find replacement parts at your local hardware store or contact Moen directly for assistance.

Moen Bathroom Sink Drain Repair

How to Repair a Moen Bathroom Sink Drain
If you are comfortable with DIY repairs, you can also attempt to repair the drain yourself. Start by disassembling the drain and inspecting all the parts. Clean or replace any damaged components and then reassemble the drain. Test it to see if it is now working properly. If not, you may need to seek further assistance from a professional plumber.


How to Repair a Moen Bathroom Sink Drain


Moen Bathroom Sink Drain Assembly
Once you have successfully removed, replaced, or repaired your Moen bathroom sink drain, you can now assemble everything back together and enjoy a fully functioning sink. Remember to regularly clean and maintain your drain to prevent future clogs and issues. With these simple tips, you can easily remove and replace your Moen bathroom sink drain and keep your sink running smoothly for years to come.
Moen Bathroom Sink Drain Assembly
How to Easily Remove a Moen Bathroom Sink Drain

Introduction
 When it comes to house design, every detail matters. From choosing the perfect paint color to selecting the right fixtures, everything contributes to the overall look and feel of your home. One essential element in a bathroom is the sink, and sometimes, it may need to be replaced or repaired. If you have a
Moen
bathroom sink, you may need to remove the drain for maintenance or replacement. Removing a sink drain may seem like a daunting task, but with the right tools and techniques, it can be a simple and straightforward process. In this article, we will guide you on
how to remove a Moen bathroom sink drain
, step by step.
When it comes to house design, every detail matters. From choosing the perfect paint color to selecting the right fixtures, everything contributes to the overall look and feel of your home. One essential element in a bathroom is the sink, and sometimes, it may need to be replaced or repaired. If you have a
Moen
bathroom sink, you may need to remove the drain for maintenance or replacement. Removing a sink drain may seem like a daunting task, but with the right tools and techniques, it can be a simple and straightforward process. In this article, we will guide you on
how to remove a Moen bathroom sink drain
, step by step.
Gather Your Tools
 Before you begin, make sure you have all the necessary tools and materials. These include a pair of pliers, an adjustable wrench, a flathead screwdriver, and a drain removal tool. You can find these tools at your local hardware store or online. Once you have all the tools, you are ready to start the process.
Step-by-Step Guide
 Step 1:
Locate the water shut-off valve and turn off the water supply to your sink. This valve is usually located under the sink or in the main water line.
Step 2:
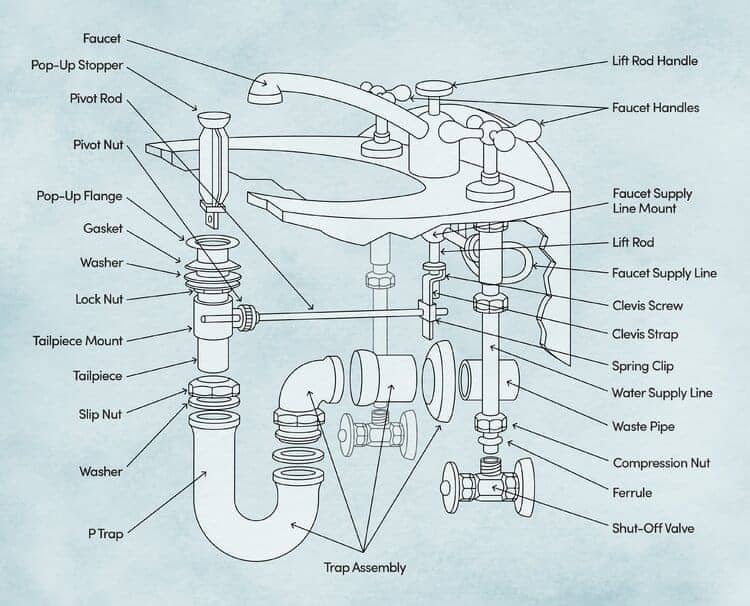
Next, remove the sink stopper by unscrewing the top knob or pulling up on the lift rod. If your sink has a pop-up drain, you may need to unscrew the nut holding the pivot rod in place.
Step 3:
Use the pliers to loosen the nut that holds the drain in place. You can find this nut at the bottom of the sink, where the drain meets the sink basin. Turn the nut counterclockwise to loosen it.
Step 4:
Once the nut is loosened, you can remove the drain by pulling it up and out of the sink.
Step 5:
If the drain is stuck, you may need to use a drain removal tool to loosen it. This tool is specifically designed to grip onto the drain, allowing you to twist and remove it easily.
Step 1:
Locate the water shut-off valve and turn off the water supply to your sink. This valve is usually located under the sink or in the main water line.
Step 2:
Next, remove the sink stopper by unscrewing the top knob or pulling up on the lift rod. If your sink has a pop-up drain, you may need to unscrew the nut holding the pivot rod in place.
Step 3:
Use the pliers to loosen the nut that holds the drain in place. You can find this nut at the bottom of the sink, where the drain meets the sink basin. Turn the nut counterclockwise to loosen it.
Step 4:
Once the nut is loosened, you can remove the drain by pulling it up and out of the sink.
Step 5:
If the drain is stuck, you may need to use a drain removal tool to loosen it. This tool is specifically designed to grip onto the drain, allowing you to twist and remove it easily.
Conclusion
 Removing a Moen bathroom sink drain may seem like a daunting task, but with the right tools and techniques, it can be a simple and straightforward process. By following the steps outlined in this article, you can easily remove the drain and complete any necessary maintenance or replacement. Remember to always turn off the water supply before starting and have all the necessary tools on hand. With a little patience and know-how, you can successfully remove a Moen bathroom sink drain and keep your bathroom looking beautiful.