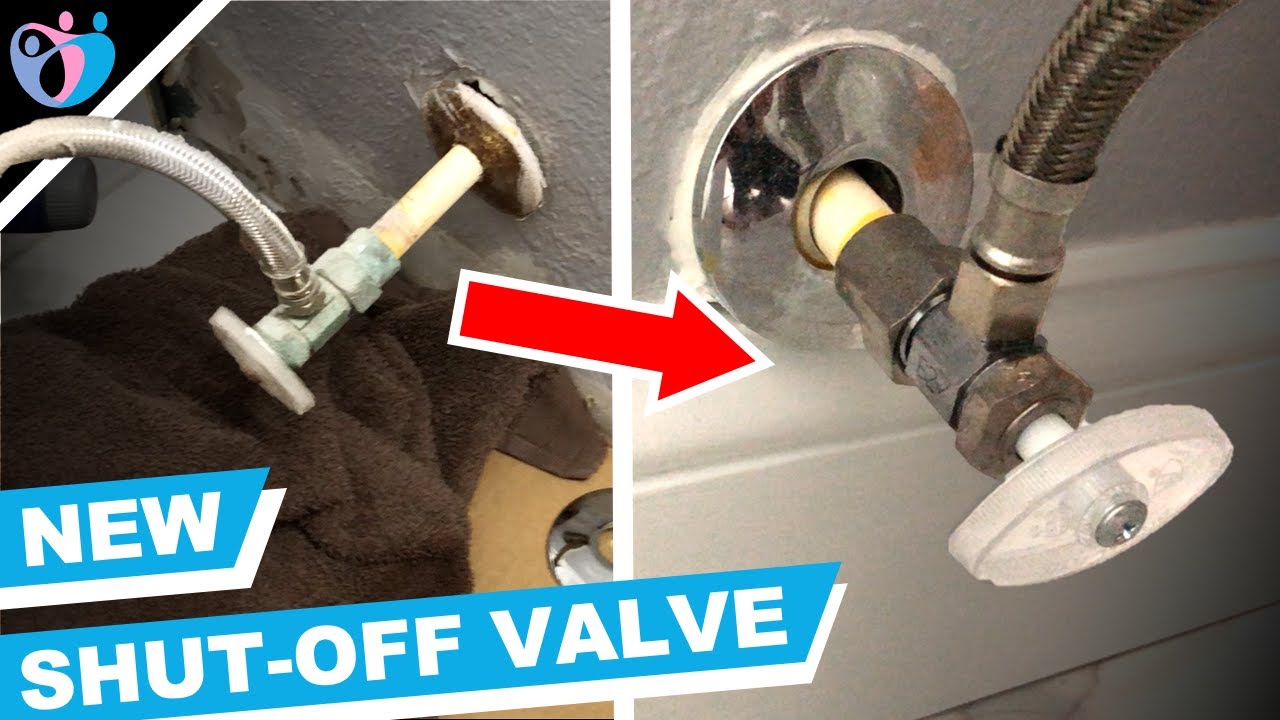
Installing a shut off valve for a bathroom sink is an essential step in any plumbing project. This valve allows you to turn off the water supply to your sink, making repairs and installations much easier. Without a shut off valve, you would have to turn off the water supply to your entire house, which can be inconvenient and time-consuming. If you're a DIY enthusiast and want to install a shut off valve for your bathroom sink on your own, this guide is for you. We have compiled a step-by-step tutorial to help you through the process, along with some expert tips and common mistakes to avoid. So let's get started!How to Install a Shut Off Valve for a Bathroom Sink


How to Install a Shut Off Valve for a Bathroom Sink


Before you begin the installation process, make sure you have all the necessary tools and materials. You will need a shut off valve, a pipe cutter, a wrench, Teflon tape, and plumber's putty. Once you have everything ready, follow these simple steps: Step 1: Start by turning off the main water supply to your sink. This can usually be found under the sink, behind the cabinet. If you can't find it, turn off the water supply to your entire house. Step 2: Once the water supply is turned off, drain the remaining water from the pipes by turning on the faucets. Step 3: Use a pipe cutter to cut the hot and cold water supply pipes below the sink. Make sure the cuts are clean and straight. Step 4: Next, attach the shut off valve to the water supply pipes. Apply plumber's putty around the threads of the valve to ensure a tight seal. Step 5: Use a wrench to tighten the nut on the shut off valve. Make sure it is secure but not over-tightened. Step 6: Wrap Teflon tape around the threads of the shut off valve's outlet. This will help create a watertight seal. Step 7: Connect the shut off valve to the faucet's water supply lines. Again, use a wrench to tighten the nuts, but be careful not to over-tighten. Step 8: Turn the main water supply back on and check for any leaks. If you notice any leaks, tighten the connections with a wrench. Step 9: Once everything is secure and there are no leaks, test the shut off valve by turning it on and off a few times. Step 10: Congratulations, you have successfully installed a shut off valve for your bathroom sink!Installing a Shut Off Valve for a Bathroom Sink: Step-by-Step Guide

Installing a Shut Off Valve for a Bathroom Sink: Step-by-Step Guide


Installing a shut off valve for a bathroom sink is a relatively simple DIY project, but it is essential to follow the correct steps to ensure it is installed correctly. Here are a few tips to keep in mind: Use a pipe cutter to make clean, straight cuts on the water supply pipes. This will help create a secure connection with the shut off valve. Apply plumber's putty to the threads of the shut off valve before attaching it to the water supply pipes. This will help create a watertight seal and prevent leaks. When connecting the shut off valve to the faucet's water supply lines, make sure to use Teflon tape to create a tight seal. This will also prevent leaks. Always test the shut off valve before finishing the installation process. This will ensure that it is working correctly and there are no leaks.DIY: Installing a Shut Off Valve for a Bathroom Sink


DIY: Installing a Shut Off Valve for a Bathroom Sink


If you're short on time and need a quick and easy guide to installing a shut off valve for your bathroom sink, we have you covered: Step 1: Turn off the main water supply to your sink. Step 2: Drain the remaining water from the pipes. Step 3: Cut the water supply pipes below the sink. Step 4: Attach the shut off valve to the pipes and secure it with a wrench. Step 5: Wrap Teflon tape around the valve's outlet and connect it to the faucet's water supply lines. Step 6: Turn the main water supply back on and check for leaks. Step 7: Test the shut off valve by turning it on and off a few times.Quick and Easy Guide to Installing a Shut Off Valve for a Bathroom Sink


Quick and Easy Guide to Installing a Shut Off Valve for a Bathroom Sink

:max_bytes(150000):strip_icc()/GettyImages-1057621140-78ab2e946841421d9a7efeebe02935d2.jpg)
Here are a few additional tips and tricks to keep in mind when installing a shut off valve for your bathroom sink: Make sure to turn off the main water supply before beginning the installation process. Use a pipe cutter instead of a hacksaw to make clean, precise cuts on the water supply pipes. Apply Teflon tape to all threaded connections to create a watertight seal. If you encounter any difficulties during the installation process, consult a professional plumber.Installing a Shut Off Valve for a Bathroom Sink: Tips and Tricks

Installing a Shut Off Valve for a Bathroom Sink: Tips and Tricks
If you're a visual learner, you may find it helpful to follow a step-by-step tutorial when installing a shut off valve for your bathroom sink. Here is one you can refer to: Step 1: Turn off the main water supply to your sink. Step 2: Drain the remaining water from the pipes. Step 3: Cut the water supply pipes below the sink. Step 4: Attach the shut off valve to the pipes and secure it with a wrench. Step 5: Wrap Teflon tape around the valve's outlet and connect it to the faucet's water supply lines. Step 6: Turn the main water supply back on and check for leaks. Step 7: Test the shut off valve by turning it on and off a few times.Step-by-Step Tutorial for Installing a Shut Off Valve for a Bathroom Sink


Step-by-Step Tutorial for Installing a Shut Off Valve for a Bathroom Sink

Here is a quick and easy guide to installing a shut off valve for your bathroom sink in just five simple steps: Step 1: Turn off the main water supply to your sink. Step 2: Drain the remaining water from the pipes. Step 3: Cut the water supply pipes below the sink. Step 4: Attach the shut off valve to the pipes and secure it with a wrench. Step 5: Turn the main water supply back on and check for leaks.How to Install a Shut Off Valve for a Bathroom Sink in 5 Simple Steps
How to Install a Shut Off Valve for a Bathroom Sink in 5 Simple Steps
Installing a shut off valve for your bathroom sink is an essential step in any plumbing project. Not only does it make repairs and installations easier, but it also helps prevent water damage in case of an emergency. Having a shut off valve for each fixture in your house can save you time and money in the long run.The Importance of Installing a Shut Off Valve for a Bathroom Sink
The Importance of Installing a Shut Off Valve for a Bathroom Sink


Here are a few tips from plumbing experts to keep in mind when installing a shut off valve for your bathroom sink: Make sure to use the correct tools and materials for the job. Always test the shut off valve before finishing the installation process. If you're unsure about any step, consult a professional plumber.Expert Tips for Installing a Shut Off Valve for a Bathroom Sink


Expert Tips for Installing a Shut Off Valve for a Bathroom Sink
Here are some common mistakes you should avoid when installing a shut off valve for your bathroom sink: Not turning off the main water supply before beginning the installation process. Using a hacksaw instead of a pipe cutter, resulting in uneven cuts. Not using Teflon tape on threaded connections, leading to leaks. In conclusion, installing a shut off valve for your bathroom sink is a relatively simple DIY project that can save you time and money in the long run. Just remember to follow the correct steps and consult a professional if you encounter any difficulties. Happy plumbing!Common Mistakes to Avoid When Installing a Shut Off Valve for a Bathroom Sink


Common Mistakes to Avoid When Installing a Shut Off Valve for a Bathroom Sink


Why Installing a Shut Off Valve for Your Bathroom Sink is Essential for Your House Design

Ensures Easy Maintenance and Repair
 When it comes to house design and maintenance, every detail counts. One essential aspect that homeowners often overlook is the importance of having a shut off valve for the bathroom sink. This small but mighty device can make a significant difference in the ease of maintenance and repair for your bathroom sink.
Having a shut off valve for your bathroom sink allows you to turn off the water supply to your sink without having to shut off the water supply to your entire house. This means that if you ever need to replace or repair your sink, you can do so without disrupting the water supply to the rest of your house. This not only saves you time and hassle but also prevents potential water damage to your home.
Shut off valve
also makes it easier to spot and address any leaks or issues with your bathroom sink. Instead of having to turn off the main water supply and then turn it back on to check for leaks, you can simply turn off the shut off valve and turn it back on when you're done. This makes it a more efficient and cost-effective solution for maintaining your bathroom sink.
When it comes to house design and maintenance, every detail counts. One essential aspect that homeowners often overlook is the importance of having a shut off valve for the bathroom sink. This small but mighty device can make a significant difference in the ease of maintenance and repair for your bathroom sink.
Having a shut off valve for your bathroom sink allows you to turn off the water supply to your sink without having to shut off the water supply to your entire house. This means that if you ever need to replace or repair your sink, you can do so without disrupting the water supply to the rest of your house. This not only saves you time and hassle but also prevents potential water damage to your home.
Shut off valve
also makes it easier to spot and address any leaks or issues with your bathroom sink. Instead of having to turn off the main water supply and then turn it back on to check for leaks, you can simply turn off the shut off valve and turn it back on when you're done. This makes it a more efficient and cost-effective solution for maintaining your bathroom sink.
Increases Water Efficiency and Saves Money
 Another benefit of installing a shut off valve for your bathroom sink is the potential for water conservation and cost savings. With a shut off valve, you can control the water flow to your sink, reducing the amount of water wasted while brushing your teeth or washing your hands.
Additionally, if you have a
leaky faucet
, a shut off valve can help prevent water from continuously running and wasting water and money. By shutting off the valve, you can temporarily stop the water flow until you can get the faucet repaired.
Another benefit of installing a shut off valve for your bathroom sink is the potential for water conservation and cost savings. With a shut off valve, you can control the water flow to your sink, reducing the amount of water wasted while brushing your teeth or washing your hands.
Additionally, if you have a
leaky faucet
, a shut off valve can help prevent water from continuously running and wasting water and money. By shutting off the valve, you can temporarily stop the water flow until you can get the faucet repaired.
Enhances the Aesthetics of Your Bathroom
 Installing a shut off valve for your bathroom sink can also add to the overall aesthetics of your bathroom design. With a variety of styles and finishes available, you can choose a shut off valve that complements your bathroom's design and adds a touch of elegance and sophistication to the space.
Not only does it enhance the look of your bathroom, but a shut off valve also eliminates the need for unsightly exposed pipes. This can give your bathroom a cleaner and more polished appearance.
In conclusion, installing a shut off valve for your bathroom sink is an essential aspect of house design that should not be overlooked. It provides convenience, efficiency, and cost savings while also adding to the overall aesthetics of your bathroom. So, if you haven't already, consider adding a shut off valve to your bathroom sink for a more functional and stylish space.
Installing a shut off valve for your bathroom sink can also add to the overall aesthetics of your bathroom design. With a variety of styles and finishes available, you can choose a shut off valve that complements your bathroom's design and adds a touch of elegance and sophistication to the space.
Not only does it enhance the look of your bathroom, but a shut off valve also eliminates the need for unsightly exposed pipes. This can give your bathroom a cleaner and more polished appearance.
In conclusion, installing a shut off valve for your bathroom sink is an essential aspect of house design that should not be overlooked. It provides convenience, efficiency, and cost savings while also adding to the overall aesthetics of your bathroom. So, if you haven't already, consider adding a shut off valve to your bathroom sink for a more functional and stylish space.