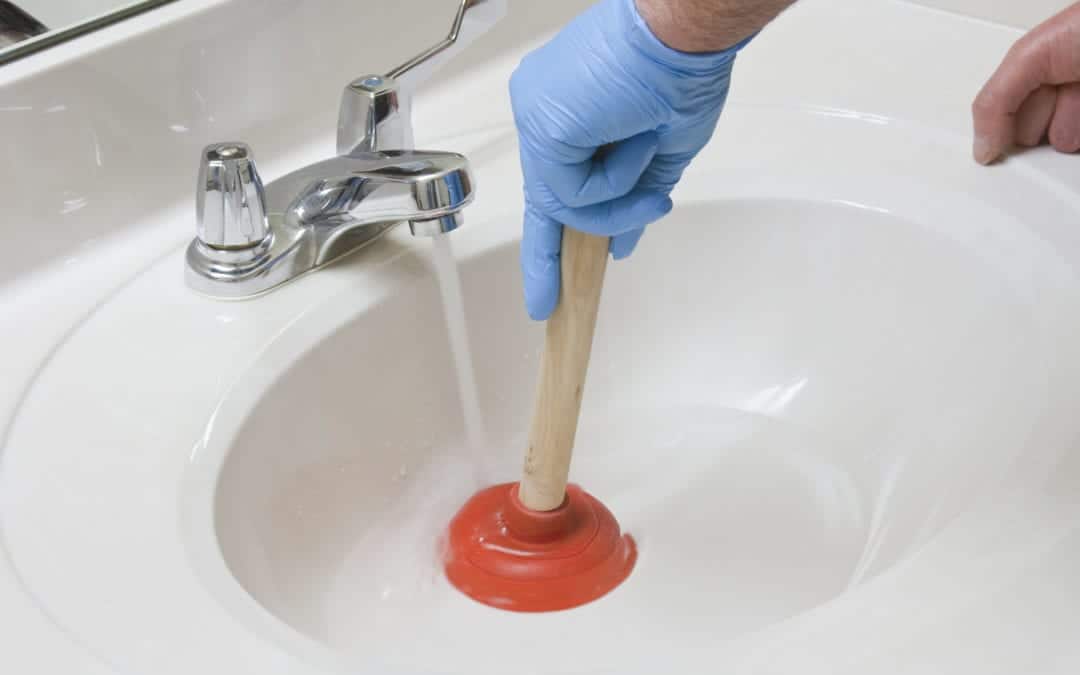
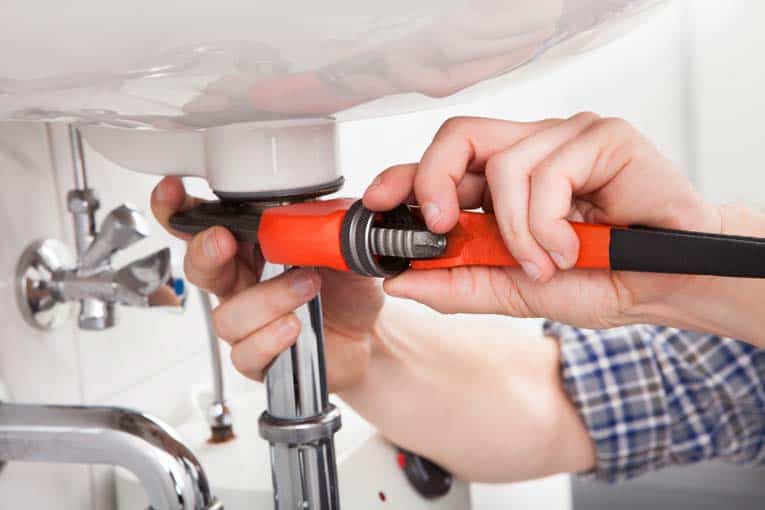
Installing a drain in a bathroom sink may seem like a daunting task, but with the right tools and knowledge, it can be a relatively easy DIY project. A properly installed drain will ensure efficient water drainage and prevent any potential clogs or leaks. In this guide, we will go through the step-by-step process of installing a drain in a bathroom sink to help you successfully complete this project.Drain Installation in Bathroom Sink
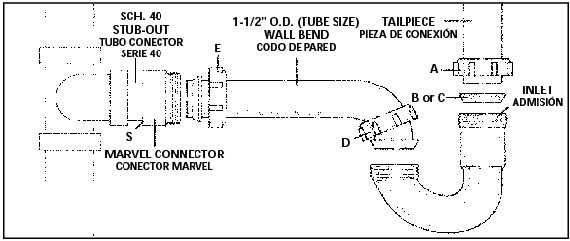
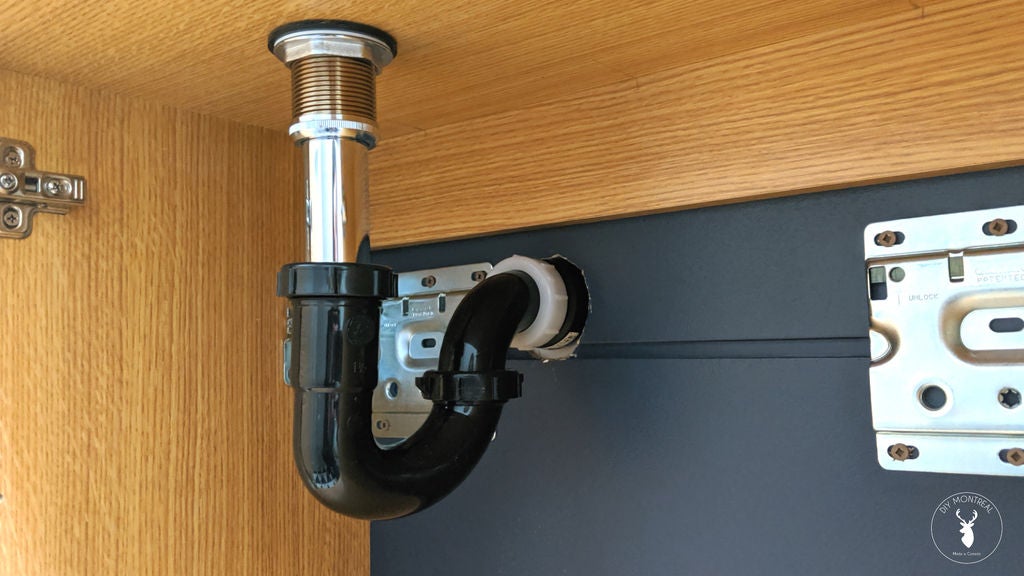
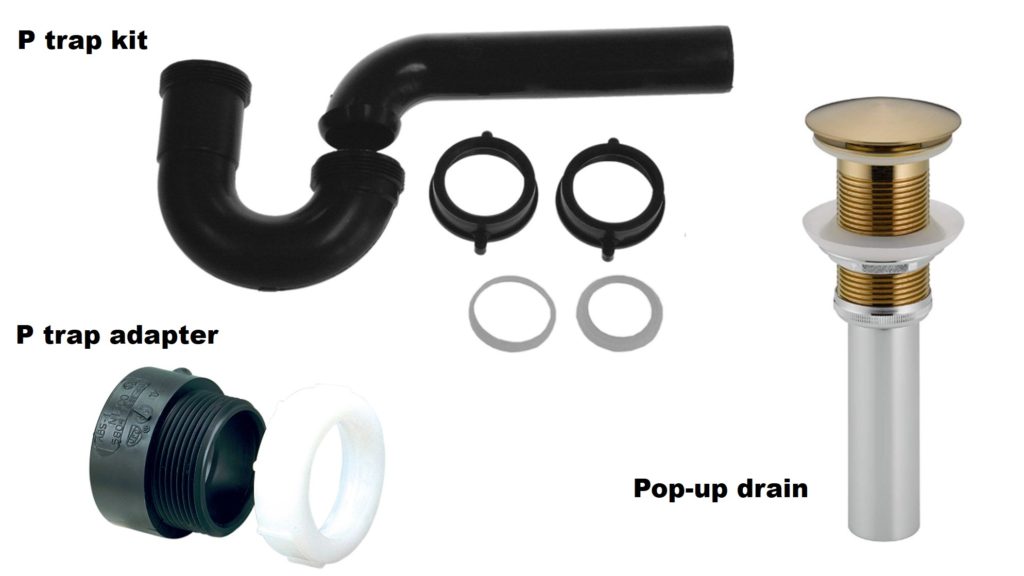
The first step in installing a drain in a bathroom sink is to gather all the necessary tools and materials. You will need a drain assembly kit, plumber's putty, a wrench, and a pair of pliers. Make sure to also have a bucket or towel on hand to catch any water that may spill during the installation process. Next, remove the old drain assembly if you are replacing an existing one. Use a wrench to loosen and remove the nut holding the drain assembly in place. Once the nut is removed, you should be able to pull out the old drain assembly. Now, apply plumber's putty to the underside of the flange of the new drain assembly. This putty will help create a watertight seal between the sink and the drain. Place the flange through the drain hole in the sink and press down firmly to secure it in place. Once the flange is in place, insert the rubber gasket and then the cardboard washer onto the threaded portion of the drain assembly. Then, insert the drain body into the drain hole from under the sink and secure it with the mounting nut. Using pliers, tighten the mounting nut until it is snug. Be careful not to over-tighten as this can cause damage to the sink or the drain assembly. Next, attach the tailpiece to the drain body and secure it with a slip nut. Make sure to align the tailpiece with the drain pipe coming from the wall. Finally, connect the P-trap to the tailpiece and the drain pipe coming from the wall. Use pliers to tighten the slip nuts and ensure a secure connection.How to Install a Drain in a Bathroom Sink
The key to a successful bathroom sink drain installation is proper preparation and following the correct steps. Here is a summarized guide for installing a drain in a bathroom sink: Step 1: Gather all necessary tools and materials. Step 2: Remove old drain assembly (if applicable). Step 3: Apply plumber's putty to the flange of the new drain assembly and insert it into the drain hole in the sink. Step 4: Install the rubber gasket and cardboard washer onto the drain body. Step 5: Insert the drain body into the drain hole and secure it with the mounting nut. Step 6: Attach the tailpiece and P-trap to the drain body and the drain pipe coming from the wall. Step 7: Tighten all slip nuts with pliers. Step 8: Turn on the water and check for any leaks. Adjust as needed.Bathroom Sink Drain Installation Guide
Now, let's dive deeper into each step of the installation process. Step 1: Gather all Necessary Tools and Materials As mentioned before, you will need a drain assembly kit, plumber's putty, a wrench, and a pair of pliers. Additionally, make sure to have a bucket or towel on hand to catch any water that may spill during the installation. Step 2: Remove Old Drain Assembly (if applicable) If you are replacing an old drain assembly, use a wrench to loosen and remove the nut holding it in place. Once the nut is removed, you should be able to pull out the old drain assembly. Step 3: Apply Plumber's Putty to the Flange of the New Drain Assembly Take a small amount of plumber's putty and roll it into a long snake-like shape. Place it on the underside of the flange of the new drain assembly. This putty will help create a watertight seal between the sink and the drain. Step 4: Insert Flange into the Drain Hole Place the flange through the drain hole in the sink and press down firmly to secure it in place. Make sure the putty is evenly distributed and there are no gaps between the flange and the sink. Step 5: Install Rubber Gasket and Cardboard Washer Slide the rubber gasket and cardboard washer onto the threaded portion of the drain assembly. Step 6: Insert Drain Body Insert the drain body into the drain hole from under the sink. Make sure the flange, rubber gasket, and cardboard washer are all aligned properly. Step 7: Secure with Mounting Nut Secure the drain body in place by tightening the mounting nut. Use pliers to ensure a snug fit, but be careful not to over-tighten as this can cause damage. Step 8: Attach Tailpiece and P-trap The tailpiece is the pipe that connects the drain to the P-trap, which then connects to the drain pipe coming from the wall. Attach the tailpiece to the drain body and the P-trap to the tailpiece. Step 9: Tighten Slip Nuts Using pliers, tighten all slip nuts to ensure a secure connection between all the pipes. Step 10: Turn on Water and Check for Leaks Once everything is in place, turn on the water and check for any leaks. If there are any, adjust the connections as needed.Step-by-Step Guide for Installing a Drain in a Bathroom Sink
Installing a drain in a bathroom sink is a relatively simple DIY project that can save you time and money. By following the steps outlined above and using the right tools and materials, you can successfully install a drain in your bathroom sink on your own.DIY Bathroom Sink Drain Installation
Here is a list of the tools and materials you will need for a DIY bathroom sink drain installation: Drain assembly kit, plumber's putty, wrench, pliers, bucket or towelTools Needed for Installing a Drain in a Bathroom Sink
While installing a drain in a bathroom sink may seem like a simple task, there are some common mistakes that can lead to issues down the line. Here are a few to avoid: - Not using enough plumber's putty - Over-tightening the mounting nut - Not properly aligning the pipes - Not checking for leaks after installationCommon Mistakes to Avoid When Installing a Drain in a Bathroom Sink
To ensure a successful bathroom sink drain installation, here are a few tips to keep in mind: - Read the instructions carefully before starting - Use the right tools and materials - Take your time and double-check each step - Ask for help if neededTips for a Successful Bathroom Sink Drain Installation
The cost of installing a drain in a bathroom sink can vary depending on the type of drain assembly kit you purchase and whether you choose to hire a professional or do it yourself. On average, the cost can range from $50 to $150.Cost of Installing a Drain in a Bathroom Sink
Hiring a professional to install a drain in your bathroom sink can cost significantly more than doing it yourself. However, if you are not comfortable with plumbing or do not have the necessary tools, it may be worth the investment to ensure a proper and efficient installation.Professional vs. DIY Bathroom Sink Drain Installation
Why Installing a Drain in a Bathroom Sink is Crucial for Your House Design

Ensuring Proper Functionality and Aesthetics
 When it comes to designing your dream bathroom, every detail matters. From the tiles to the fixtures, each element plays a vital role in creating a cohesive and functional space. One crucial component that often gets overlooked is the
drain
in your
bathroom sink
. However, this small feature is essential for both
functionality
and
aesthetics
in your bathroom design.
Preventing Water Damage
 A
properly installed drain
is crucial for preventing water damage in your bathroom. Without a drain, water from your sink will pool and eventually seep into your floors and walls, causing mold and mildew growth. This can lead to costly repairs and even pose health hazards for you and your family. By installing a drain, you can avoid potential water damage and keep your bathroom safe and dry.
Efficient Water Drainage
 Not only does a drain prevent water damage, but it also ensures efficient water drainage.
Drains
are designed to quickly and effectively remove water from your sink, preventing any potential clogs or backups. This is especially important in a
bathroom sink
where you may be washing your face, brushing your teeth, or even shaving, all of which require access to a functioning sink.
Enhancing the Look of Your Bathroom
 While functionality is crucial, the
aesthetics
of your bathroom should not be ignored. A
well-designed drain
can add a touch of elegance and sophistication to your bathroom. With various styles and finishes available, you can choose a drain that complements the overall design of your bathroom, adding a stylish touch to your sink area.
The Importance of Professional Installation
 While it may seem like a simple task, installing a drain in a bathroom sink requires
professional expertise
. A licensed plumber has the necessary skills and tools to ensure that the drain is installed correctly, preventing any potential leaks or other issues. They can also provide guidance on the best type of drain for your sink and help you choose the right size and style for your bathroom design.
Conclusion
 In conclusion, installing a drain in your bathroom sink is a crucial aspect of your house design. It not only ensures proper functionality and efficient water drainage but also adds to the overall aesthetics of your bathroom. Make sure to hire a professional for the installation to avoid any potential issues and to achieve the best possible results for your dream bathroom.


/bathroom-sink-drain-installation-2718843-03-6fee5b9d9f7d475abfe06a95ddb1f695.jpg)




/bathroom-sink-drain-installation-2718843-01-4955fe1f576b447a91abe51c126d220b.jpg)

