How to Install a Bathroom Sink Drain Stopper
Installing a bathroom sink drain stopper is a relatively simple task that can be done without the help of a professional plumber. Not only does it save you money, but it also allows you to have more control over the process and ensure that the job is done correctly. Whether you are looking to replace an old stopper or install a new one, here is a step-by-step guide on how to install a bathroom sink drain stopper.


How to Install a Bathroom Sink Drain Stopper
:max_bytes(150000):strip_icc()/bathroom-sink-drain-installation-2718843-07-2b728cbd5c994dc39179346f51bb6421.jpg)


/bathroom-sink-drain-installation-2718843-03-6fee5b9d9f7d475abfe06a95ddb1f695.jpg)


Installing a Bathroom Sink Drain Stopper: A Step-by-Step Guide
Before you begin, make sure you have all the necessary tools and materials. You will need a wrench, pliers, a screwdriver, plumber's putty, and the new drain stopper. Once you have everything ready, follow these steps:
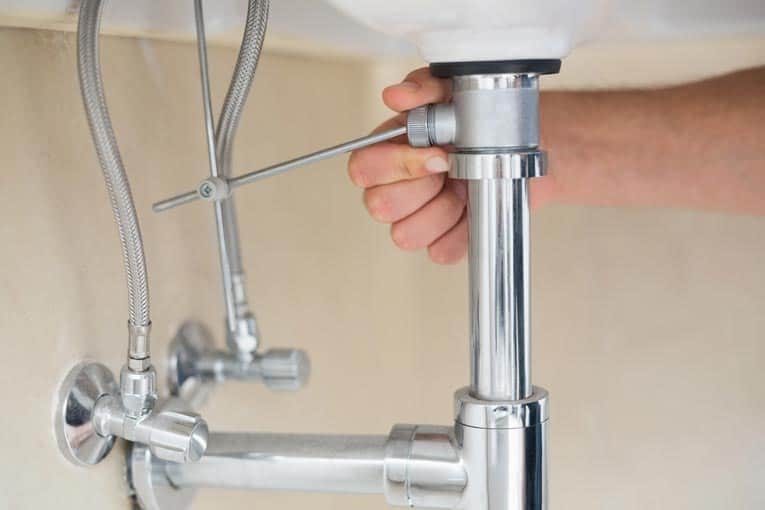
Step 1: Start by removing the old drain stopper. Use a wrench to loosen the nut that connects the stopper to the drain. Once the nut is loose, pull the stopper out of the drain.
Step 2: Clean the area around the drain and remove any old plumber's putty that may be stuck to the sink.
Step 3: Roll a small amount of plumber's putty into a rope-like shape and wrap it around the bottom of the new drain stopper.
Step 4: Insert the new stopper into the drain and push it down firmly. Make sure it is centered and level.
Step 5: Under the sink, attach the nut to the bottom of the drain and tighten it with pliers. This will secure the stopper in place.
Step 6: Test the stopper by pulling up and pushing down on the knob. It should move freely and create a tight seal when closed.


Installing a Bathroom Sink Drain Stopper: A Step-by-Step Guide


DIY Bathroom Sink Drain Stopper Installation
Installing a bathroom sink drain stopper yourself is not only cost-effective but also gives you the satisfaction of completing a project on your own. With the right tools and materials, you can easily install a new stopper in your bathroom sink in just a few simple steps.


DIY Bathroom Sink Drain Stopper Installation


/bathroom-sink-drain-installation-2718843-01-4955fe1f576b447a91abe51c126d220b.jpg)


Quick and Easy Bathroom Sink Drain Stopper Installation
Installing a bathroom sink drain stopper doesn't have to be a time-consuming task. With the right approach, you can have a new stopper in place in no time. Follow these easy steps to quickly install a new stopper in your bathroom sink.


Quick and Easy Bathroom Sink Drain Stopper Installation


Installing a Pop-Up Drain Stopper in Your Bathroom Sink
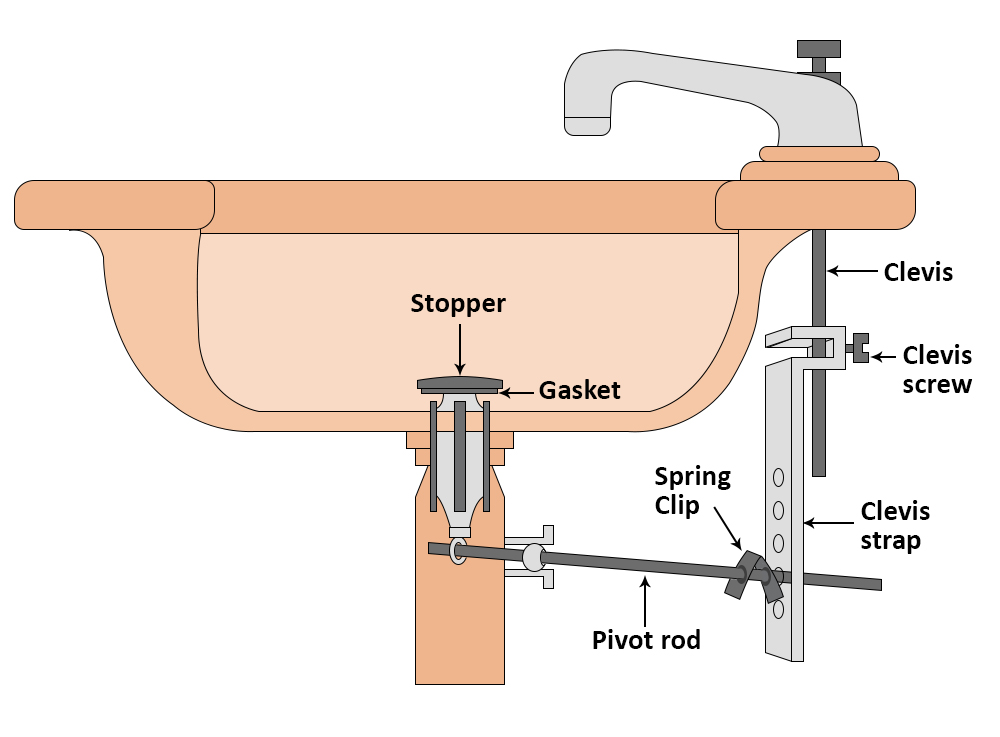
A pop-up drain stopper is a popular choice for many bathroom sinks as it allows for easy opening and closing of the drain. To install a pop-up drain stopper, follow the same steps as mentioned above. However, instead of attaching the nut to the bottom of the drain, you will need to attach the linkage rod to the stopper and the lift rod that operates the stopper.


Installing a Pop-Up Drain Stopper in Your Bathroom Sink


Replacing a Bathroom Sink Drain Stopper
If your old drain stopper is damaged or no longer functioning properly, it may be time to replace it with a new one. Replacing a bathroom sink drain stopper follows the same steps as installing a new one. Remember to clean the area around the drain and use plumber's putty to create a tight seal.


Replacing a Bathroom Sink Drain Stopper


Tools and Materials Needed for Installing a Bathroom Sink Drain Stopper
Having the right tools and materials is essential for a successful bathroom sink drain stopper installation. Make sure you have a wrench, pliers, a screwdriver, plumber's putty, and the new drain stopper before you begin the installation process.


Tools and Materials Needed for Installing a Bathroom Sink Drain Stopper


Common Mistakes to Avoid When Installing a Bathroom Sink Drain Stopper
While installing a bathroom sink drain stopper may seem like a simple task, there are a few common mistakes that people make. These mistakes can lead to a faulty installation and cause problems in the future. Avoid these mistakes to ensure a successful installation:


Common Mistakes to Avoid When Installing a Bathroom Sink Drain Stopper


Tips for a Successful Bathroom Sink Drain Stopper Installation
Here are a few tips to keep in mind for a smooth and successful bathroom sink drain stopper installation:


Tips for a Successful Bathroom Sink Drain Stopper Installation

Troubleshooting Common Issues with Bathroom Sink Drain Stoppers
If you encounter any issues with your bathroom sink drain stopper, here are a few troubleshooting tips:


Troubleshooting Common Issues with Bathroom Sink Drain Stoppers


How to Properly Install a Bathroom Sink Drain Stopper

Step 3: Assemble the Drain Stopper
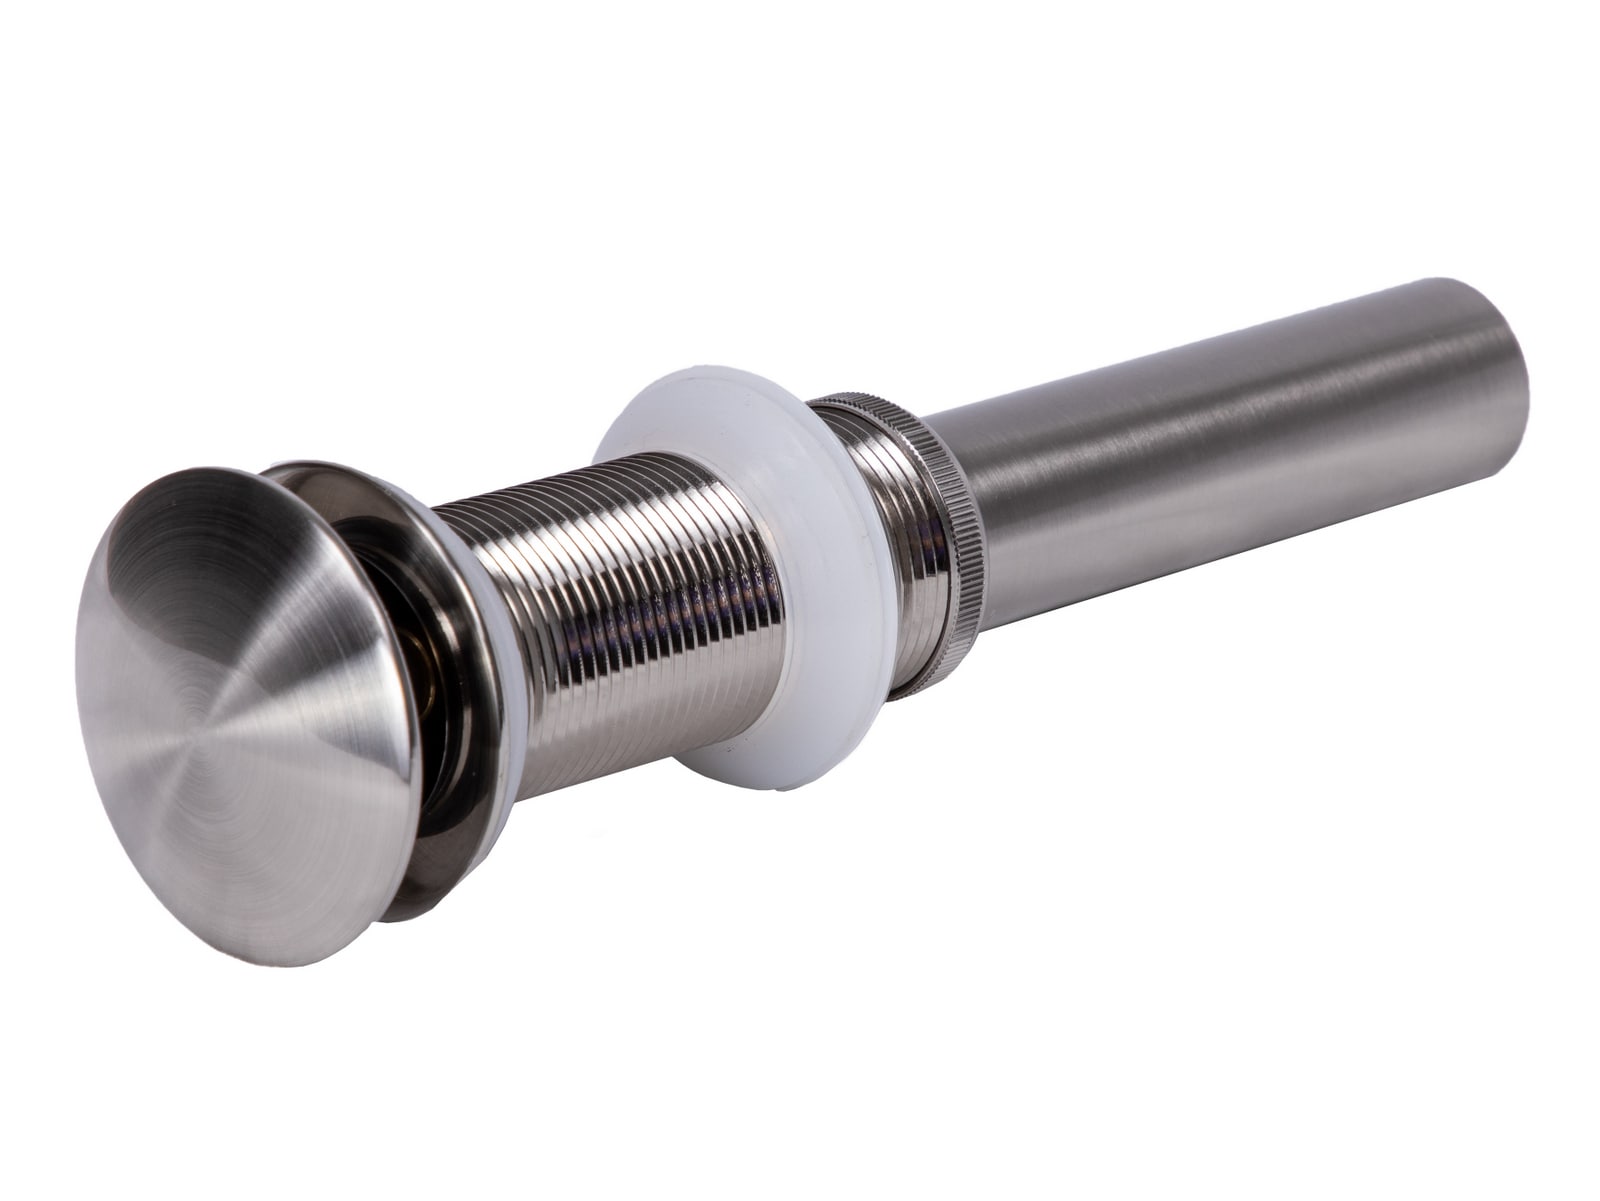
 Once you have removed the old drain stopper, it's time to assemble and install the new one. Start by placing the rubber gasket on the bottom of the drain body, followed by the metal washer and locknut. This will help create a tight seal and prevent any leaks.
Next, insert the drain stopper into the drain body. Make sure the stopper is in the closed position, with the flat side facing up. Then, take the horizontal rod and insert it into the hole at the back of the drain body. Secure it in place with the nut and washer provided.
Once you have removed the old drain stopper, it's time to assemble and install the new one. Start by placing the rubber gasket on the bottom of the drain body, followed by the metal washer and locknut. This will help create a tight seal and prevent any leaks.
Next, insert the drain stopper into the drain body. Make sure the stopper is in the closed position, with the flat side facing up. Then, take the horizontal rod and insert it into the hole at the back of the drain body. Secure it in place with the nut and washer provided.
Step 4: Test and Adjust
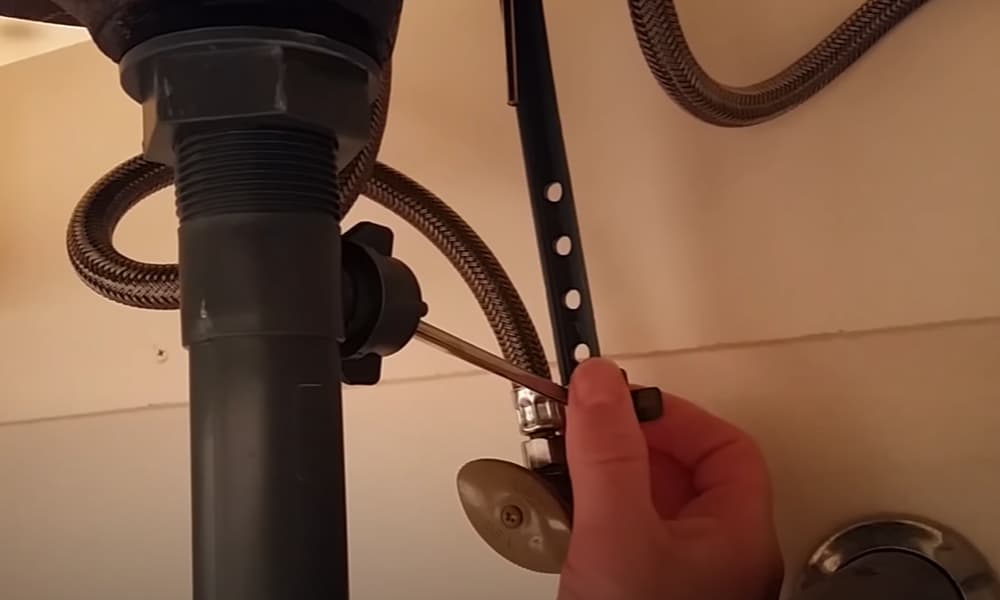
 Once the drain stopper is assembled, it's important to test it before fully securing it in place. Fill the sink with water and pull up on the drain stopper to close it. If the water drains properly, you can move on to the next step. If not, you may need to adjust the horizontal rod by loosening the nut and moving it up or down until the stopper functions properly.
Step 5: Secure the Drain Stopper
 Finally, once you are satisfied with the placement and functionality of the drain stopper, it's time to secure it in place. Tighten the locknut and washer on the bottom of the drain body to create a strong seal. Then, test the drain stopper again to ensure it is working properly.
By following these simple steps, you can easily install a bathroom sink drain stopper and improve the functionality of your sink. Remember to regularly clean and maintain your drain stopper to prevent any clogs and keep your sink running smoothly.
Finally, once you are satisfied with the placement and functionality of the drain stopper, it's time to secure it in place. Tighten the locknut and washer on the bottom of the drain body to create a strong seal. Then, test the drain stopper again to ensure it is working properly.
By following these simple steps, you can easily install a bathroom sink drain stopper and improve the functionality of your sink. Remember to regularly clean and maintain your drain stopper to prevent any clogs and keep your sink running smoothly.


/cdn.vox-cdn.com/uploads/chorus_image/image/49030277/republic.0.0.jpg)

