Are you looking to upgrade your kitchen with a sleek and modern undermount kitchen sink? Installing an undermount sink can be a bit daunting for some, but with the right tools and techniques, it can be a simple and straightforward process. In this article, we will provide you with a step-by-step guide on how to install an undermount kitchen sink, as well as some expert tips and common mistakes to avoid. Let's dive in!How to Install an Undermount Kitchen Sink


How to Install an Undermount Kitchen Sink


Before we get started, it's important to note that installing an undermount kitchen sink may require some plumbing and carpentry skills. If you're not confident in your abilities, it's always best to hire a professional to do the job. However, if you're up for the challenge, here's a detailed guide on how to install an undermount kitchen sink.Undermount Kitchen Sink Installation Guide


Undermount Kitchen Sink Installation Guide


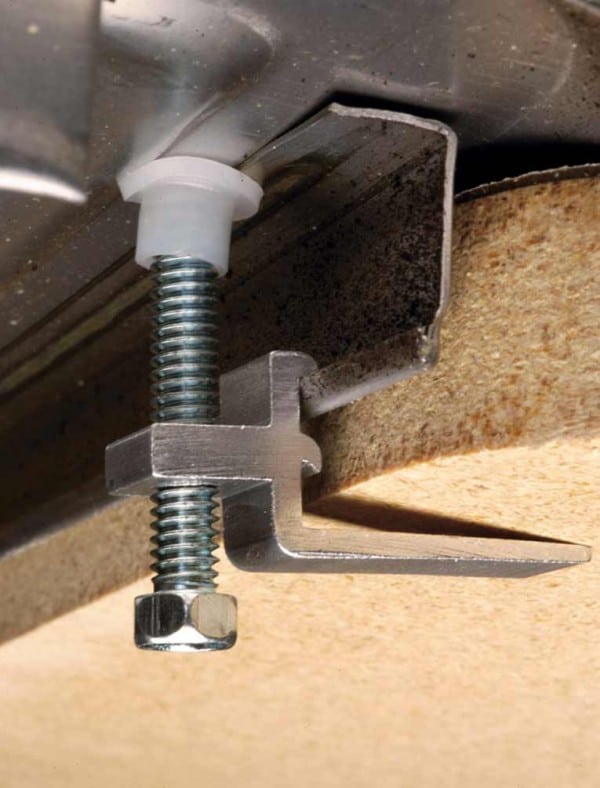
Step 1: Gather your tools and materials. You will need a drill, screwdriver, silicone adhesive, mounting brackets, a tape measure, a level, and a caulking gun. Step 2: Measure and mark the placement of your sink on the countertop. Make sure to leave enough space for the sink and faucet to fit comfortably. Step 3: Cut the hole for the sink using a jigsaw or router. Make sure to follow the manufacturer's instructions for the specific measurements. Step 4: Apply a thin layer of silicone adhesive around the edges of the sink cutout on the underside of the countertop. Step 5: Carefully lower the sink into place and make sure it is centered and level. Use mounting brackets to secure the sink to the countertop. Step 6: Apply a bead of silicone caulk around the edges of the sink to create a watertight seal between the sink and the countertop. Step 7: Install the faucet and drain according to the manufacturer's instructions. Step 8: Turn on the water supply and check for any leaks. Make any necessary adjustments. Step 9: Clean up any excess caulk or adhesive and enjoy your new undermount kitchen sink!Step-by-Step Guide for Installing an Undermount Kitchen Sink


Step-by-Step Guide for Installing an Undermount Kitchen Sink


:no_upscale()/cdn.vox-cdn.com/uploads/chorus_asset/file/19495086/drain_0.jpg)


If you're a DIY enthusiast, installing an undermount kitchen sink can be a fun and rewarding project. However, there are a few things to keep in mind when taking on this task. First, make sure you have all the necessary tools and materials. It's also important to carefully follow the manufacturer's instructions to ensure a proper installation. And if you run into any issues, don't hesitate to seek help from a professional.DIY Undermount Kitchen Sink Installation


DIY Undermount Kitchen Sink Installation


Here are some expert tips to help make your undermount kitchen sink installation go smoothly: - Always use silicone adhesive to secure the sink to the countertop. This will provide a stronger and more durable bond than caulk. - Before installing the sink, make sure to clean and dry the area thoroughly to ensure a strong bond between the sink and countertop. - Use a level to make sure your sink is evenly placed and avoid any potential water pooling. - Allow the silicone adhesive to dry completely before using the sink to avoid any shifting or movement.Installing an Undermount Kitchen Sink: Tips and Tricks


Installing an Undermount Kitchen Sink: Tips and Tricks


The best way to install an undermount kitchen sink is to carefully follow the manufacturer's instructions. Each sink may have specific measurements and requirements, so it's important to read the instructions thoroughly. Additionally, make sure to properly secure the sink to the countertop and use the appropriate adhesive for a long-lasting installation.The Best Way to Install an Undermount Kitchen Sink


The Best Way to Install an Undermount Kitchen Sink


When installing an undermount kitchen sink, it's important to consider the weight of the sink and the water that will be sitting in it. This is why it's crucial to properly secure the sink to the countertop using mounting brackets and silicone adhesive. Additionally, make sure to regularly clean and maintain your sink to prevent any potential issues.Undermount Kitchen Sink Installation: What You Need to Know


Undermount Kitchen Sink Installation: What You Need to Know
Here are some additional expert tips to keep in mind when installing an undermount kitchen sink: - Make sure to choose a high-quality sink that is made of durable materials. This will ensure a longer lifespan and reduce the risk of any potential issues. - Consider hiring a professional if you're not confident in your abilities or if you encounter any difficulties during the installation process. - Regularly check for any signs of leaks or damage and address them promptly to avoid any potential damage to your countertop or cabinets.Expert Tips for Installing an Undermount Kitchen Sink


Expert Tips for Installing an Undermount Kitchen Sink


Proper installation of an undermount kitchen sink is crucial for ensuring its longevity and functionality. To properly install an undermount sink, make sure to follow the correct measurements and use the appropriate tools and materials. It's also important to regularly clean and maintain the sink to prevent any potential issues.How to Properly Install an Undermount Kitchen Sink

How to Properly Install an Undermount Kitchen Sink


Here are some common mistakes to avoid when installing an undermount kitchen sink: - Using the wrong adhesive or not securing the sink properly can lead to shifting or movement, causing potential leaks or damage. - Not properly measuring the placement of the sink can lead to an uneven installation, resulting in water pooling or drainage issues. - Neglecting to regularly clean and maintain the sink can lead to buildup and potential damage to the sink and countertop. With these tips and a bit of patience, you can successfully install an undermount kitchen sink and elevate the look and functionality of your kitchen. And remember, if you encounter any difficulties or are unsure about any steps, seek help from a professional for a stress-free installation process. Good luck!Undermount Kitchen Sink Installation: Common Mistakes to Avoid

Undermount Kitchen Sink Installation: Common Mistakes to Avoid


Why Choose an Undermount Kitchen Sink for Your Home

The Benefits of an Undermount Kitchen Sink
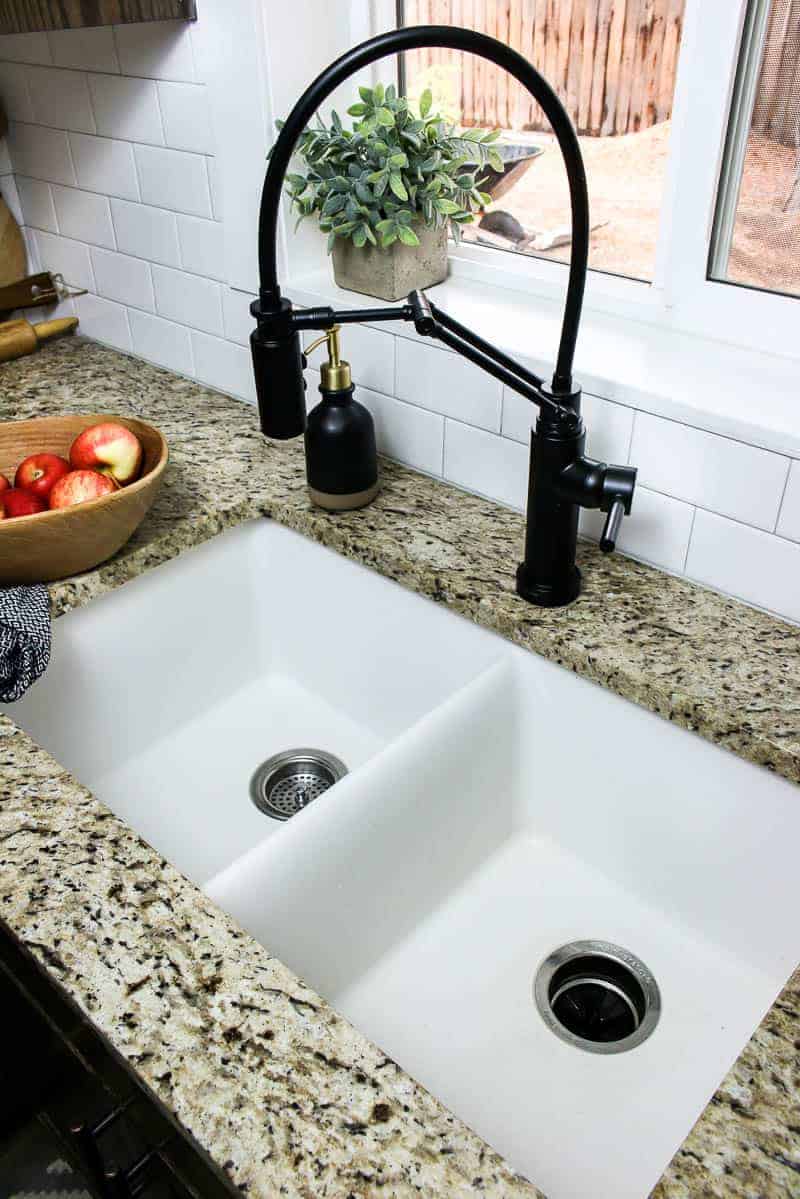
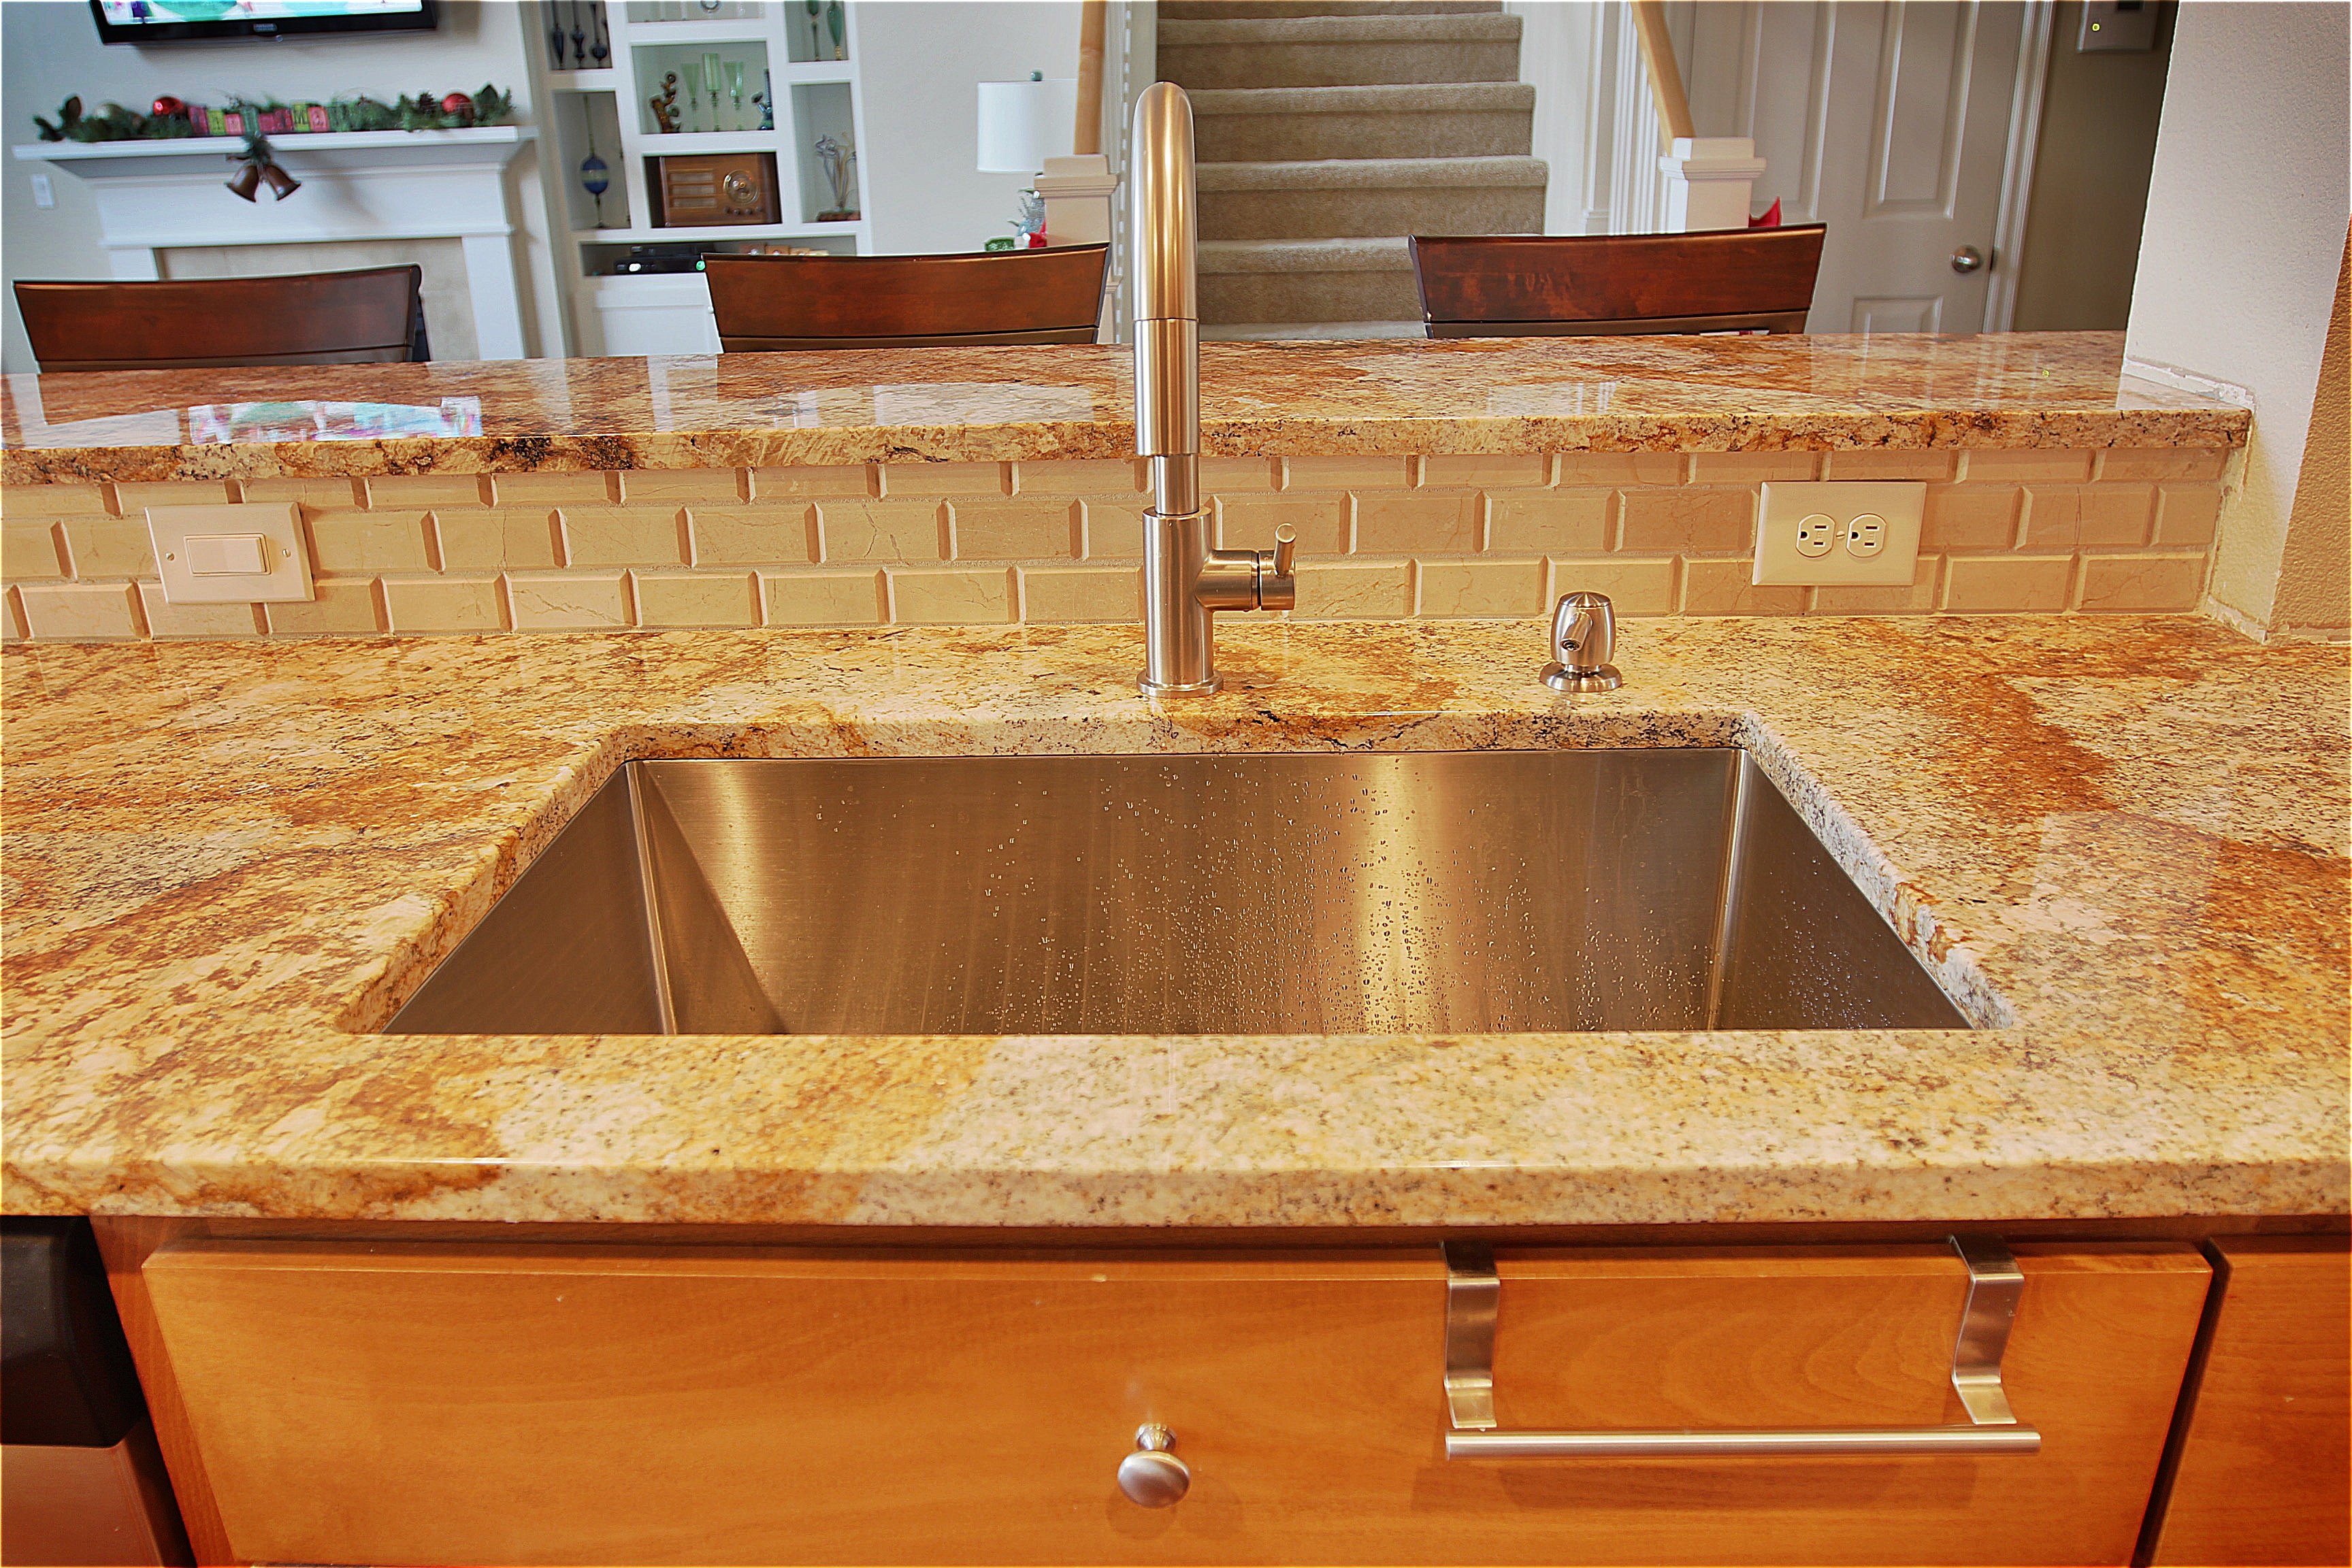
 When it comes to designing your dream kitchen, every detail matters. From the cabinets to the countertops, every element plays a crucial role in creating a functional and aesthetically pleasing space. One often overlooked but essential element is the kitchen sink. While there are many options available, one that stands out for its sleek and modern design is the undermount kitchen sink.
Undermount kitchen sinks
are installed underneath the countertop, creating a seamless and streamlined look. This type of sink is becoming increasingly popular among homeowners and interior designers for several reasons.
When it comes to designing your dream kitchen, every detail matters. From the cabinets to the countertops, every element plays a crucial role in creating a functional and aesthetically pleasing space. One often overlooked but essential element is the kitchen sink. While there are many options available, one that stands out for its sleek and modern design is the undermount kitchen sink.
Undermount kitchen sinks
are installed underneath the countertop, creating a seamless and streamlined look. This type of sink is becoming increasingly popular among homeowners and interior designers for several reasons.
Space-Saving Design
 One of the main advantages of an undermount kitchen sink is its space-saving design. As the sink is mounted underneath the countertop, it takes up less space on the surface, allowing for more usable counter space. This is especially beneficial for smaller kitchens, where every inch counts.
Easy to Clean and Maintain
 Another benefit of undermount kitchen sinks is their easy maintenance. With no rim or lip to catch debris, cleaning becomes a breeze. You can simply wipe any crumbs or spills directly into the sink without worrying about food getting stuck in the edges. This also makes it easier to keep your countertops clean and free of bacteria.
Modern and Versatile
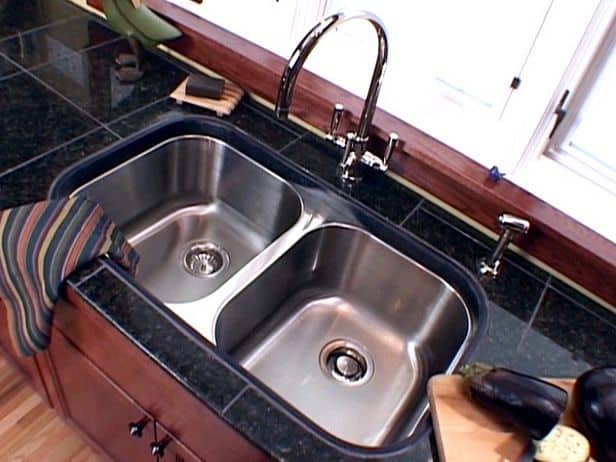
 Undermount kitchen sinks come in a variety of materials, such as stainless steel, porcelain, and granite, allowing you to choose one that best fits your kitchen's style. They also come in various shapes and sizes, making them a versatile choice for any kitchen design. Their sleek and modern appearance adds a touch of elegance to the space, making it a popular choice among homeowners and designers alike.
Installation Process
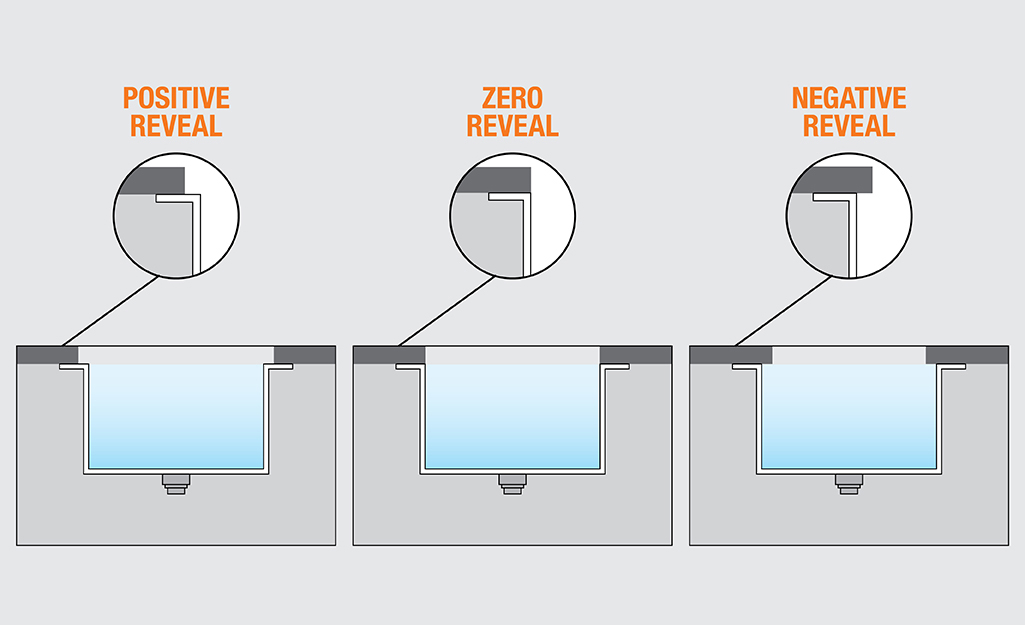
 Installing an undermount kitchen sink requires professional expertise, as it involves securing the sink underneath the countertop and creating a watertight seal. Therefore, it is essential to hire a professional plumber or contractor to ensure the sink is installed correctly.
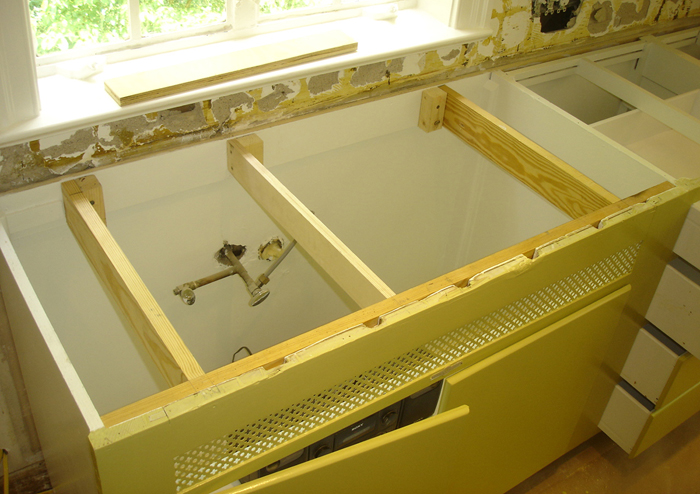
The process starts by measuring the dimensions of the sink and cutting a hole in the countertop to fit it. The sink is then placed in the hole and secured with clips and adhesive. Once the sink is securely in place, the plumber will connect the plumbing and make sure everything is functioning correctly.
In conclusion, an undermount kitchen sink is a practical and stylish addition to any kitchen. Its space-saving design, easy maintenance, and modern appearance make it a popular choice for homeowners looking to upgrade their kitchen. If you are considering installing an undermount kitchen sink in your home, make sure to consult with a professional to ensure a seamless and successful installation process.
Installing an undermount kitchen sink requires professional expertise, as it involves securing the sink underneath the countertop and creating a watertight seal. Therefore, it is essential to hire a professional plumber or contractor to ensure the sink is installed correctly.
The process starts by measuring the dimensions of the sink and cutting a hole in the countertop to fit it. The sink is then placed in the hole and secured with clips and adhesive. Once the sink is securely in place, the plumber will connect the plumbing and make sure everything is functioning correctly.
In conclusion, an undermount kitchen sink is a practical and stylish addition to any kitchen. Its space-saving design, easy maintenance, and modern appearance make it a popular choice for homeowners looking to upgrade their kitchen. If you are considering installing an undermount kitchen sink in your home, make sure to consult with a professional to ensure a seamless and successful installation process.