Installing a farmhouse sink is a great way to add a touch of rustic charm and functionality to your kitchen. These spacious and deep sinks have become increasingly popular in recent years, and for good reason. Not only do they provide more room for washing dishes and food prep, but they also make a unique statement in any kitchen.Farmhouse Sink Installation: Everything You Need to Know


Farmhouse Sink Installation: Everything You Need to Know


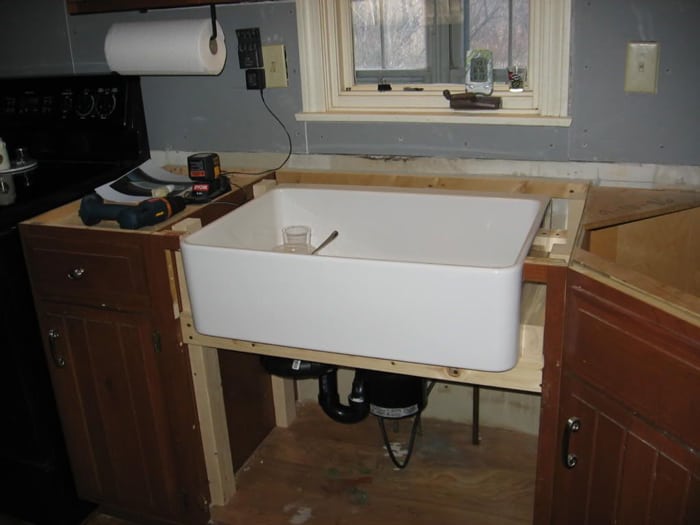


If you're considering installing a farmhouse sink in your kitchen, you may be wondering where to start. While it may seem like a daunting task, the good news is that with the right tools and a little know-how, anyone can install a farmhouse sink in just 7 easy steps. Step 1: Measure and Plan The first step in any successful farmhouse sink installation is to measure your sink and plan out the space. Farmhouse sinks typically come in standard sizes, but it's always a good idea to double-check the measurements before making any cuts to your cabinets or countertop. Step 2: Prep the Area Before you can begin the installation process, you'll need to clear out the space under your sink and remove any old plumbing fixtures. This will give you ample room to work and make the installation process smoother. Step 3: Cut the Countertop Depending on the design of your sink, you may need to cut the countertop to accommodate the sink. This step is crucial, so make sure to measure multiple times and use a saw or drill with a hole saw attachment for a clean cut. Step 4: Install the Support Frame Most farmhouse sinks require a support frame to hold them in place. This frame will need to be installed before the sink is set in place. Follow the manufacturer's instructions for the best results. Step 5: Install the Sink Now it's time to install the sink itself. Carefully place the sink into the hole in the countertop and make sure it is level. You may need to use shims to ensure a secure fit. Step 6: Connect the Plumbing Once the sink is in place, it's time to connect the plumbing. This can be a tricky step, so if you're not confident in your plumbing skills, it's always best to call a professional. Step 7: Seal the Sink The final step is to seal the edges of the sink with silicone caulk. This will prevent any water from leaking into the cabinet below and give your sink a clean, finished look.How to Install a Farmhouse Sink in 7 Steps


How to Install a Farmhouse Sink in 7 Steps


If you're a fan of DIY projects and want to save some money, you may be considering installing your farmhouse sink yourself. While this is certainly doable, it's important to have a good understanding of the installation process and the necessary tools and materials before you begin. Tools and Materials You'll Need: - Measuring tape - Saw or drill with hole saw attachment - Screwdriver - Silicone caulk - Shims - Support frame (if required) - Plumbing supplies (if connecting new plumbing) - Safety glasses and glovesDIY Farmhouse Sink Installation Guide


DIY Farmhouse Sink Installation Guide


Now that you know the basic steps for installing a farmhouse sink, here are a few tips and tricks to help you along the way: 1. Choose the Right Sink Before you begin the installation process, make sure you have chosen the right sink for your kitchen. Consider the size, material, and design that will best suit your needs and complement your kitchen's style. 2. Check for Levelness It's important to ensure that your sink is level before sealing it in place. Use a level to check both side-to-side and front-to-back and make any necessary adjustments with shims. 3. Use Support Brackets If your sink is particularly heavy or if you are installing it in an existing cabinet, it's a good idea to use support brackets for added stability. 4. Mind the Gap When cutting your countertop to fit your sink, make sure to leave a small gap between the edge of the sink and the countertop. This will allow for proper water drainage and prevent water from pooling on the countertop. 5. Don't Rush Installing a farmhouse sink takes time and patience, so don't rush through the process. Take your time to ensure everything is done correctly for a long-lasting and functional sink.Farmhouse Sink Installation: Tips and Tricks


Farmhouse Sink Installation: Tips and Tricks

If you're a visual learner, here's a quick step-by-step guide to installing a farmhouse sink: Step 1: Measure and plan the space Step 2: Prep the area under the sink Step 3: Cut the countertop Step 4: Install the support frame Step 5: Install the sink Step 6: Connect the plumbing Step 7: Seal the sinkStep-by-Step Guide to Installing a Farmhouse Sink


Step-by-Step Guide to Installing a Farmhouse Sink


While installing a farmhouse sink may seem like a straightforward task, there are a few common mistakes that can easily be avoided with proper preparation and attention to detail: - Not measuring correctly One of the most crucial steps in installing a farmhouse sink is measuring the space correctly. Take your time and double-check your measurements to avoid any costly mistakes. - Not providing enough support If your sink is not properly supported, it can lead to cracks, leaks, and even damage to your cabinets. Make sure to use support brackets or a support frame if required. - Rushing through the process As mentioned before, installing a farmhouse sink takes time and patience. Don't rush through the process and make sure to follow each step carefully for the best results.Farmhouse Sink Installation: Common Mistakes to Avoid


Farmhouse Sink Installation: Common Mistakes to Avoid

If you're new to home improvement projects, installing a farmhouse sink may seem intimidating. However, with the right tools and instructions, anyone can successfully install a farmhouse sink in their kitchen. Remember to measure and plan carefully, use the right tools, and take your time to ensure a smooth installation process. And if you're not confident in your skills, it's always best to call a professional for assistance.Installing a Farmhouse Sink: A Beginner's Guide


Installing a Farmhouse Sink: A Beginner's Guide


Before you dive into installing a farmhouse sink, it's important to consider both the pros and cons of this type of sink: Pros: - Adds a unique, rustic touch to your kitchen - Provides extra room for washing and food prep - Can increase the value of your home Cons: - Can be more expensive than traditional sinks - Requires cutting the countertop and plumbing adjustments - May not be suitable for smaller kitchensFarmhouse Sink Installation: Pros and Cons


Farmhouse Sink Installation: Tools and Materials You'll Need

:max_bytes(150000):strip_icc()/GettyImages-1129272101-5fb5d4164b074765834b4c7aa89c731f.jpg)

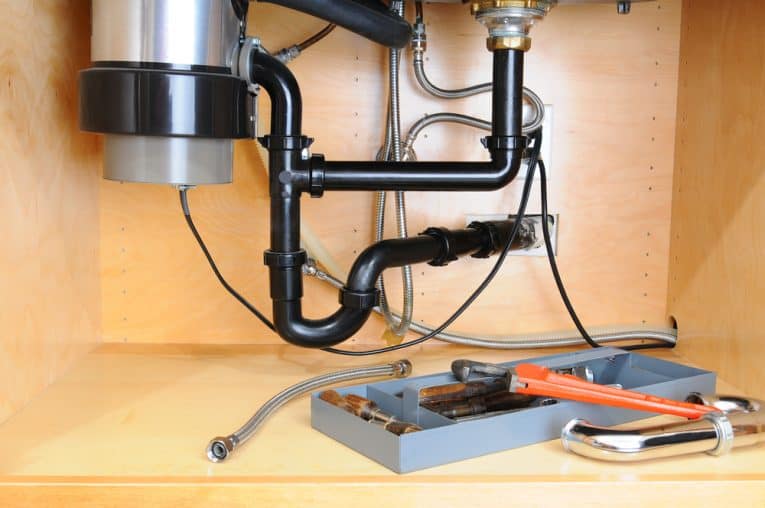
Before you begin your farmhouse sink installation, make sure you have all the necessary tools and materials on hand: - Measuring tape - Saw or drill with hole saw attachment - Screwdriver - Silicone caulk - Shims - Support frame (if required) - Plumbing supplies (if connecting new plumbing) - Safety glasses and gloves Installing a farmhouse sink may seem like a daunting task, but with the right tools and instructions, anyone can successfully complete this project. Remember to take your time, measure carefully, and seek professional help if needed. With a little effort, you'll soon have a beautiful and functional farmhouse sink in your kitchen.Farmhouse Sink Installation: Tools and Materials You'll Need


How to Install a Farmhouse Sink in an Existing Cabinet


The Benefits of Installing a Farm Kitchen Sink

Upgrade Your Kitchen with a Farm Kitchen Sink Installation
 Are you looking to add a touch of charm and functionality to your kitchen? Look no further than a farm kitchen sink installation. This classic and timeless sink style has been a staple in farmhouse kitchens for centuries, and for good reason. Not only does it add a rustic and inviting feel to your kitchen, but it also offers practical benefits that you won't find with traditional sinks. Let's explore the benefits of installing a farm kitchen sink in your home.
Ample Space and Versatility
 One of the main advantages of a farm kitchen sink is its size and depth. These sinks are typically larger and deeper than traditional sinks, providing ample space for all your kitchen needs. From washing large pots and pans to giving your furry friend a bath, a farm sink can handle it all. This makes it a versatile and practical addition to any kitchen.
Durability and Longevity
 Farm kitchen sinks are known for their durability and longevity. Made from materials like fireclay, cast iron, or stainless steel, these sinks are built to withstand heavy use and last for years. They can handle hot pots and pans, sharp knives, and heavy dishes without showing signs of wear and tear. This makes it a worthwhile investment for your home.
Easy Maintenance and Cleaning
 With its large and deep basin, a farm kitchen sink is easy to clean and maintain. Unlike traditional sinks with multiple compartments, a farm sink has a single large basin, making it easier to wipe down and keep clean. It also doesn't have any hard-to-reach corners or edges, reducing the chances of dirt and grime buildup. This makes it a practical choice for busy households.
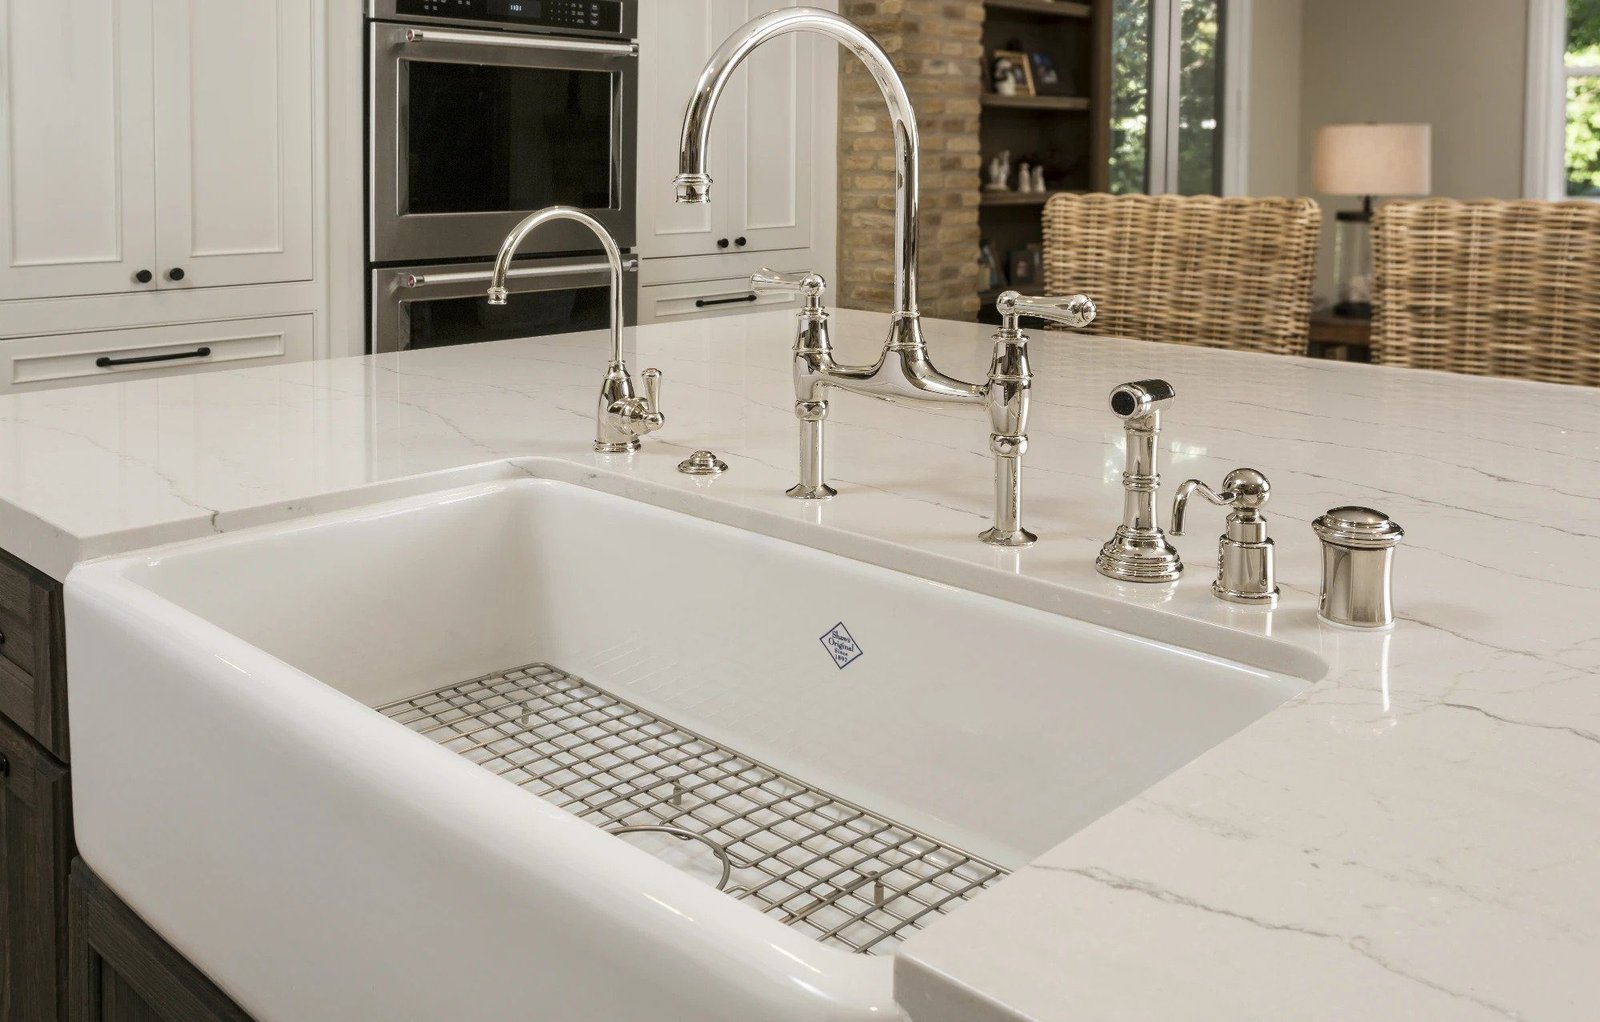
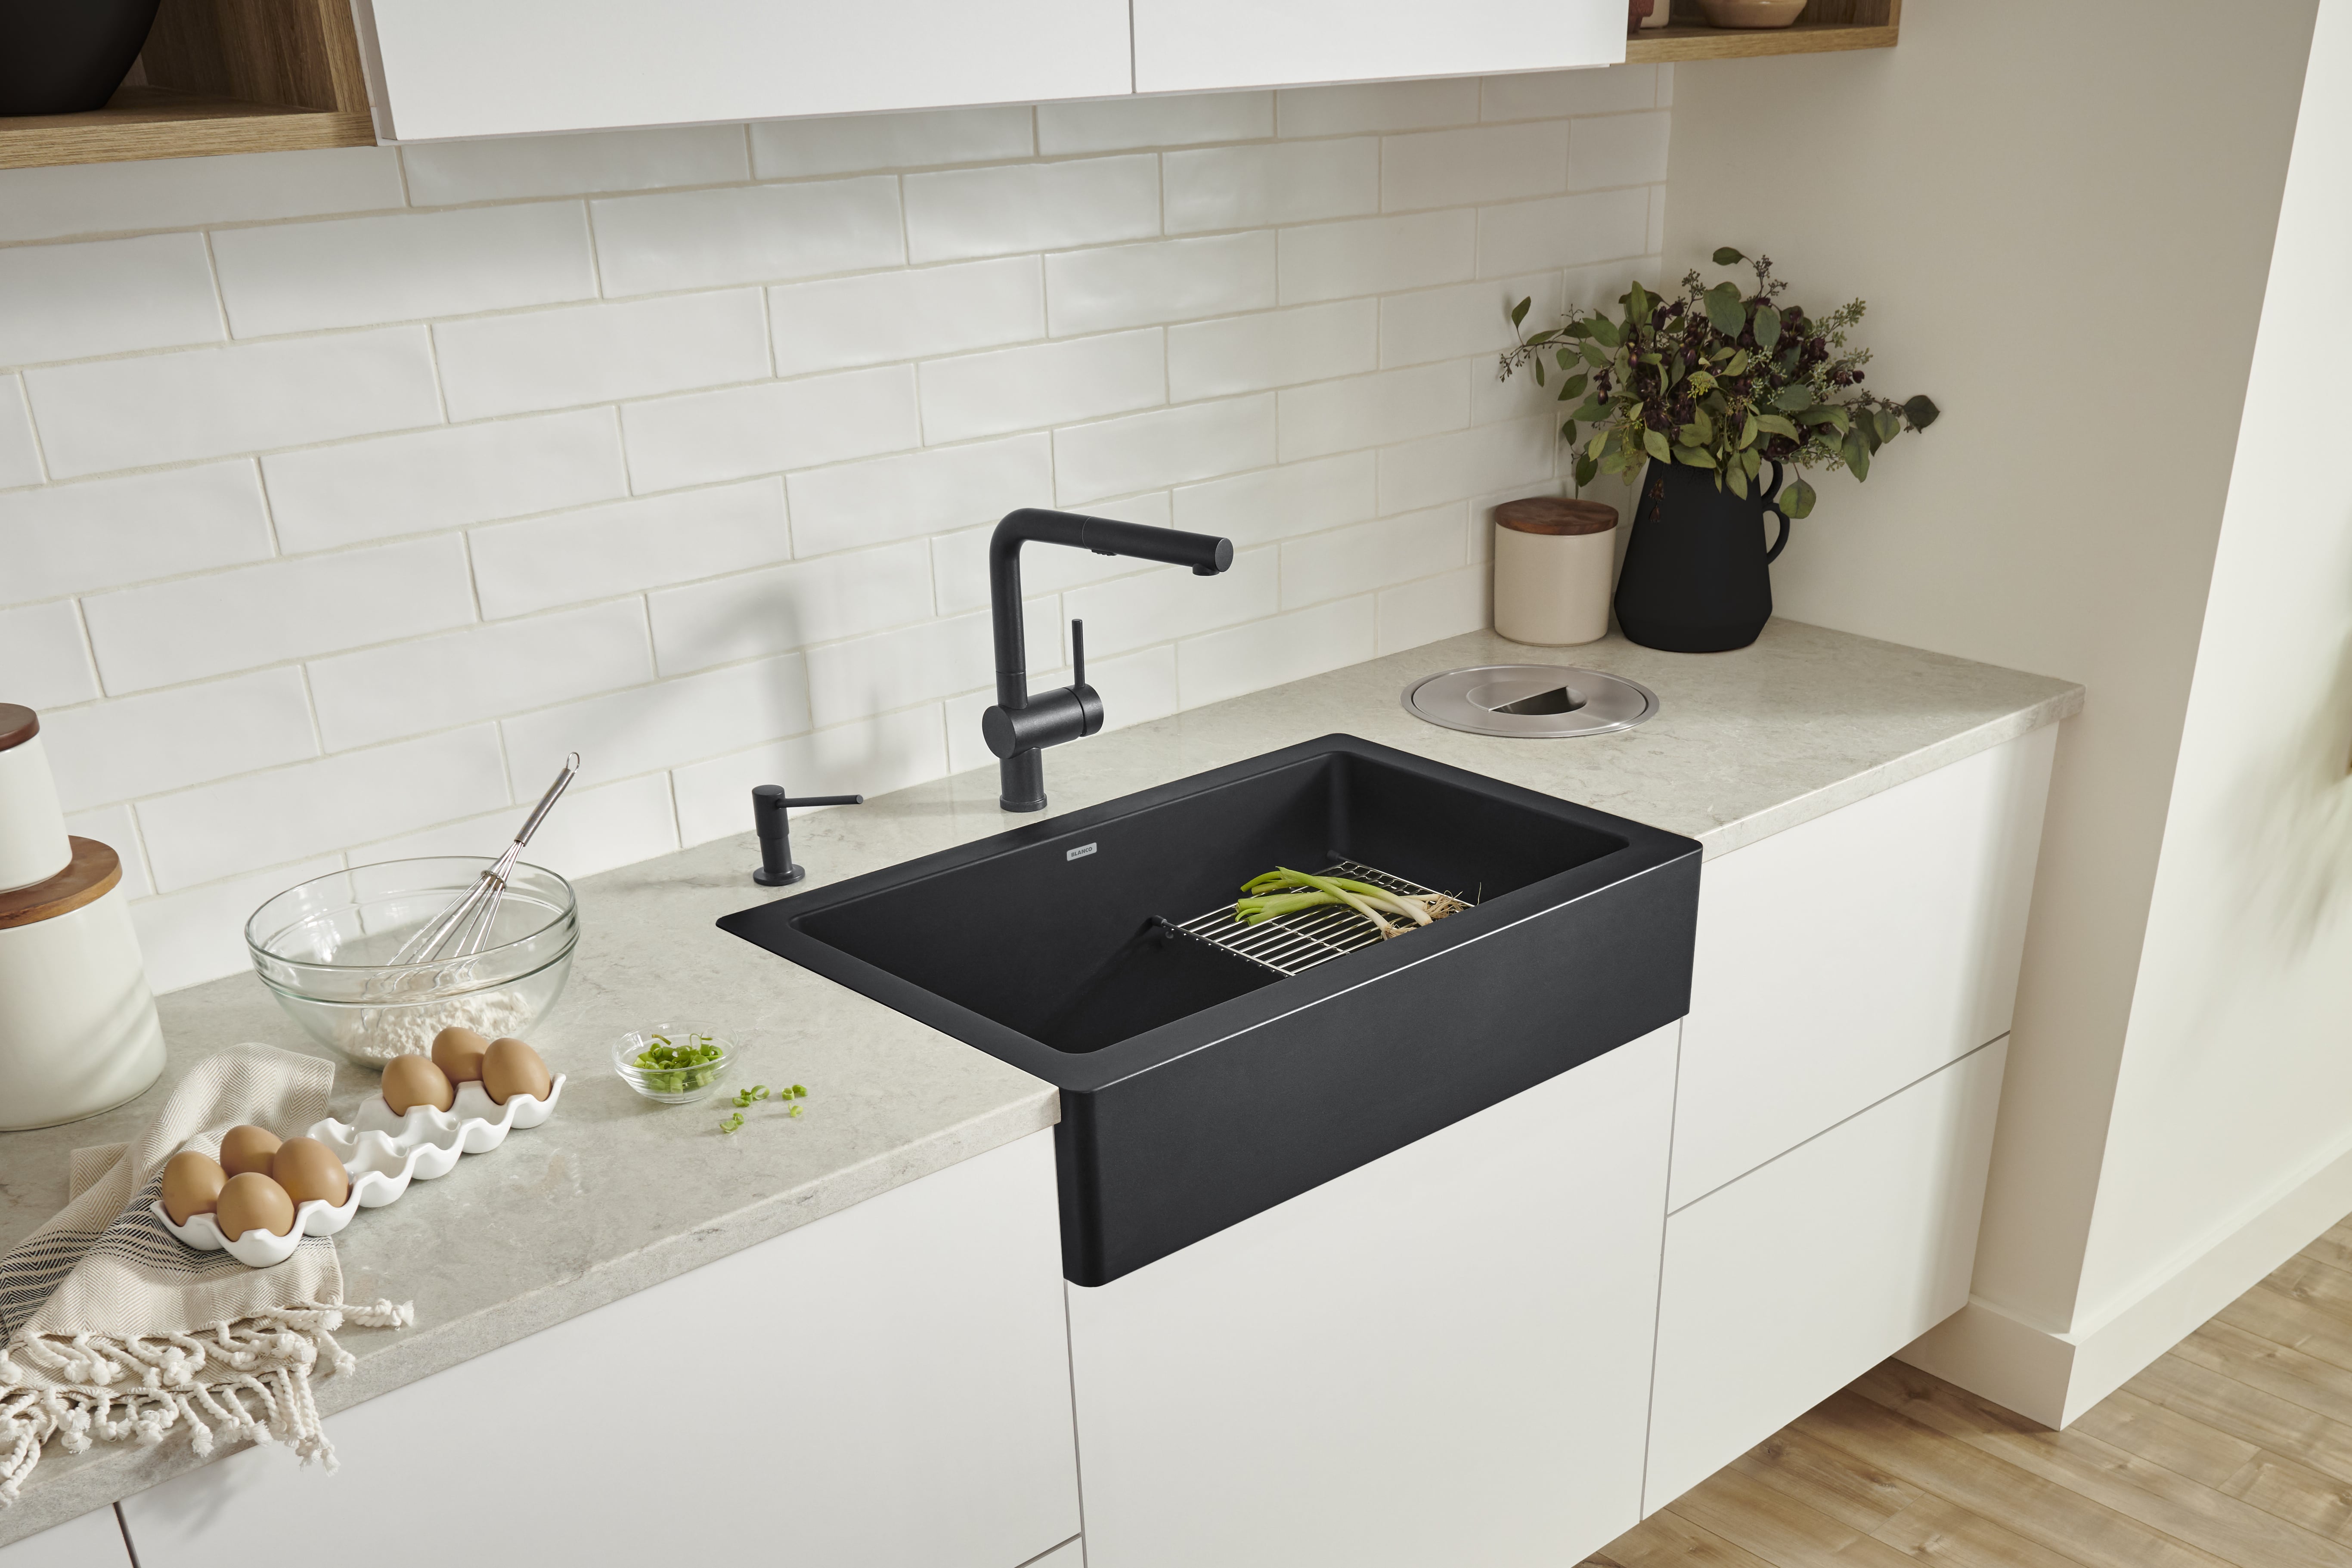
Aesthetic Appeal
 Last but not least, a farm kitchen sink adds a touch of aesthetic appeal to any kitchen. Its farmhouse charm and vintage look can instantly elevate the design of your kitchen. Plus, with a variety of styles and finishes to choose from, you can find a farm sink that perfectly complements your kitchen's design and aesthetic.
In conclusion,
a farm kitchen sink installation is a practical and visually appealing addition to any home. With its ample space, durability, easy maintenance, and timeless design, it's no wonder that this sink style has stood the test of time. So why not consider upgrading your kitchen with a farm sink and enjoy all the benefits it has to offer?
Last but not least, a farm kitchen sink adds a touch of aesthetic appeal to any kitchen. Its farmhouse charm and vintage look can instantly elevate the design of your kitchen. Plus, with a variety of styles and finishes to choose from, you can find a farm sink that perfectly complements your kitchen's design and aesthetic.
In conclusion,
a farm kitchen sink installation is a practical and visually appealing addition to any home. With its ample space, durability, easy maintenance, and timeless design, it's no wonder that this sink style has stood the test of time. So why not consider upgrading your kitchen with a farm sink and enjoy all the benefits it has to offer?