Adding a sprayer to your kitchen sink can make your daily tasks easier and more efficient. Installing a sprayer may seem like a daunting task, but with the right tools and a little bit of know-how, you can easily upgrade your sink in no time. In this guide, we'll walk you through the steps of how to install a kitchen sink sprayer. First and foremost, you'll need to gather all the necessary tools and materials. These include a sink sprayer kit, a wrench, plumber's tape, and a bucket or towel to catch any water that may leak during the installation process. Next, turn off the water supply to your sink by shutting off the valves located under the sink. This will prevent any water from leaking out while you work. Now, you'll need to remove the existing faucet aerator from your sink. This can usually be done by twisting it off by hand or using pliers if it's stuck. Once removed, clean any debris or buildup from the aerator. Take the sprayer hose and feed it through the faucet hole in your sink. Then, attach the hose to the faucet by screwing it onto the threaded connection. Make sure to use plumber's tape to ensure a tight and leak-free connection. Next, you'll need to install the sprayer head onto the other end of the hose. This can be done by simply screwing it on until it's tight. Once the sprayer head is attached, you'll need to connect the other end of the hose to the water supply valve under your sink. This may require some maneuvering and adjusting to ensure a secure connection. Before turning the water supply back on, double-check all connections to make sure they are tight and secure. Once everything is in place, turn the water supply back on and test out your new sprayer. If there are any leaks, tighten the connections as needed. Congratulations, you have successfully installed a kitchen sink sprayer! Now you can enjoy the convenience and functionality of having a sprayer in your kitchen sink.1. How to Install a Kitchen Sink Sprayer


1. How to Install a Kitchen Sink Sprayer


Are you tired of constantly juggling pots and pans to fill them up with water from your kitchen faucet? Adding a sprayer to your kitchen sink can make your life so much easier. Not only does it provide convenience, but it also adds an extra level of functionality to your sink. In this article, we'll discuss the benefits of adding a sprayer to your kitchen sink and how it can improve your daily tasks. One of the main benefits of having a sprayer in your kitchen sink is the ability to easily rinse off dishes and cookware. This is especially helpful when dealing with items that have stubborn food residue or when washing larger items that may not fit under the faucet. With a sprayer, you can reach and clean these items more effectively. Another benefit is the flexibility and versatility a sprayer provides. Most sprayers have adjustable water pressure, making it easier to control the strength of the water flow. This can come in handy when rinsing delicate items or when trying to conserve water. Adding a sprayer to your kitchen sink can also improve the overall appearance of your sink. With a sleek and modern design, a sprayer can enhance the look of your sink and give it a more updated and polished look. When choosing a sprayer for your kitchen sink, be sure to consider the different types and features available. Some sprayers have a pull-down or pull-out feature, which can be useful for reaching and cleaning different areas of your sink. Others have a single stream option or a multiple spray pattern option. Consider your needs and preferences when selecting the right sprayer for your sink. By adding a sprayer to your kitchen sink, you can make your daily tasks more efficient, save time and water, and improve the overall look and functionality of your sink. So why wait? Upgrade your sink with a sprayer today!2. Adding a Sprayer to Your Kitchen Sink


2. Adding a Sprayer to Your Kitchen Sink


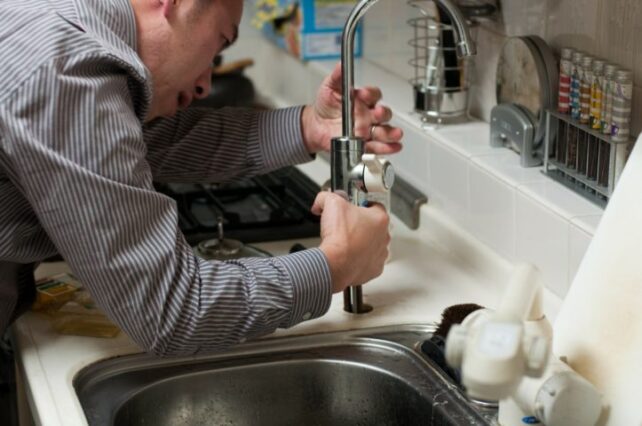
Are you a DIY enthusiast looking to tackle a new project? Adding a sprayer to your kitchen sink is a great way to test your skills and improve your sink's functionality. In this guide, we'll show you how to install a kitchen sink sprayer on your own. The first step is to gather all the necessary tools and materials. These include a sink sprayer kit, a wrench, plumber's tape, and a bucket or towel to catch any water that may leak during the installation process. Next, shut off the water supply to your sink by turning off the valves located under the sink. This will prevent any water from leaking out while you work. Now it's time to remove the existing faucet aerator from your sink. This can usually be done by twisting it off by hand or using pliers if it's stuck. Once removed, clean any debris or buildup from the aerator. Take the sprayer hose and feed it through the faucet hole in your sink. Then, attach the hose to the faucet by screwing it onto the threaded connection. Use plumber's tape to ensure a tight and leak-free connection. Next, attach the sprayer head onto the other end of the hose by screwing it on until it's tight. Now it's time to connect the other end of the hose to the water supply valve under your sink. This may require some maneuvering and adjusting to ensure a secure connection. Before turning the water supply back on, double-check all connections to make sure they are tight and secure. Once everything is in place, turn the water supply back on and test out your new sprayer. If there are any leaks, tighten the connections as needed. Congratulations, you have successfully installed a kitchen sink sprayer on your own! Not only have you saved money by doing it yourself, but you have also gained new skills and knowledge.3. DIY Kitchen Sink Sprayer Installation


3. DIY Kitchen Sink Sprayer Installation


Is your kitchen sink lacking in functionality? Adding a sprayer can take your sink to the next level and make your daily tasks more efficient. In this article, we'll discuss the benefits of upgrading your kitchen sink with a sprayer and how it can improve your overall kitchen experience. One of the main benefits of having a sprayer in your kitchen sink is the added convenience. Instead of having to constantly move items around to fit them under the faucet, you can simply use the sprayer to rinse and clean them effortlessly. This can save you time and make your kitchen tasks less of a hassle. Another benefit is the versatility a sprayer provides. With the ability to adjust the water pressure, you can easily switch between a strong stream and a gentle spray. This is especially useful when dealing with delicate items or when trying to conserve water. In addition to functionality, a sprayer can also improve the overall appearance of your sink. With a modern and sleek design, a sprayer can give your sink a more updated and polished look. When choosing a sprayer for your kitchen sink, consider the different options available. Some sprayers have a pull-down or pull-out feature, which can be helpful for reaching and cleaning different areas of your sink. Others have a single stream option or a multiple spray pattern option. Think about your needs and preferences when selecting the right sprayer for your sink. Upgrade your kitchen sink with a sprayer and enjoy the added convenience, versatility, and enhanced appearance it provides. You'll wonder how you ever managed without one!4. Upgrading Your Kitchen Sink with a Sprayer


4. Upgrading Your Kitchen Sink with a Sprayer


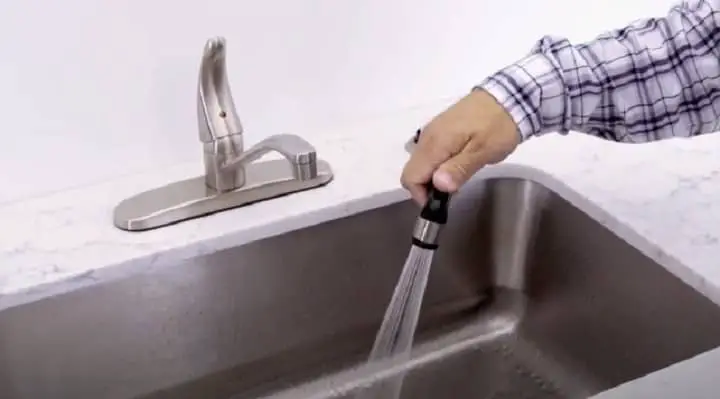
Adding a sprayer to your kitchen sink can make your daily tasks easier and more efficient. If you're unsure of how to install a sprayer, don't worry – we've got you covered. In this step-by-step guide, we'll walk you through the process of adding a sprayer to your kitchen sink. First, gather all the necessary tools and materials. These include a sink sprayer kit, a wrench, plumber's tape, and a bucket or towel to catch any water that may leak during the installation process. Next, turn off the water supply to your sink by shutting off the valves located under the sink. Remove the existing faucet aerator from your sink and clean any debris or buildup from it. Take the sprayer hose and feed it through the faucet hole in your sink. Then, attach the hose to the faucet by screwing it onto the threaded connection. Use plumber's tape to ensure a tight and leak-free connection. Attach the sprayer head onto the other end of the hose by screwing it on until it's tight. Connect the other end of the hose to the water supply valve under your sink, making any necessary adjustments to ensure a secure connection. Double-check all connections to make sure they are tight and secure before turning the water supply back on. Test out your new sprayer and make any adjustments as needed to ensure proper functioning. Congratulations, you have successfully added a sprayer to your kitchen sink! Enjoy the convenience and functionality it provides.5. Step-by-Step Guide for Adding a Sprayer to Your Kitchen Sink


5. Step-by-Step Guide for Adding a Sprayer to Your Kitchen Sink


Installing a sprayer in your kitchen sink can seem like a daunting task, but with the right tools and knowledge, it can be a straightforward process. In this article, we'll share some tips and tricks to make your kitchen sink sprayer installation go smoothly. First and foremost, make sure to turn off the water supply to your sink before beginning the installation process. This will prevent any water from leaking out while you work. Use plumber's tape to ensure a tight and leak-free connection between the hose and the faucet. This will also make it easier to remove and replace the sprayer in the future, if needed. When connecting the sprayer hose to the water supply valve, make sure to tighten the connections properly. This will prevent any leaks and ensure proper functioning of the sprayer. If you're having trouble attaching the sprayer head onto the hose, try using pliers to get a tighter grip and make it easier to screw on. After installation, test out the sprayer and make any necessary adjustments to ensure proper functioning and water pressure. By following these tips and tricks, you can make your kitchen sink sprayer installation a breeze.6. Kitchen Sink Sprayer Installation: Tips and Tricks


6. Kitchen Sink Sprayer Installation: Tips and Tricks
:no_upscale()/cdn.vox-cdn.com/uploads/chorus_asset/file/19495086/drain_0.jpg)
/how-to-install-a-sink-drain-2718789-hero-24e898006ed94c9593a2a268b57989a3.jpg)


Are you considering adding a sprayer to your kitchen sink but not sure if it's worth the investment? Let us assure you – it is! In this article, we'll discuss the benefits of adding a sprayer to your kitchen sink and how it can improve your daily tasks. One of the main benefits of having a sprayer in your kitchen sink is the added convenience. Instead of having to constantly move items around to fit them under the faucet, you can simply use the sprayer to rinse and clean them effortlessly. This can save you time and make your kitchen tasks less of a hassle. A sprayer also provides versatility in terms of water pressure. With the ability to adjust the water flow, you can easily switch between a strong stream and a gentle spray. This is especially useful when dealing with delicate items or when trying to conserve water. In addition to functionality, a sprayer can also enhance the appearance of your sink. With a modern and sleek design, a sprayer can give your sink a more updated and polished look. When choosing a sprayer for your kitchen sink, consider the different options available. Some sprayers have a pull-down or pull-out feature, which can be helpful for reaching and cleaning different areas of your sink. Others have a single stream option or a multiple spray pattern option. Think about your needs and preferences when selecting the right sprayer for your sink. Upgrade your kitchen sink with a sprayer and enjoy the added convenience, versatility, and enhanced appearance it provides. You won't regret it!7. The Benefits of Adding a Sprayer to Your Kitchen Sink


7. The Benefits of Adding a Sprayer to Your Kitchen Sink


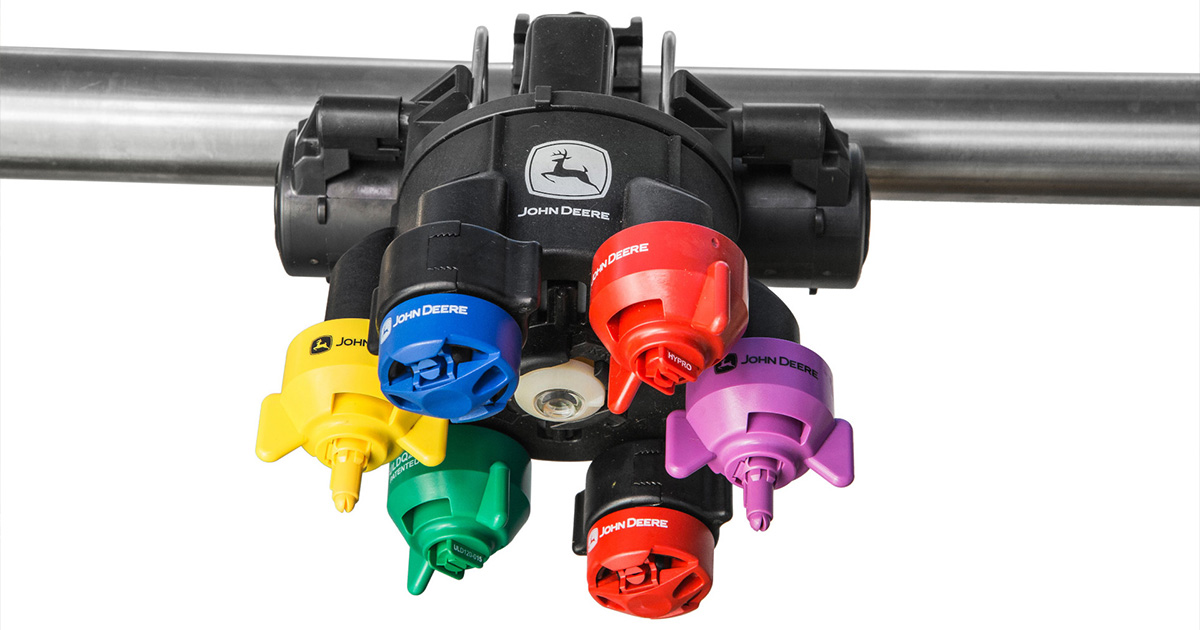
Are you ready to add a sprayer to your kitchen sink but not sure which one to choose? With so many options available, it can be overwhelming to make a decision. In this guide, we'll discuss how to choose the right sprayer for your kitchen sink. First, consider the design and style of your sink. You'll want to choose a sprayer that complements the overall look of your sink and doesn't stand out too much. Next, think about the type of sprayer you want. Do you prefer a pull-down or pull-out feature? Do you want a single stream or multiple spray pattern option? Make sure to choose a sprayer that aligns with your needs and preferences. Consider the material of the sprayer. Stainless steel is a popular choice for its durability and resistance to rust and corrosion. However, there are also options available in plastic and chrome. Read reviews and do some research on different brands and models to ensure you choose a high-quality sprayer that will last you a long time. By considering these factors, you can choose the right sprayer for your kitchen sink and enjoy all its benefits.8. How to Choose the Right Sprayer for Your Kitchen Sink


8. How to Choose the Right Sprayer for Your Kitchen Sink
/installing-a-kitchen-sink-sprayer-2718817-hero-2b7047468d594da6be2494ba0eebb480.jpg)

Installing a sprayer in your kitchen sink can seem like a simple task, but there are some common mistakes that can cause issues down the road. In this article, we'll discuss some of these mistakes and how you can avoid them.9. Common Mistakes to Avoid When Installing a Kitchen Sink Sprayer


9. Common Mistakes to Avoid When Installing a Kitchen Sink Sprayer


Why Adding a Sprayer to Your Kitchen Sink is a Must-Have Upgrade

Efficient and Convenient Washing Experience
 The kitchen sink is one of the most frequently used areas in any household. From washing dishes to cleaning fruits and vegetables, it is important to have a well-functioning kitchen sink that can make these tasks more efficient and convenient. This is where adding a sprayer to your kitchen sink comes into play.
Not only does it offer a more targeted and powerful water flow, but it also makes cleaning up a breeze with the ability to reach every nook and cranny
of your sink and dishes.
The kitchen sink is one of the most frequently used areas in any household. From washing dishes to cleaning fruits and vegetables, it is important to have a well-functioning kitchen sink that can make these tasks more efficient and convenient. This is where adding a sprayer to your kitchen sink comes into play.
Not only does it offer a more targeted and powerful water flow, but it also makes cleaning up a breeze with the ability to reach every nook and cranny
of your sink and dishes.
Practical and Versatile Design
 Sprayers for kitchen sinks come in a variety of designs, making it easy to find one that suits your personal style and needs. Whether you prefer a traditional or modern look, there is a sprayer that will seamlessly blend in with your kitchen's aesthetic.
With its practical and versatile design, a sprayer can easily be installed onto any existing sink, making it a simple and affordable upgrade for your kitchen.
Sprayers for kitchen sinks come in a variety of designs, making it easy to find one that suits your personal style and needs. Whether you prefer a traditional or modern look, there is a sprayer that will seamlessly blend in with your kitchen's aesthetic.
With its practical and versatile design, a sprayer can easily be installed onto any existing sink, making it a simple and affordable upgrade for your kitchen.
Cost-Effective and Eco-Friendly
 Adding a sprayer to your kitchen sink not only saves you time and effort, but it can also save you money in the long run.
Compared to a standard faucet, a sprayer uses less water, making it a more eco-friendly option that can also lower your water bill.
Additionally, with its powerful spray, you can easily remove stubborn food particles without the need for harsh chemicals or excessive scrubbing, making it a more sustainable and cost-effective choice for your kitchen cleaning routine.
Adding a sprayer to your kitchen sink not only saves you time and effort, but it can also save you money in the long run.
Compared to a standard faucet, a sprayer uses less water, making it a more eco-friendly option that can also lower your water bill.
Additionally, with its powerful spray, you can easily remove stubborn food particles without the need for harsh chemicals or excessive scrubbing, making it a more sustainable and cost-effective choice for your kitchen cleaning routine.
A Must-Have Upgrade for Any Kitchen
 In conclusion, adding a sprayer to your kitchen sink is a must-have upgrade for any household.
Not only does it offer a more efficient and convenient washing experience, but it also has a practical and versatile design that is cost-effective and eco-friendly.
With its numerous benefits, it's no wonder why sprayers are becoming a popular addition to modern kitchen designs. So why settle for a standard faucet when you can elevate your kitchen sink with a sprayer? Make the switch today and see the difference for yourself.
In conclusion, adding a sprayer to your kitchen sink is a must-have upgrade for any household.
Not only does it offer a more efficient and convenient washing experience, but it also has a practical and versatile design that is cost-effective and eco-friendly.
With its numerous benefits, it's no wonder why sprayers are becoming a popular addition to modern kitchen designs. So why settle for a standard faucet when you can elevate your kitchen sink with a sprayer? Make the switch today and see the difference for yourself.