Refinishing a cherry kitchen table can give it a new lease on life and make it the centerpiece of your dining room once again. But where do you start? Follow these steps to learn how to refinish your cherry kitchen table and achieve beautiful, long-lasting results. First, gather your supplies. You will need sandpaper, wood stain, a paintbrush or cloth, a sealer, and any other tools required for the specific refinishing method you choose. Next, prep your work area by covering the floor with a drop cloth and removing any hardware or decorations from the table. It's also a good idea to wear protective gear such as gloves and a mask to avoid inhaling any dust or fumes. Begin by sanding the entire surface of the table with a coarse grit sandpaper to remove the old finish and any imperfections. Then, switch to a finer grit sandpaper to smooth out the surface. Make sure to sand in the direction of the wood grain to avoid scratches. Once the table is sanded down, wipe it with a damp cloth to remove any dust. Now it's time to apply the stain. You can choose from a variety of stains, such as oil-based or water-based, to achieve your desired color. Apply the stain with a paintbrush or cloth, following the direction of the wood grain. After the stain has dried, it's important to seal the table to protect it from scratches and spills. You can use a polyurethane sealer for a glossy finish or a wax sealer for a more natural look. Apply the sealer in thin coats, letting each coat dry completely before applying the next. Once the sealer is dry, your cherry kitchen table is ready to be used and enjoyed for years to come. Remember to follow the manufacturer's instructions for drying times and any additional steps for your specific refinishing products.1. How to Refinish a Cherry Kitchen Table


1. How to Refinish a Cherry Kitchen Table


If you're looking to save some money and take on a fun project, refinishing your cherry kitchen table yourself is a great option. With a little bit of elbow grease and some basic supplies, you can achieve professional-looking results. Start by following the steps outlined in our first heading, "How to Refinish a Cherry Kitchen Table." Once you have sanded and stained your table, you can get creative with the finishing touches. One popular option is to distress your table, giving it a rustic, aged look. You can use a hammer, chains, or sandpaper to create dents, scratches, and other marks on the wood. Then, apply a dark stain over the distressed areas to highlight the imperfections and give your table a unique, weathered appearance. Another DIY idea is to add a design or pattern to your table using stencils and paint. This is a great way to personalize your table and make it a statement piece in your home. Just make sure to use a paint that is suitable for wood surfaces and let it dry completely before sealing. With a little bit of creativity and some DIY skills, your cherry kitchen table can become a one-of-a-kind masterpiece that you can be proud of.2. DIY Cherry Kitchen Table Refinishing


2. DIY Cherry Kitchen Table Refinishing


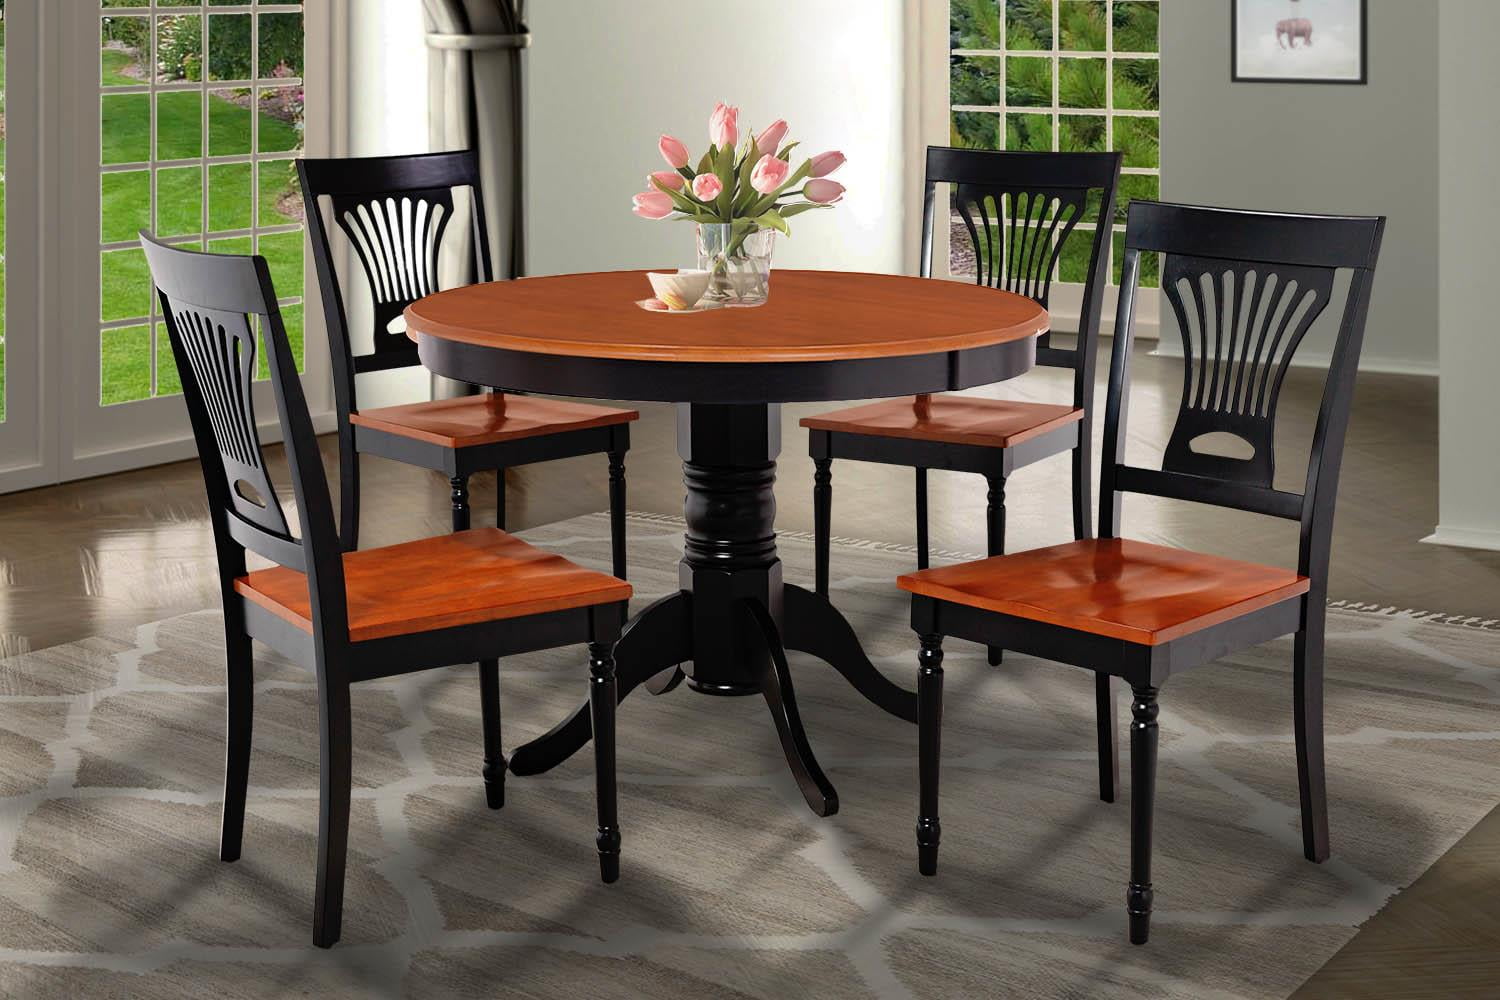
Cherry wood is known for its beautiful grain and rich, warm color. However, over time, the finish on your cherry wood kitchen table may become dull or damaged. Refinishing it can restore its natural beauty and protect it for years to come. To start, follow the steps outlined in the first heading, "How to Refinish a Cherry Kitchen Table." When selecting your stain, choose one that complements the natural color of your cherry wood. You can also opt for a clear coat to enhance the wood's natural color and grain. One important thing to note when refinishing a cherry wood table is to be mindful of the wood's natural color changes. Cherry wood tends to darken over time, so if you are matching your table to other cherry wood pieces in your home, make sure to take this into consideration when selecting your stain. Properly refinishing your cherry wood kitchen table will not only bring it back to life but also keep it looking beautiful for years to come.3. Refinishing a Cherry Wood Kitchen Table


3. Refinishing a Cherry Wood Kitchen Table


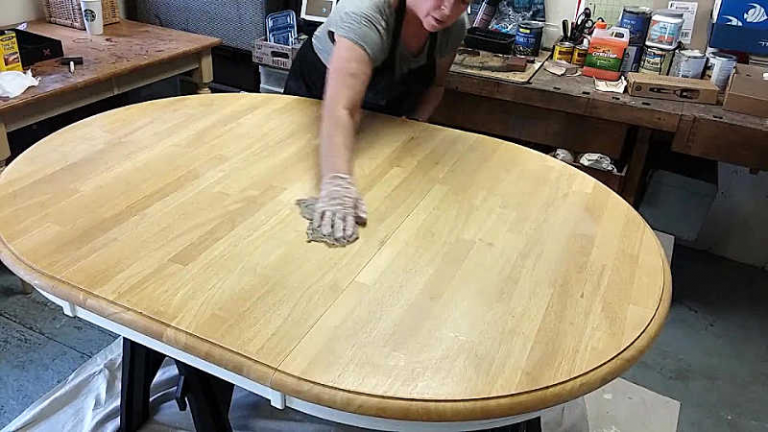
Refinishing a cherry kitchen table may seem like a daunting task, but with our step-by-step guide, you can easily achieve professional results. Step 1: Gather your supplies, including sandpaper, wood stain, a paintbrush or cloth, a sealer, and any other tools required for your chosen refinishing method. Step 2: Prep your work area by covering the floor with a drop cloth and removing any hardware or decorations from the table. Step 3: Sand the table with a coarse grit sandpaper, followed by a finer grit sandpaper, to remove the old finish and smooth out the surface. Step 4: Wipe the table with a damp cloth to remove any dust. Step 5: Apply the stain in thin coats, following the direction of the wood grain. Step 6: Let the stain dry completely before applying a sealer in thin coats. Step 7: Once the sealer is dry, your cherry kitchen table is ready to be used and enjoyed. Remember to follow the manufacturer's instructions for drying times and any additional steps for your specific refinishing products.4. Step-by-Step Guide to Refinishing a Cherry Kitchen Table


4. Step-by-Step Guide to Refinishing a Cherry Kitchen Table


Choosing the right products is crucial for achieving a successful refinishing project. Here are some top-rated products to consider when refinishing your cherry kitchen table: Minwax Pre-Stain Wood Conditioner: This product helps the wood absorb the stain more evenly, preventing blotches and streaks. Varathane Premium Wood Stain: This stain is available in a variety of colors and provides long-lasting, rich color to your table. Minwax Fast-Drying Polyurethane: This sealer provides a durable, clear finish and is easy to apply with a paintbrush or cloth. Howard Products Feed-N-Wax Wood Polish and Conditioner: This natural beeswax and orange oil product helps to nourish and protect your cherry wood table. Remember to always read and follow the instructions on the product labels for best results.5. Best Products for Refinishing a Cherry Kitchen Table


5. Best Products for Refinishing a Cherry Kitchen Table


Refinishing a cherry kitchen table requires patience, attention to detail, and the right techniques. Here are some tips to help you achieve beautiful, long-lasting results: Start with a clean, smooth surface: Make sure to sand and clean your table thoroughly before applying any stain or sealer. Test the stain on a small area first: This will ensure that you are happy with the color before applying it to the entire table. Apply thin coats: This will prevent drips and ensure an even finish. Follow the wood grain: Sand, stain, and seal in the direction of the wood grain for a professional look. Let each coat dry completely: This will prevent any smudging or unevenness.6. Tips for Successfully Refinishing a Cherry Kitchen Table


6. Tips for Successfully Refinishing a Cherry Kitchen Table

When it comes to reviving an old cherry kitchen table, there are two options: refinishing or restoring. While these terms are often used interchangeably, there are some key differences between the two. Refinishing involves stripping the old finish, sanding, and applying a new finish to the wood. This process changes the appearance of the table and can give it a new look. On the other hand, restoring involves repairing any damages to the wood, such as scratches or dents, and applying a new finish to preserve the table's original look. Deciding whether to refinish or restore your cherry kitchen table depends on your personal preference and the condition of the table. If your table has significant damage, restoring may be the best option. If you simply want to change the look of the table, refinishing is the way to go.7. Refinishing vs. Restoring a Cherry Kitchen Table: What's the Difference?


7. Refinishing vs. Restoring a Cherry Kitchen Table: What's the Difference?


With so many stain options available, it can be overwhelming to choose the right one for your cherry kitchen table. Here are some factors to consider when selecting a stain: Desired color: Do you want a light, medium, or dark finish? Keep in mind that the natural color of cherry wood tends to darken over time. Type of stain: Oil-based stains are more durable, while water-based stains dry faster and have less odor. Wood grain: Consider the direction and pattern of the wood grain and how the stain will enhance it. Other wood tones in the room: If you have other cherry wood pieces in the same room, make sure to choose a stain that complements them. It's always a good idea to test the stain on a small area of the table first to ensure you are happy with the color before applying it to the entire surface.8. How to Choose the Right Stain for Your Refinished Cherry Kitchen Table


8. How to Choose the Right Stain for Your Refinished Cherry Kitchen Table


Refinishing a cherry kitchen table may seem like a straightforward process, but there are some common mistakes that can lead to unsatisfactory results. Here are some things to avoid when refinishing your table: Sanding too much: This can damage the wood and affect the final result. Follow the manufacturer's instructions for the recommended grit of sandpaper. Not cleaning properly: Make sure to remove all dust and debris before applying any products to the table. This will ensure a smooth finish. Skipping the sealer: A sealer is important for protecting your table from scratches and spills. Don't skip this step! Not following drying times: Rushing the process and not allowing each coat to dry completely can result in a sticky, uneven finish. By avoiding these common mistakes, you can achieve a beautiful, professional finish on your cherry kitchen table.9. Common Mistakes to Avoid When Refinishing a Cherry Kitchen Table


9. Common Mistakes to Avoid When Refinishing a Cherry Kitchen Table


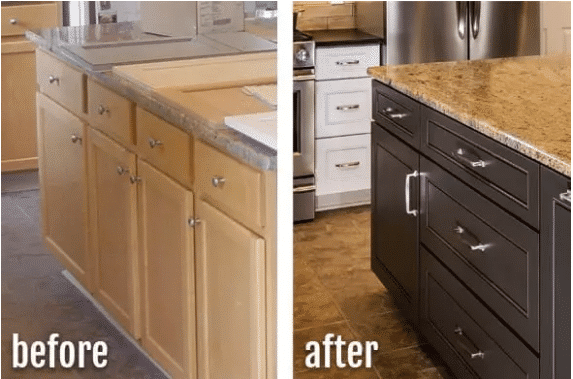
If you're still on the fence about refinishing your cherry kitchen table, take a look at some before and after photos to see the amazing transformations that can be achieved: Before: A dull, scratched cherry kitchen table that has lost its luster. After: A beautiful, glossy cherry kitchen table that looks brand new and adds warmth to the dining room. Before: A worn, outdated cherry kitchen table that no longer fits with the homeowners' style. After: A stunning, distressed cherry kitchen table that adds character and charm to the space. With the right techniques and products, your cherry kitchen table can also undergo an incredible transformation. Don't be afraid to give it a new life and make it a standout piece in your home.10. Before and After: Stunning Cherry Kitchen Table Refinishing Transformations


10. Before and After: Stunning Cherry Kitchen Table Refinishing Transformations


Why Refinishing Your Cherry Kitchen Table is the Perfect Way to Refresh Your Kitchen

Bringing New Life to Your Kitchen Table
 Refinishing your cherry kitchen table is not only a great way to update its look, but it also adds a touch of elegance and warmth to your kitchen. A well-loved kitchen table often bears the marks of daily use, from scratches and dents to fading and discoloration. However, with a little bit of effort and the right techniques, your cherry kitchen table can regain its original beauty and become the centerpiece of your kitchen once again.
The Beauty of Cherry Wood
 Cherry wood is a popular choice for kitchen tables due to its rich, warm tones and durability. Its natural reddish-brown color deepens with age, making it a timeless and classic choice for any kitchen. However, even the highest quality cherry wood can become worn and dull over time. That's where refinishing comes in.
The Refinishing Process
 Refinishing your cherry kitchen table involves sanding down the old finish, repairing any imperfections, and applying a new coat of stain and finish. This process not only restores the original beauty of the wood but also helps to protect it from further damage. With the right tools and techniques, refinishing your cherry kitchen table can be a relatively simple and satisfying DIY project.
Personalize Your Kitchen Table
 One of the great things about refinishing your kitchen table is that you have the opportunity to make it your own. With a variety of stain colors and finishes available, you can choose to keep the natural look of the cherry wood or add a pop of color to match your kitchen's design. You can also experiment with different techniques, such as distressing or antiquing, to create a unique and personalized look.
Cost-Effective and Eco-Friendly
 Rather than buying a brand new kitchen table, refinishing your current one is a cost-effective and eco-friendly option. You can save money and resources by avoiding the production and transportation of a new table, and instead, give your existing one a new lease on life. Plus, with proper care and maintenance, your newly refinished cherry kitchen table can last for years to come.
Conclusion
 In conclusion, refinishing your cherry kitchen table is an excellent way to refresh your kitchen and add a touch of elegance and warmth. With the right tools and techniques, you can restore the natural beauty of the wood and personalize it to your liking. Not only is it a cost-effective and eco-friendly option, but it also allows you to keep a piece of furniture that holds sentimental value in your home. So why not give your kitchen table the love and attention it deserves and see the transformation for yourself?