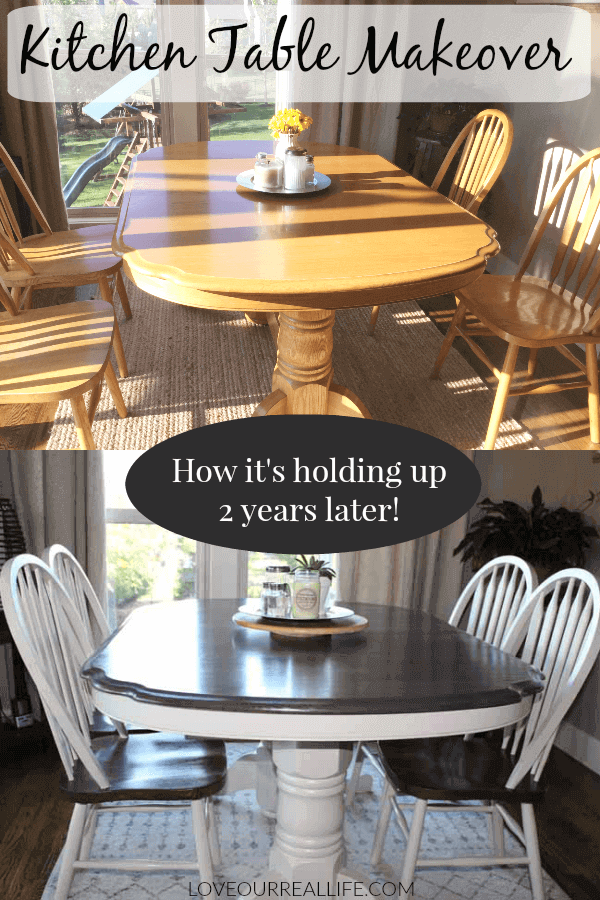
1. How to Apply Contact Paper on a Kitchen Table
Transforming your kitchen table with contact paper is an easy and affordable way to give your space a fresh new look. But if you've never used contact paper before, you may be wondering how to apply it correctly. Don't worry, we've got you covered! Here's a step-by-step guide on how to apply contact paper on your kitchen table:
Step 1: Measure your table - Before you begin, make sure to measure your kitchen table so you know how much contact paper you'll need. It's always better to have a little extra than not enough.
Step 2: Clean the table - It's important to have a clean surface before applying contact paper. Use a mild cleaner and a soft cloth to wipe down your table and remove any dirt or debris.
Step 3: Cut the contact paper - Using your measurements, cut the contact paper to the appropriate size. Don't worry about being too precise, you can always trim any excess later.
Step 4: Peel and stick - Slowly peel off the backing of the contact paper and carefully place it on your table. Use a squeegee or credit card to smooth out any bubbles or wrinkles.
Step 5: Trim any excess - Once the contact paper is applied, use a sharp knife or scissors to trim any excess paper around the edges of your table.
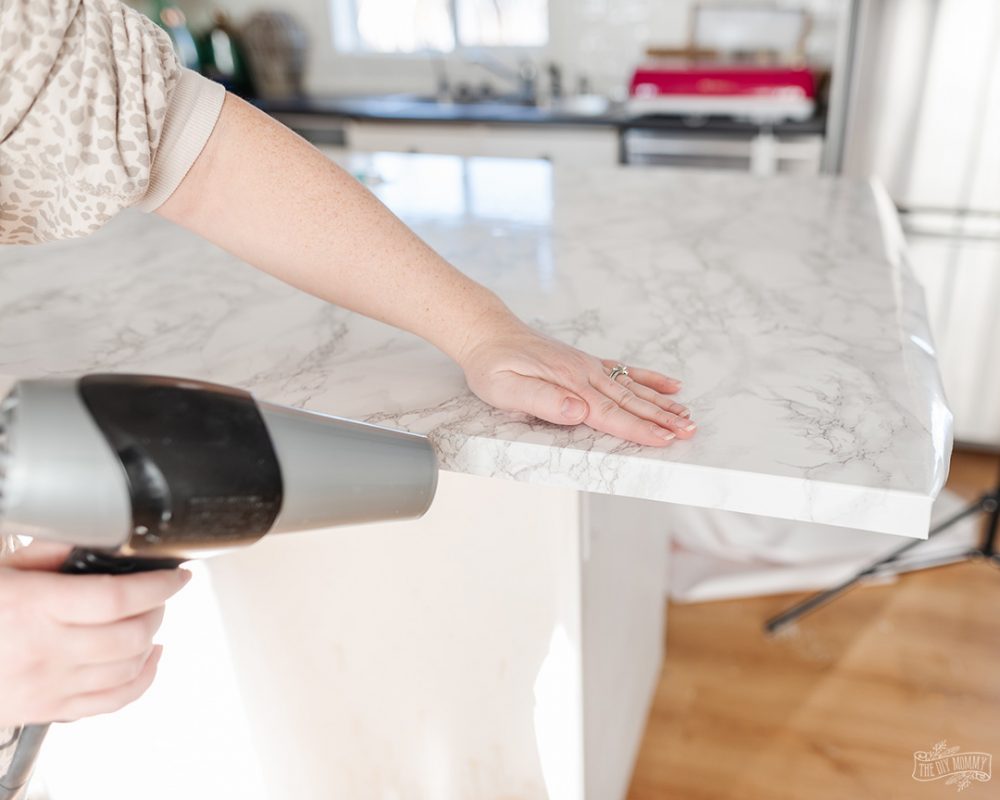
Step 6: Smooth out any imperfections - If you notice any bubbles or wrinkles, use a hairdryer on low heat to warm up the contact paper and smooth out any imperfections.


1. How to Apply Contact Paper on a Kitchen Table


2. DIY Kitchen Table Makeover with Contact Paper
Are you tired of looking at the same old kitchen table day after day? Give it a DIY makeover with contact paper! This simple and budget-friendly solution can completely transform the look of your table. Here's how to do it:
Step 1: Choose your design - Contact paper comes in a variety of patterns and colors, so the possibilities are endless. Choose a design that complements your kitchen decor and personal style.
Step 2: Prep the table - Clean your table and make sure it's free of any dust or grime before applying the contact paper.
Step 3: Apply the contact paper - Follow the steps outlined in the previous heading to apply the contact paper onto your table.
Step 4: Add a finishing touch - To give your table a more polished look, consider adding a layer of clear adhesive film on top of the contact paper. This will protect the paper and make it easier to clean.


2. DIY Kitchen Table Makeover with Contact Paper


3. Transform Your Kitchen Table with Contact Paper
Is your kitchen table outdated or showing signs of wear and tear? Don't rush to buy a new one just yet. Contact paper can be a game-changer in transforming the look of your table. Here are some creative ways to use contact paper on your kitchen table:
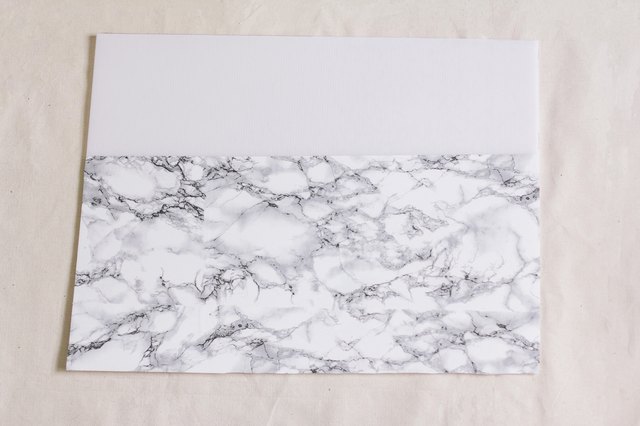
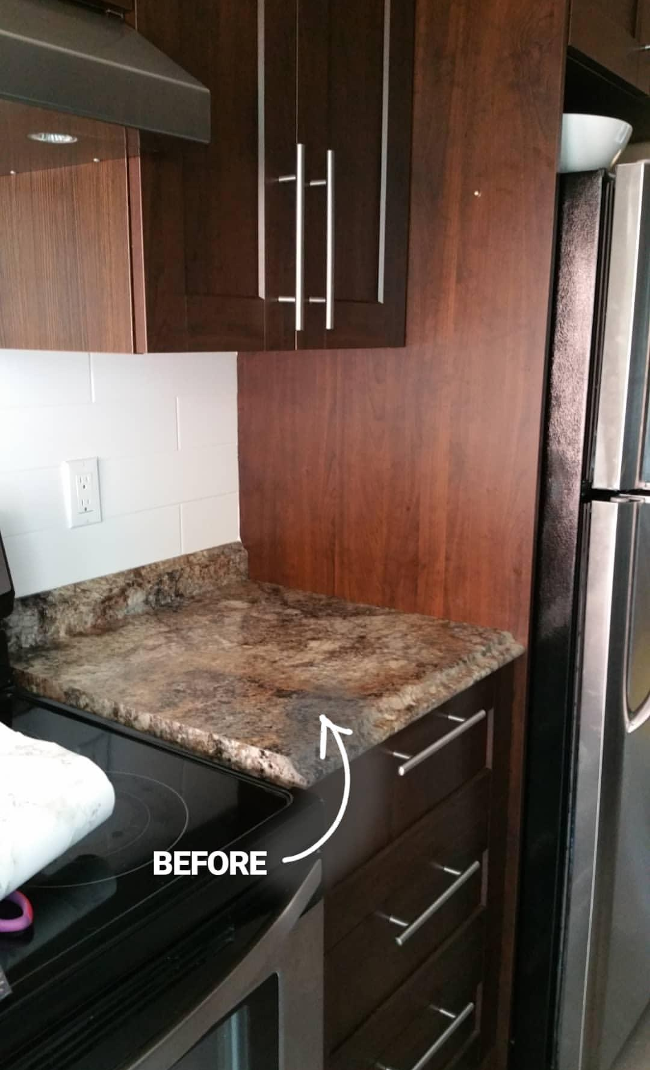
1. Marble or granite look - If you want to add a touch of elegance to your kitchen, consider using contact paper with a marble or granite design. It will give your table a high-end look without the hefty price tag.
2. Chalkboard surface - Want a fun and functional kitchen table? Use chalkboard contact paper to create a surface where you can write notes, menus, or doodles.
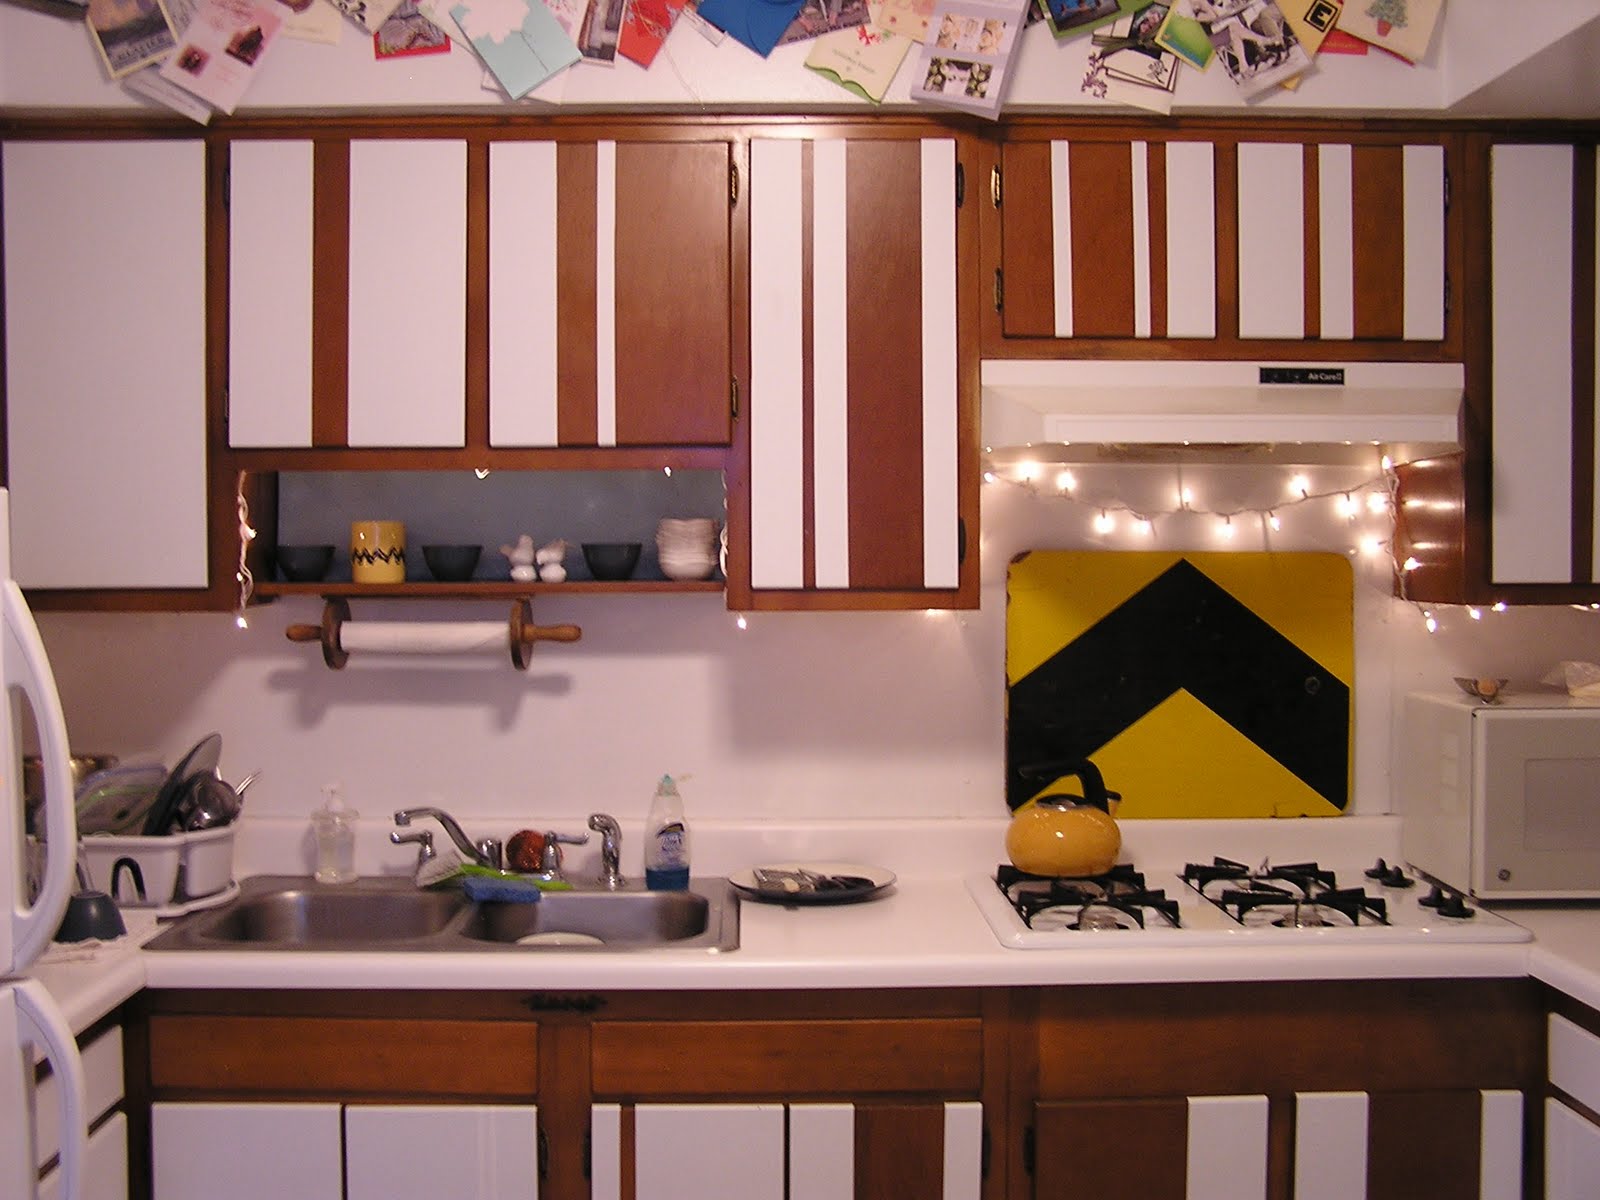
3. Woodgrain design - Bring some warmth and texture to your kitchen with a woodgrain contact paper. It's a great way to give your table a rustic or farmhouse feel.
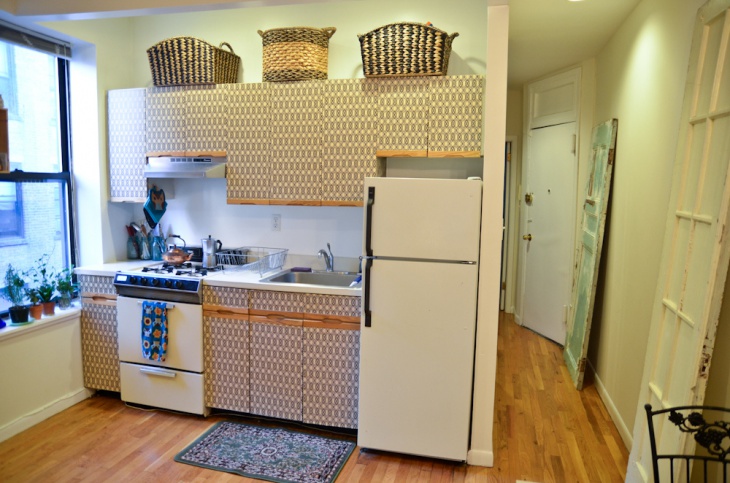
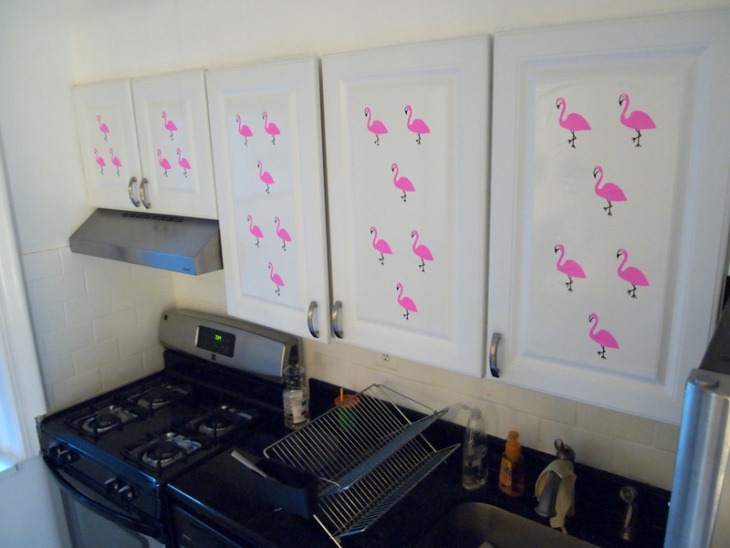
4. Geometric patterns - For a modern and trendy look, try using contact paper with geometric patterns on your kitchen table. It will add a pop of color and visual interest to your space.


3. Transform Your Kitchen Table with Contact Paper


4. Creative Ways to Use Contact Paper on Your Kitchen Table
When it comes to using contact paper on your kitchen table, the possibilities are endless. Here are a few more creative ideas to inspire you:
1. Create a mosaic - Using small pieces of contact paper in different colors, create a mosaic design on your table. This is a great way to add a unique and personalized touch to your space.
2. Ombre effect - For a subtle and elegant look, use contact paper in different shades of the same color to create an ombre effect on your table. It will give your table a beautiful gradient look.
3. Mix and match - Who says you have to stick to just one design? Mix and match different contact paper designs to create a one-of-a-kind kitchen table that reflects your personality.


4. Creative Ways to Use Contact Paper on Your Kitchen Table


5. The Benefits of Using Contact Paper on Your Kitchen Table
Still not convinced about using contact paper on your kitchen table? Here are some benefits that may change your mind:
1. Affordable - Contact paper is a budget-friendly option compared to buying a new table or using expensive tablecloths.
2. Easy to clean - Contact paper is water-resistant and easy to wipe clean, making it a practical choice for kitchen tables.
3. Versatile - As mentioned earlier, contact paper comes in a variety of designs, making it a versatile option for any design style.
4. Temporary - If you like to switch up your home decor frequently, contact paper is a great temporary solution. It can easily be removed without damaging your table.


5. The Benefits of Using Contact Paper on Your Kitchen Table


6. Step-by-Step Guide to Covering Your Kitchen Table with Contact Paper
Now that you know the benefits and creative ways to use contact paper on your kitchen table, here's a step-by-step guide on how to do it:
Step 1: Gather your materials - You will need contact paper, a ruler or measuring tape, a sharp knife or scissors, and a squeegee or credit card.
Step 2: Measure and cut the contact paper - Measure your table and cut the contact paper to the appropriate size, leaving a few extra inches on each side.
Step 3: Clean the table - Use a mild cleaner and a soft cloth to clean your table and remove any dirt or debris.
Step 4: Peel and stick - Slowly peel off the backing of the contact paper and carefully place it on your table, starting from one end and smoothing it out as you go.
Step 5: Trim any excess - Use a sharp knife or scissors to trim any excess contact paper around the edges of your table.
Step 6: Smooth out any imperfections - If you notice any bubbles or wrinkles, use a hairdryer on low heat to warm up the contact paper and smooth them out.


6. Step-by-Step Guide to Covering Your Kitchen Table with Contact Paper


7. Contact Paper vs. Tablecloth: Which is Better for Your Kitchen Table?
Both contact paper and tablecloths can serve as protectors and decorative elements for your kitchen table. But which is the better option? Here are some factors to consider:
1. Durability - Contact paper is more durable and can withstand spills and stains better than a tablecloth.
2. Easy maintenance - Contact paper is easy to clean and maintain, whereas tablecloths may require frequent washing.
3. Design options - While tablecloths come in various designs, contact paper offers more versatility and customization options.
4. Budget-friendly - As mentioned earlier, contact paper is a more affordable option compared to buying a new tablecloth every time it gets stained or damaged.


7. Contact Paper vs. Tablecloth: Which is Better for Your Kitchen Table?


8. How to Remove Contact Paper from Your Kitchen Table
Eventually, you may want to remove the contact paper from your kitchen table to switch up your decor or if it starts to show signs of wear and tear. Here's how to do it without damaging your table:
Step 1: Heat it up - Use a hairdryer on low heat to warm up the contact paper. This will make it easier to peel off.
Step 2: Peel off slowly - Slowly peel off the contact paper, pulling it back on itself at a 180-degree angle.
Step 3: Clean the residue - If there is any sticky residue left on your table, use a mild cleaner and a soft cloth to wipe it off.

8. How to Remove Contact Paper from Your Kitchen Table


9. The Best Types of Contact Paper for Kitchen Tables
When it comes to choosing contact paper for your kitchen table, it's essential to pick a durable and water-resistant option. Look for contact paper with a thicker and more adhesive backing. Here are some of the best types of contact paper for kitchen tables:
1. Vinyl - Vinyl contact paper is durable and easy to clean, making it a popular choice for kitchen tables.
2. Self-adhesive - This type of contact paper has a strong adhesive backing, making it easy to apply and remove.
3. Decorative - If you want to add a pop of color or pattern to your kitchen, look for decorative contact paper. Just make sure it's also water-resistant and durable.


9. The Best Types of Contact Paper for Kitchen Tables


10. Contact Paper Design Ideas for Your Kitchen Table
Ready to give your kitchen table a new look with contact paper? Here are some design ideas to inspire you:
1. Floral - Bring the beauty of nature into your kitchen with a floral contact paper design. It will add a touch of freshness and charm to your space.
2. Chevron - For a fun and modern look, try using contact paper with a chevron pattern on your kitchen table.
3. Geometric - As mentioned earlier, geometric patterns are trendy and versatile, making them a great choice for contact paper design.
4. Stripes - Give your kitchen table a classic and timeless look with striped contact paper. You can choose from thin or bold stripes, depending on your preference.
5. Faux wood - If you love the look of wood but don't want the hassle of maintaining it, opt for a woodgrain contact paper design. It will add warmth and texture to your kitchen.
Transforming your kitchen table with contact paper is an easy and budget-friendly way to give your space a new look. With the right materials and a little creativity, you can achieve a beautiful and unique design that reflects your personal style. So go ahead, get creative, and give your kitchen table a makeover with contact paper!

10. Contact Paper Design Ideas for Your Kitchen Table
/AMI089-4600040ba9154b9ab835de0c79d1343a.jpg)


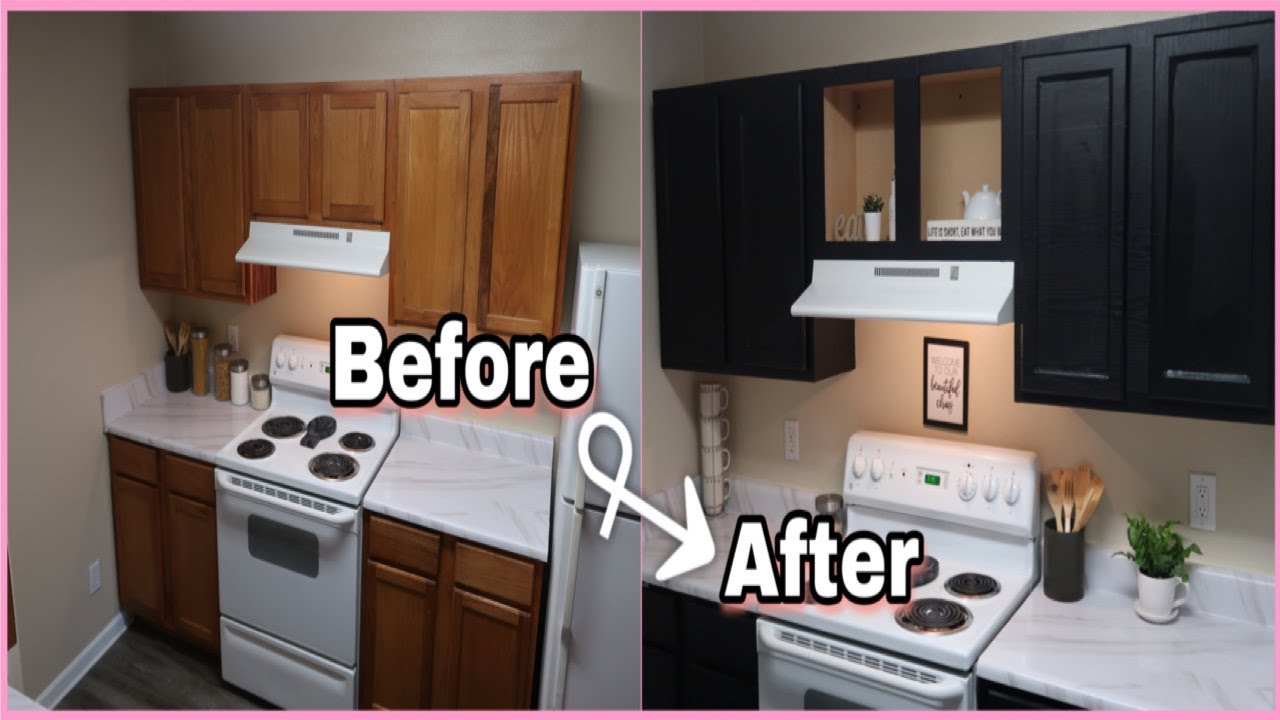
Update Your Kitchen Design with Contact Paper on Your Kitchen Table
Revamp Your Kitchen Without Breaking the Bank
 If you're looking to give your kitchen an updated and stylish look without spending a fortune,
contact paper on your kitchen table
is the perfect solution. With its affordability and versatility, contact paper allows you to transform your kitchen table in just a few simple steps. This budget-friendly DIY project is a great way to add a touch of personality and sophistication to your kitchen design.
If you're looking to give your kitchen an updated and stylish look without spending a fortune,
contact paper on your kitchen table
is the perfect solution. With its affordability and versatility, contact paper allows you to transform your kitchen table in just a few simple steps. This budget-friendly DIY project is a great way to add a touch of personality and sophistication to your kitchen design.
Why Choose Contact Paper?
 Contact paper
is a self-adhesive vinyl or paper material that comes in a variety of patterns, colors, and designs. It is known for its durability and easy application, making it a popular choice for kitchen makeovers. Contact paper is also moisture-resistant and easy to clean, making it a practical option for a high-traffic area like the kitchen.
Contact paper
is a self-adhesive vinyl or paper material that comes in a variety of patterns, colors, and designs. It is known for its durability and easy application, making it a popular choice for kitchen makeovers. Contact paper is also moisture-resistant and easy to clean, making it a practical option for a high-traffic area like the kitchen.
Step-by-Step Guide to Applying Contact Paper on Your Kitchen Table
 Applying contact paper to your kitchen table is a simple process that anyone can do. Here are the steps to follow:
Step 1:
Gather Materials - Before you begin, make sure you have all the necessary materials, including contact paper, scissors, a ruler, and a squeegee or credit card.
Step 2:
Measure and Cut - Measure the dimensions of your kitchen table and add an extra 2-3 inches on each side. This will ensure that you have enough contact paper to cover the entire surface. Using a ruler, mark the measurements on the back of the contact paper and use scissors to cut along the lines.
Step 3:
Clean and Prep - Thoroughly clean your kitchen table, making sure to remove any dust or debris. If there are any scratches or imperfections, use sandpaper to smooth them out.
Step 4:
Apply Contact Paper - Slowly peel off the backing of the contact paper and begin applying it to one side of the table, smoothing out any air bubbles with a squeegee or credit card as you go. Continue to apply the contact paper, working your way across the table until it is completely covered.
Step 5:
Trim Excess Paper - Once the entire surface is covered, use a sharp utility knife to trim off any excess contact paper along the edges of the table.
Applying contact paper to your kitchen table is a simple process that anyone can do. Here are the steps to follow:
Step 1:
Gather Materials - Before you begin, make sure you have all the necessary materials, including contact paper, scissors, a ruler, and a squeegee or credit card.
Step 2:
Measure and Cut - Measure the dimensions of your kitchen table and add an extra 2-3 inches on each side. This will ensure that you have enough contact paper to cover the entire surface. Using a ruler, mark the measurements on the back of the contact paper and use scissors to cut along the lines.
Step 3:
Clean and Prep - Thoroughly clean your kitchen table, making sure to remove any dust or debris. If there are any scratches or imperfections, use sandpaper to smooth them out.
Step 4:
Apply Contact Paper - Slowly peel off the backing of the contact paper and begin applying it to one side of the table, smoothing out any air bubbles with a squeegee or credit card as you go. Continue to apply the contact paper, working your way across the table until it is completely covered.
Step 5:
Trim Excess Paper - Once the entire surface is covered, use a sharp utility knife to trim off any excess contact paper along the edges of the table.
Final Touches and Maintenance
 Once your contact paper is applied, you can add some extra touches to personalize your kitchen table. You can add a clear adhesive film on top for extra protection, or add a decorative border around the edges for a finished look. To maintain your new and improved kitchen table, simply wipe it down with a damp cloth or mild cleaner as needed.
Transform Your Kitchen Design Today
 With just a roll of contact paper and a few easy steps, you can give your kitchen table a whole new look. Whether you want to add a pop of color, a sleek marble design, or a fun pattern, the possibilities are endless with
contact paper on your kitchen table
. So why wait? Transform your kitchen design today with this affordable and creative solution.
With just a roll of contact paper and a few easy steps, you can give your kitchen table a whole new look. Whether you want to add a pop of color, a sleek marble design, or a fun pattern, the possibilities are endless with
contact paper on your kitchen table
. So why wait? Transform your kitchen design today with this affordable and creative solution.